Installation & Configuration Guide
Thank you for choosing DiscountWisp to power your discount automation and elevate your customer experience.
The DiscountWisp Installation Guide is designed to help Shopify merchants properly install, enable, and configure DiscountWisp on their store (regardless of their Shopify Plan) to launch precision discount campaigns, streamline customer tiering, and unlock automated, scalable discounting across B2B and B2C segments.
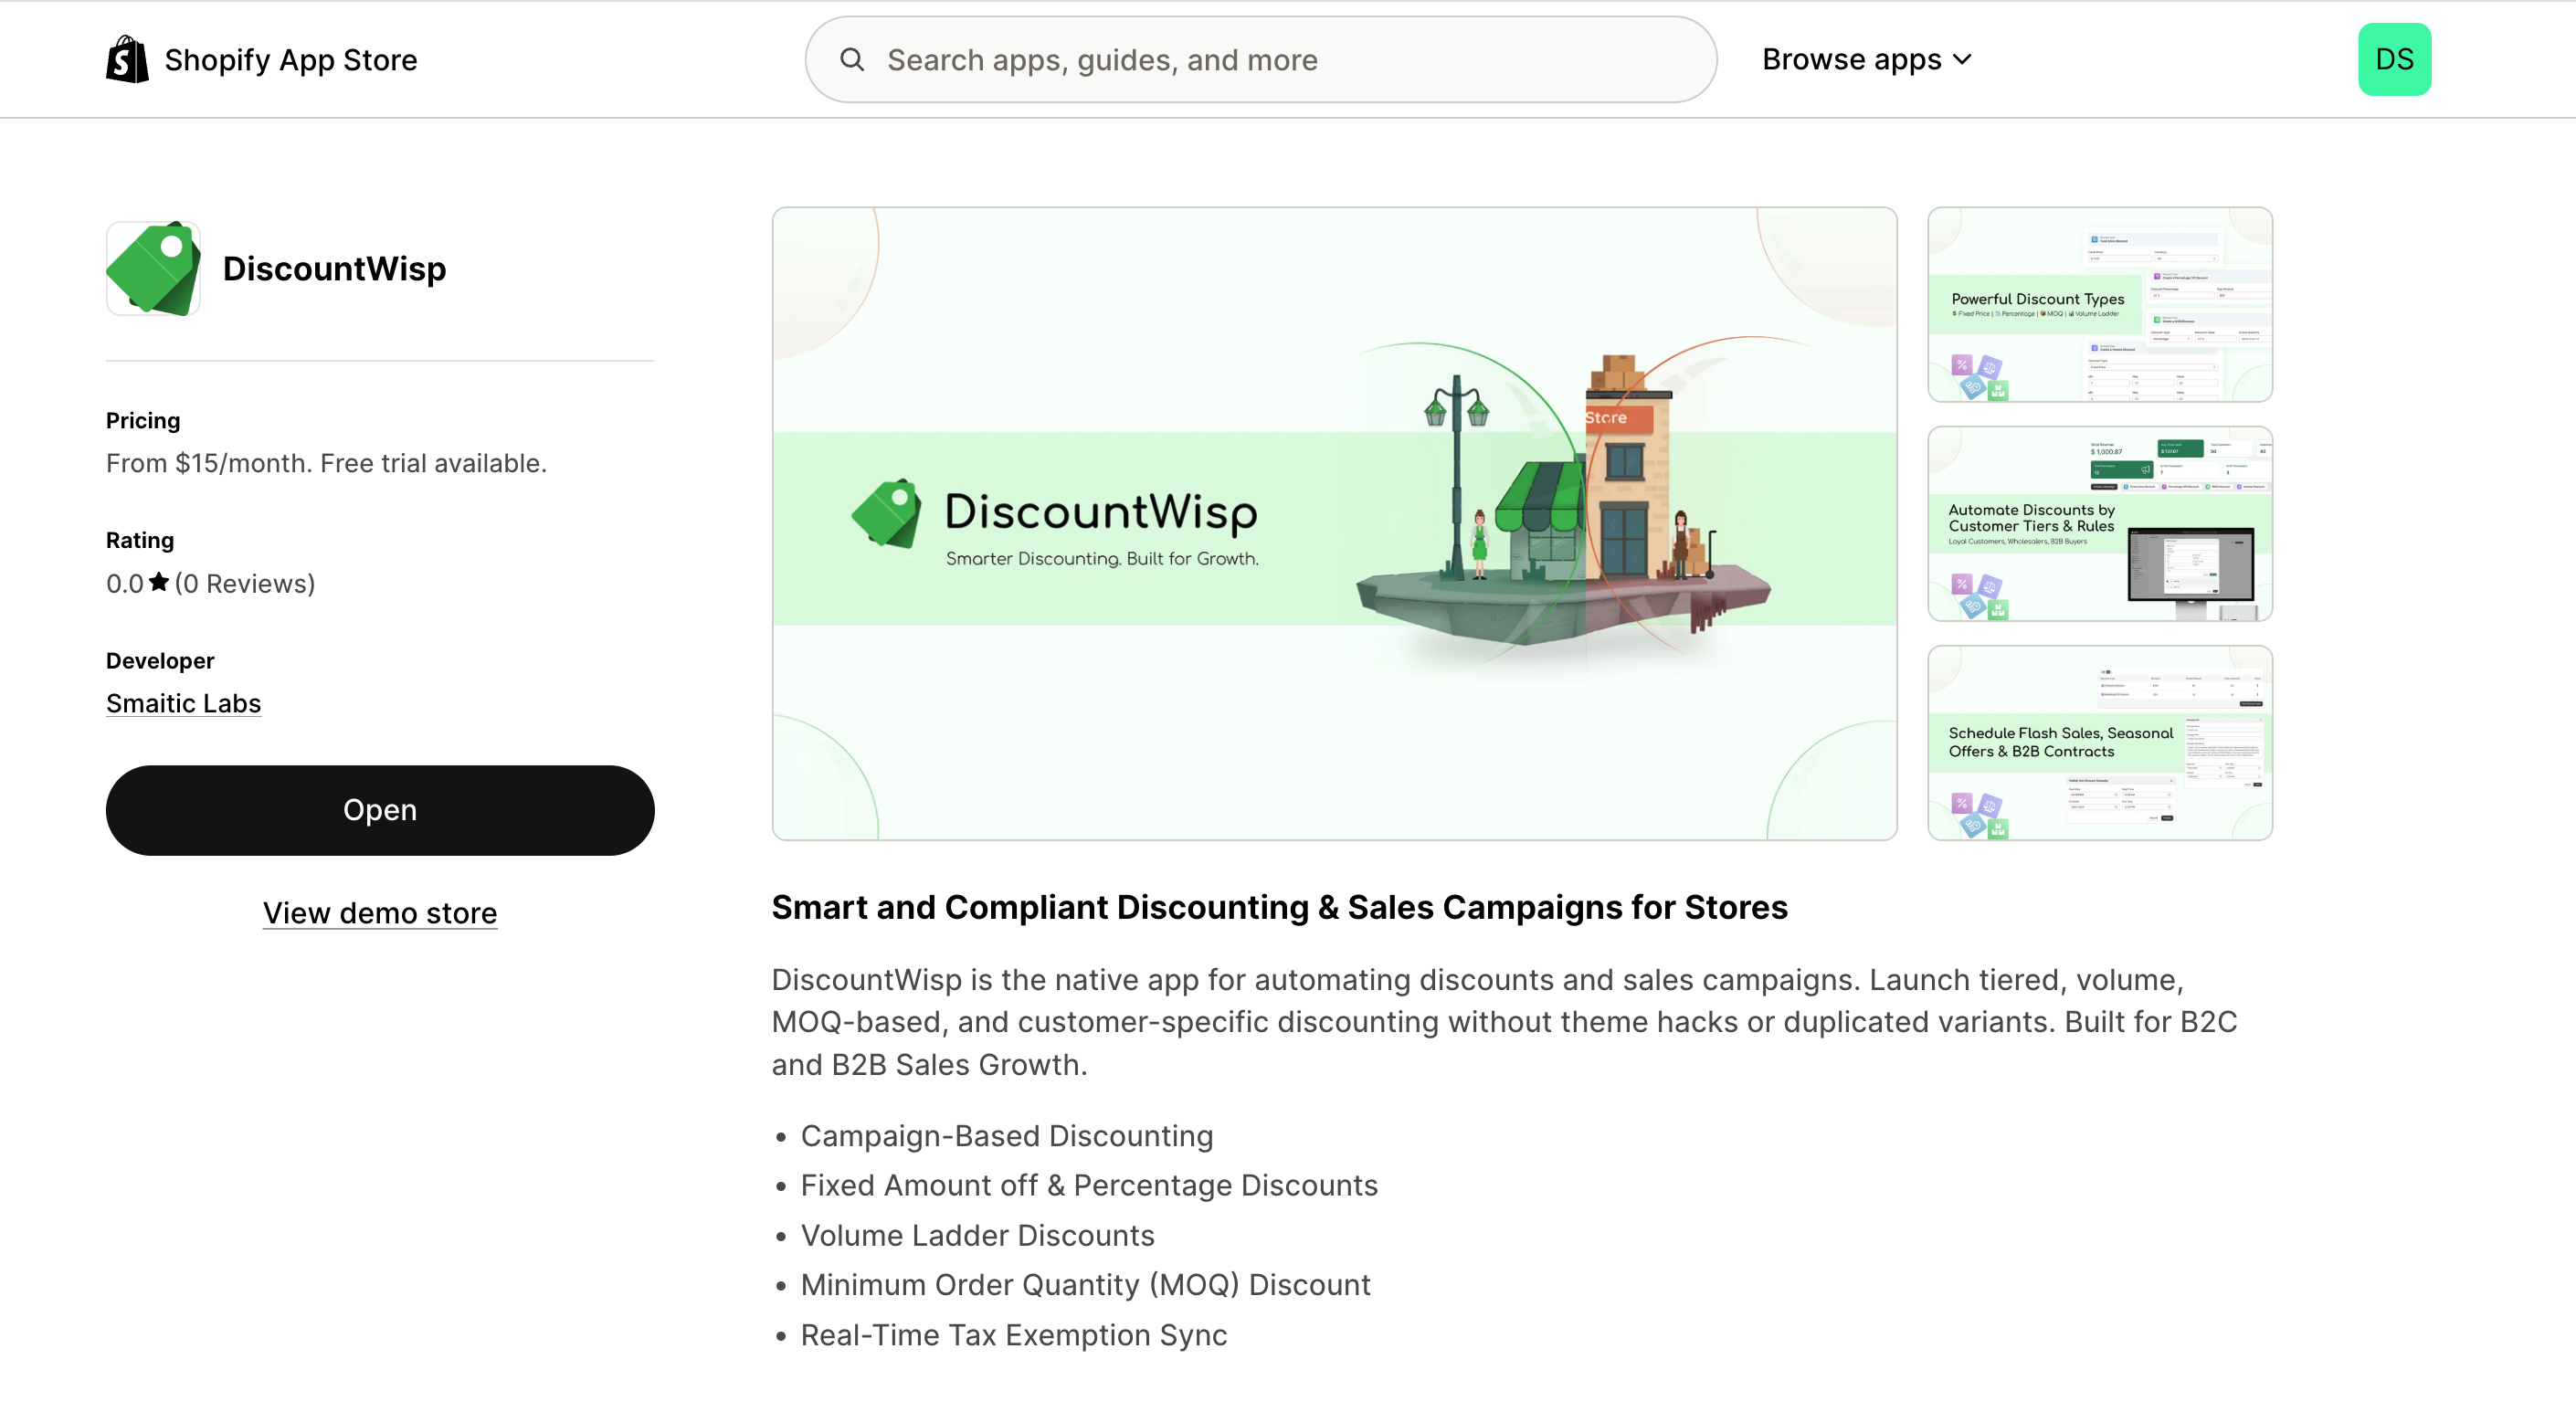
Step 1: Access DiscountWisp on Shopify App Store
Alternatively, open the Shopify App Store from your admin dashboard or browser. Search for "DiscountWisp" and select it from the results. Click on the app card to go to the DiscountWisp app listing page, where you can see the app details.
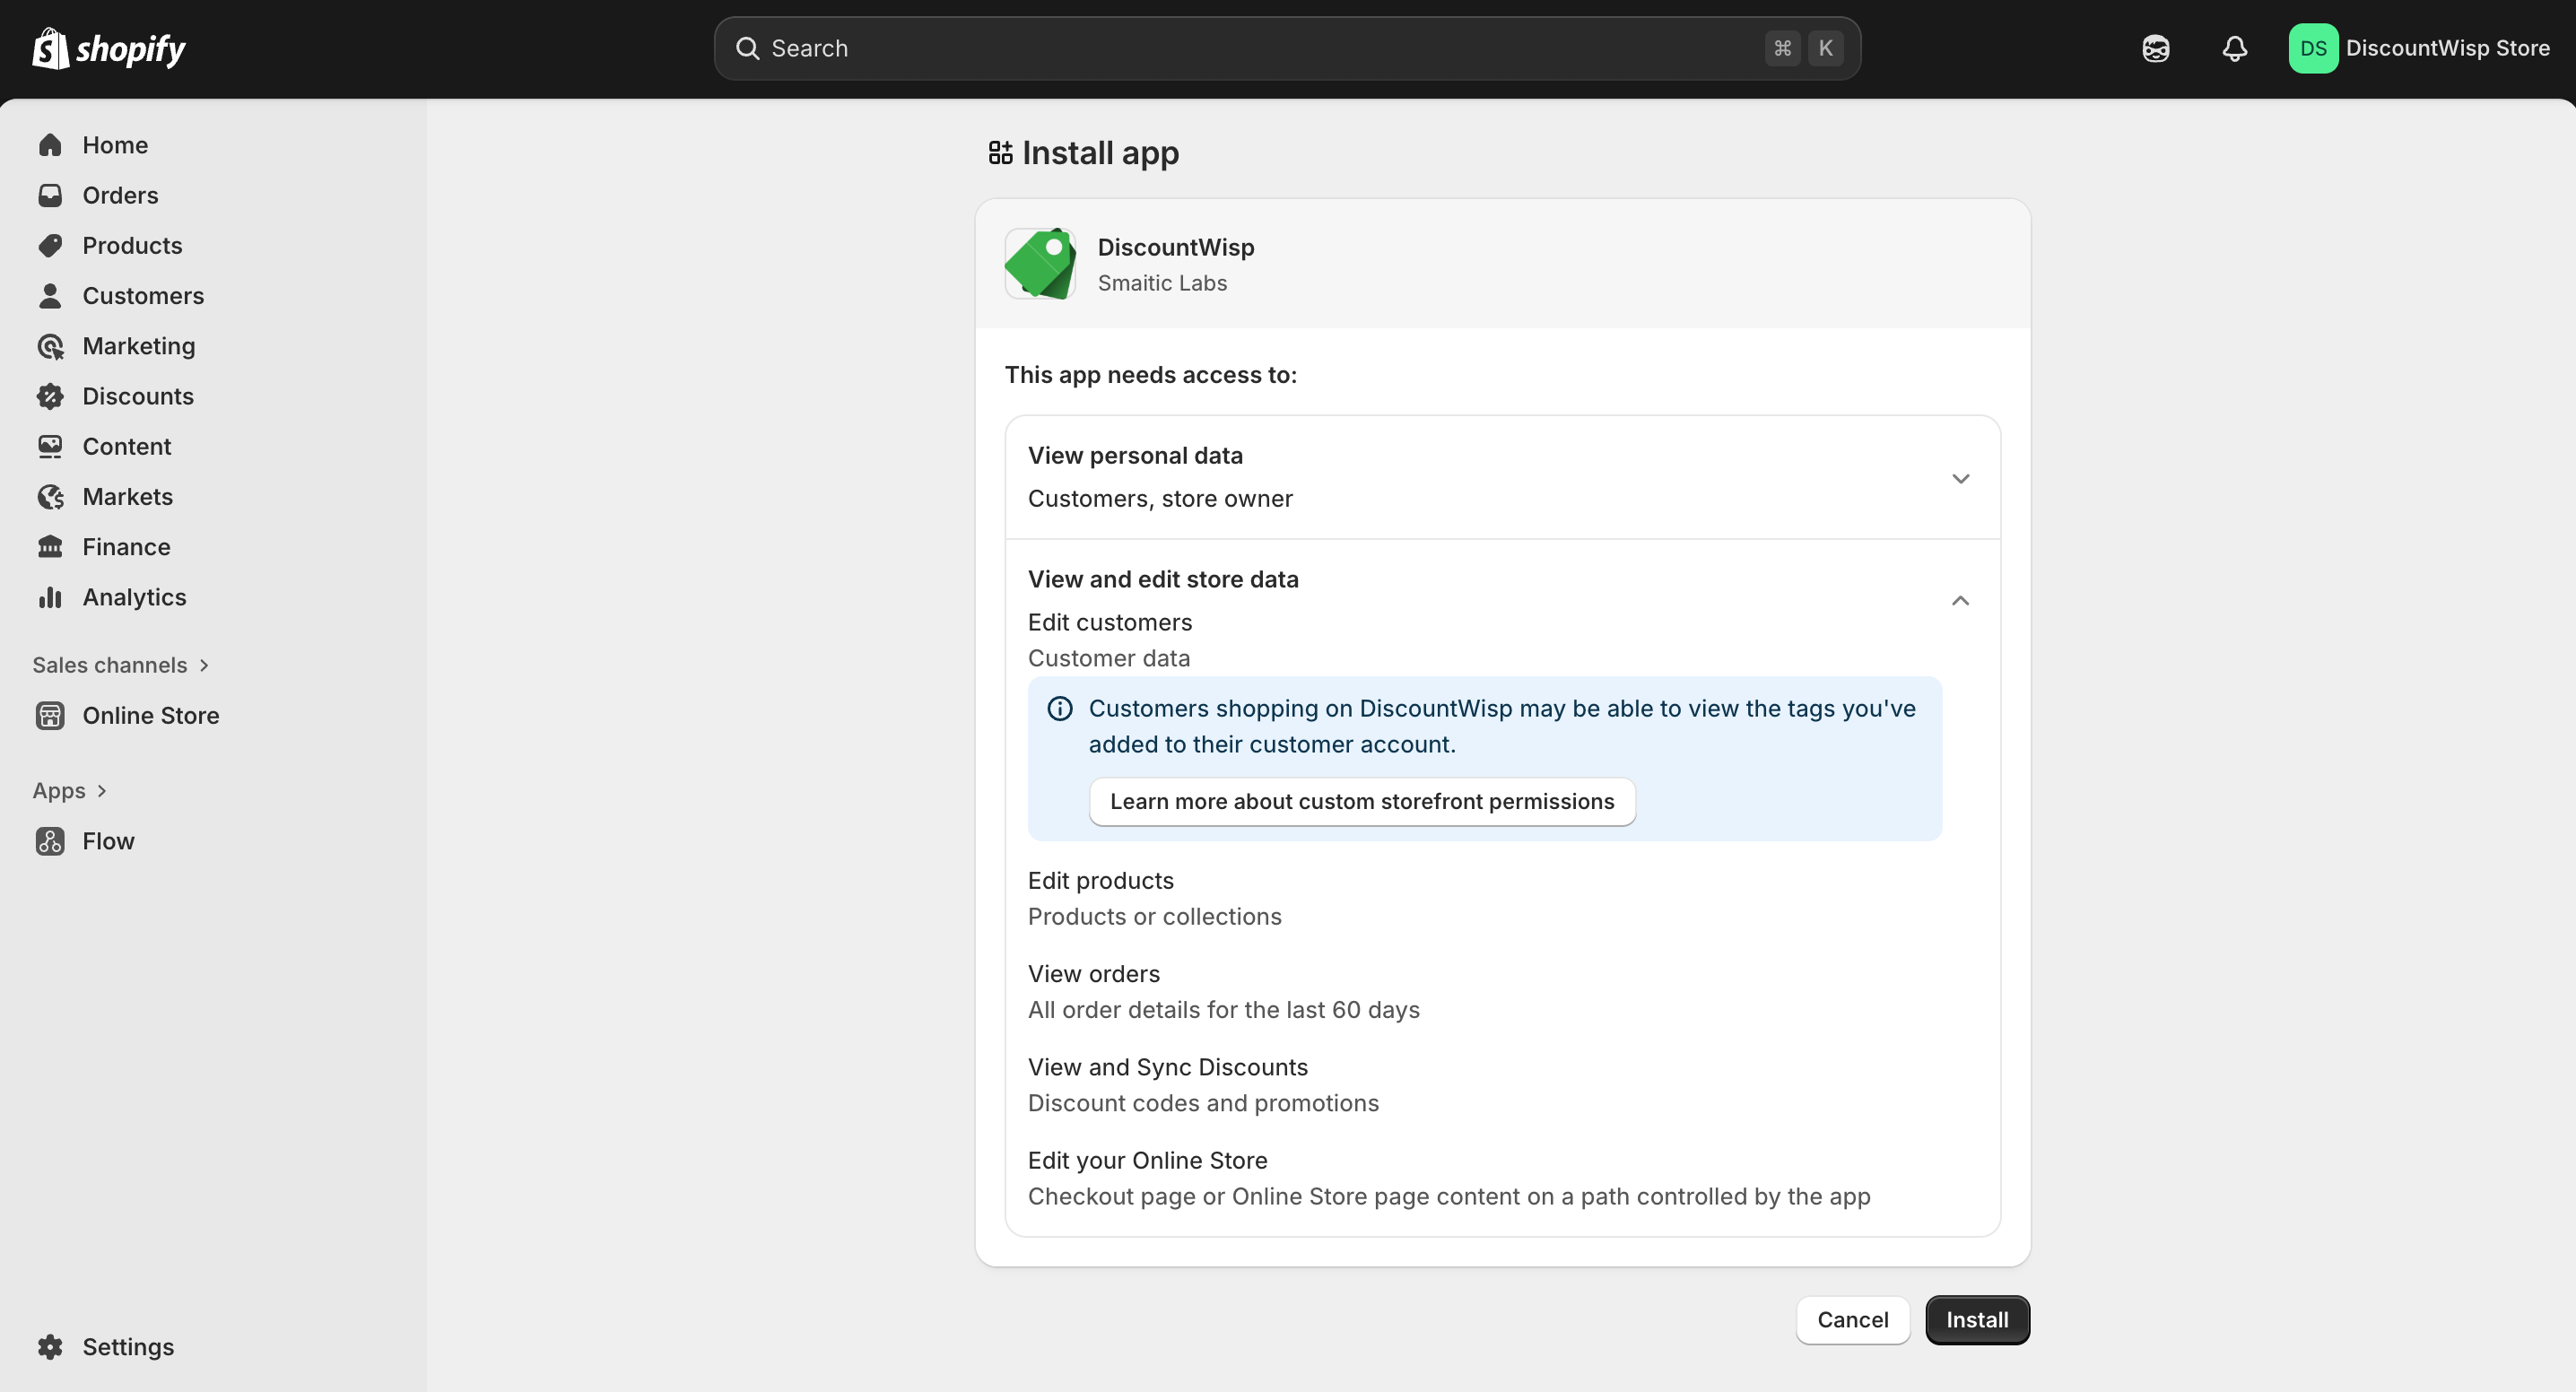
Step 2: Install the App
- From the app listing page, click Install to begin.
- Log in to your Shopify store when prompted.
- Carefully review the permissions that DiscountWisp requests (e.g., access to products, orders, and customers).
- Click Install to finalize installation.
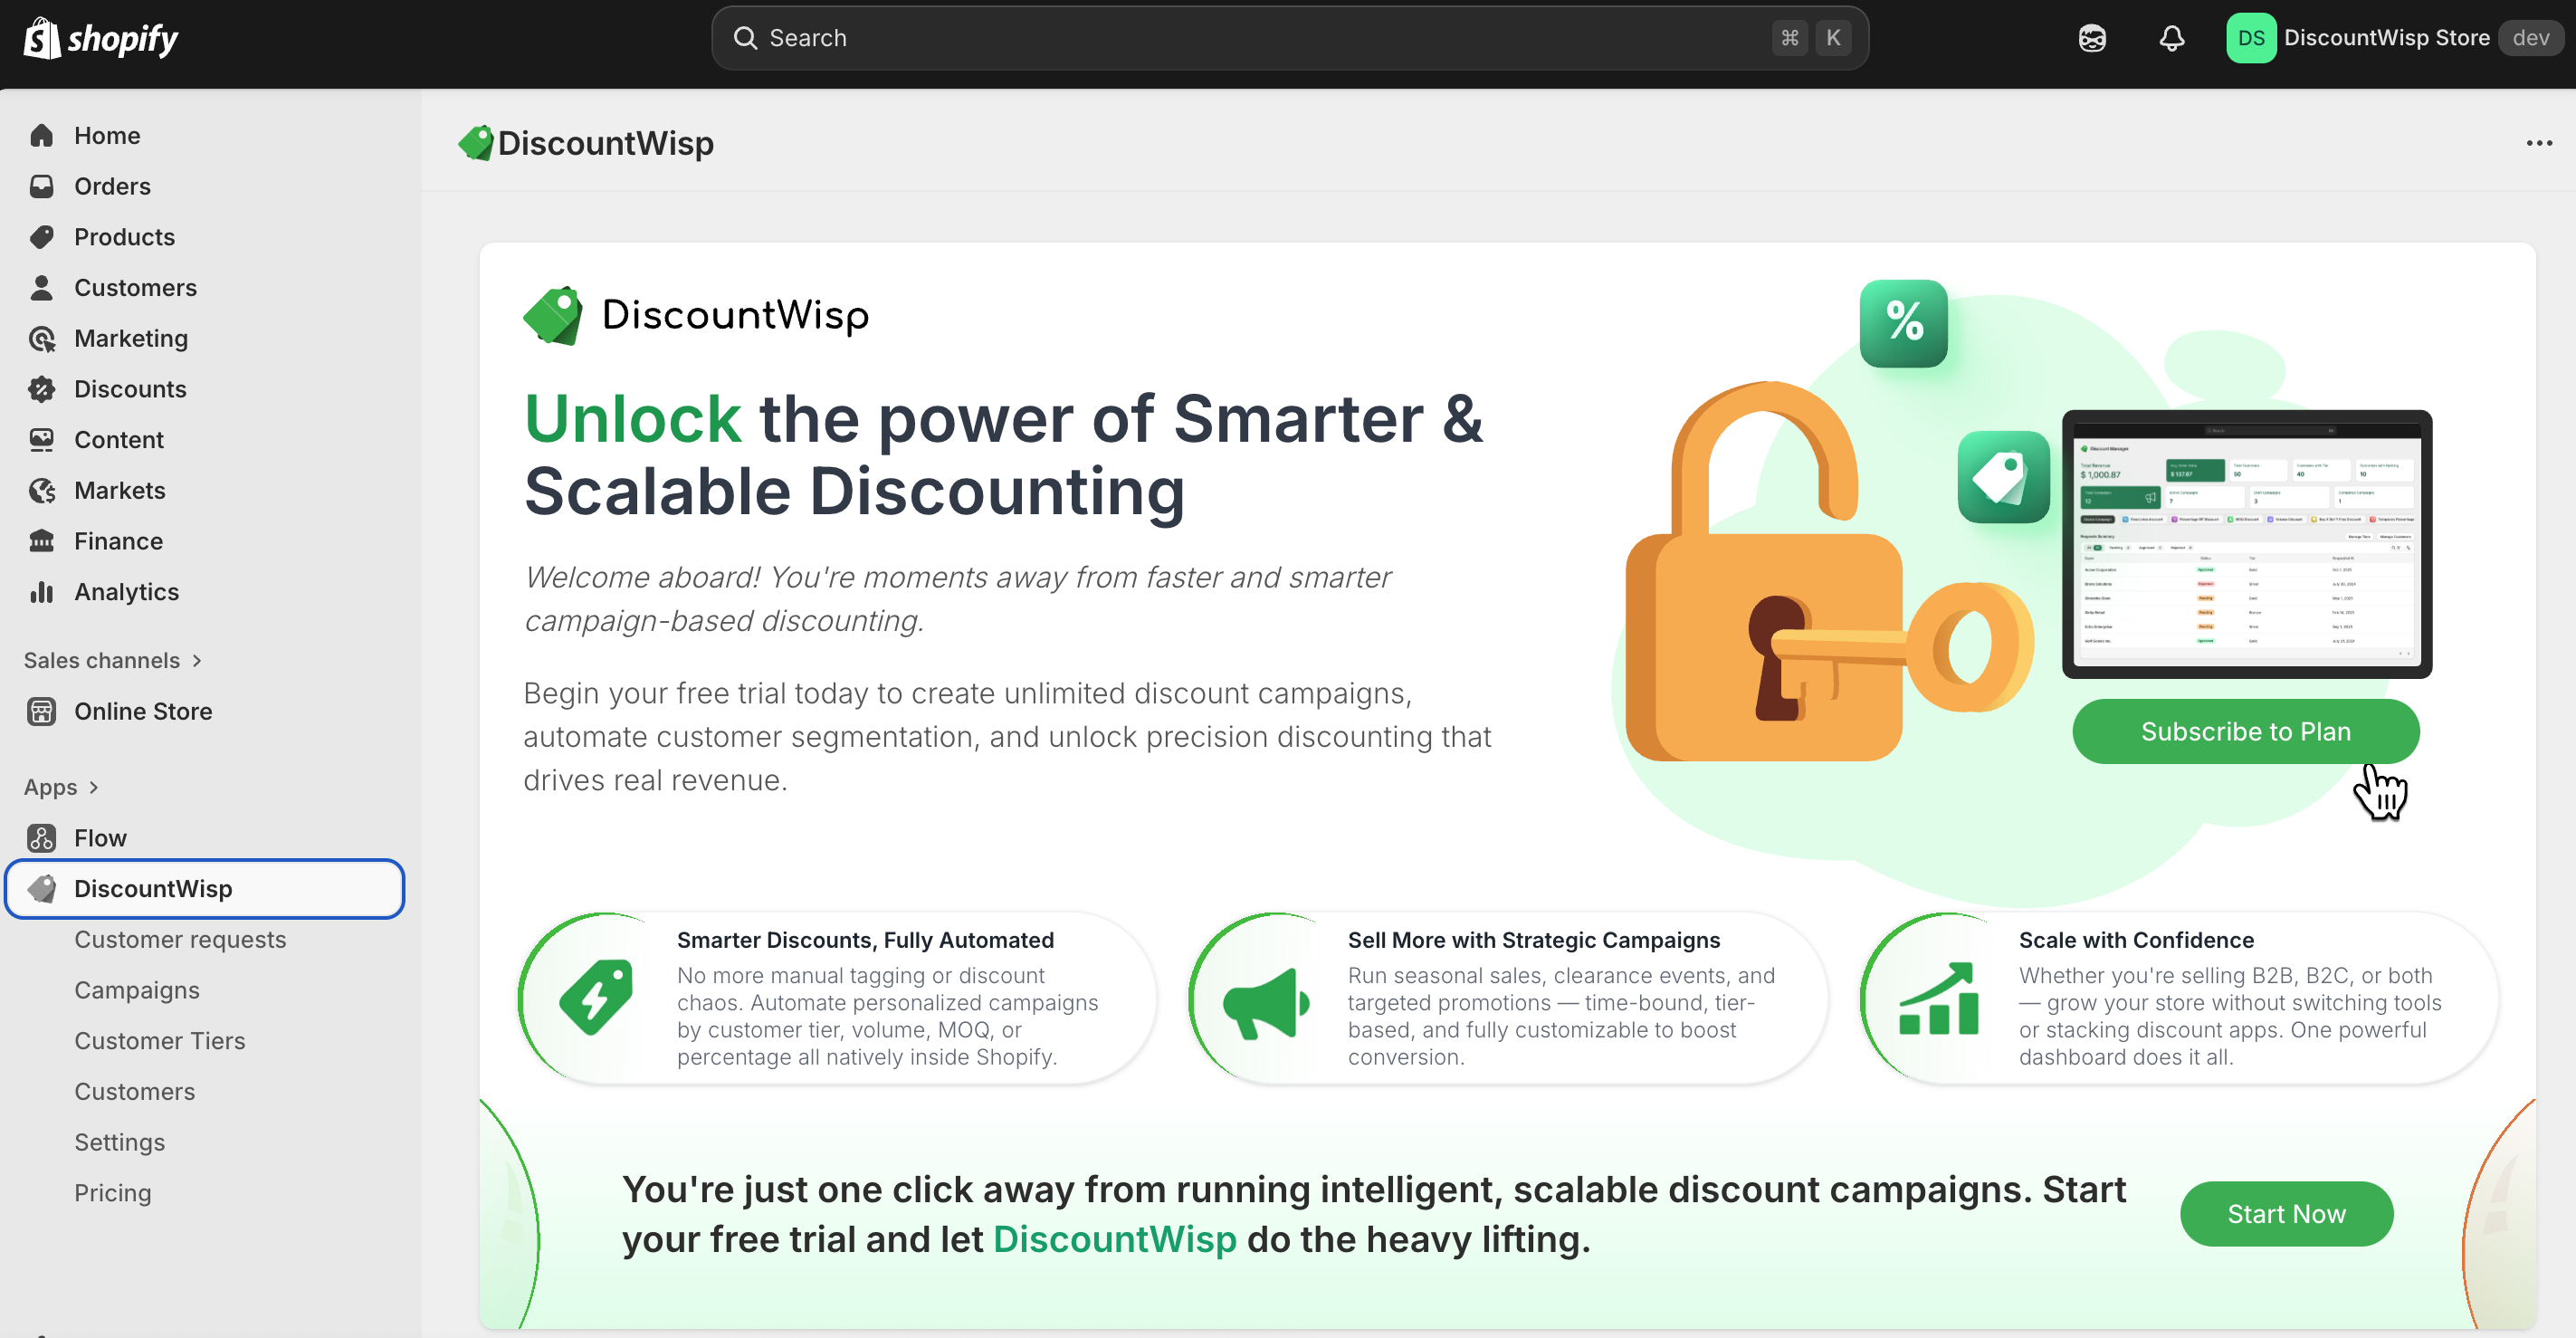
Step 3: Enroll in a Plan to Unlock Features
To begin using DiscountWisp, you must activate a subscription plan or start a free trial. This ensures access to all core features such as discount campaigns, customer tiering, and rule automation.
- Click “Subscribe to Plan” or “Start Now” on the prompt that appears after installation.
- You’ll be taken to the Pricing Page, where you can review plans, select a plan, and confirm subscription to a plan that fits your business needs.
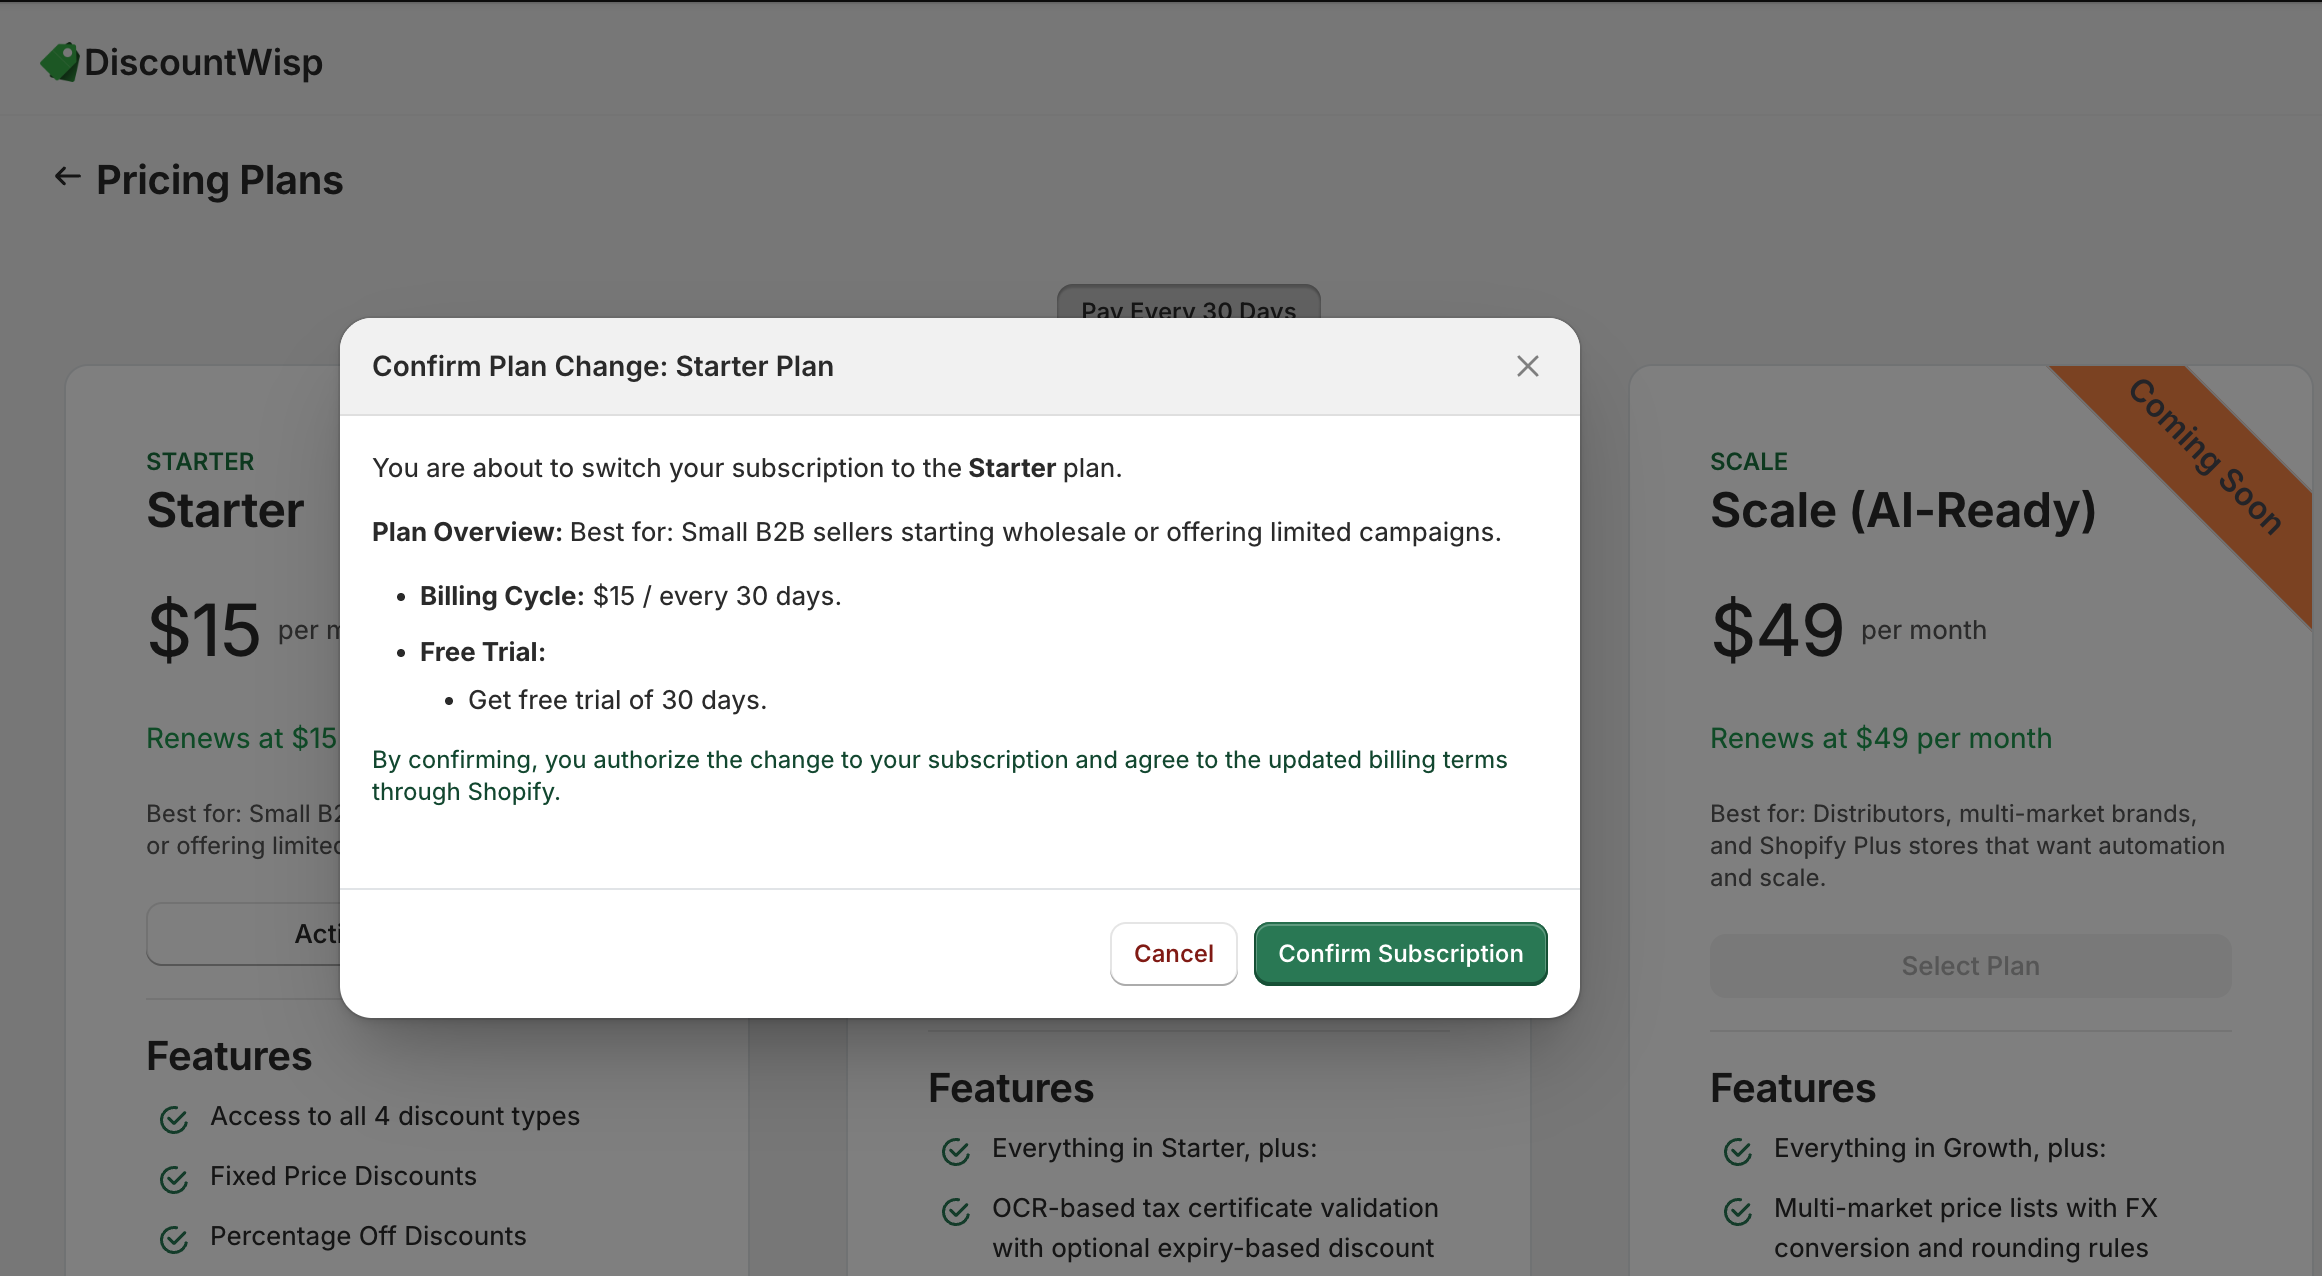
- After selecting a plan, you'll proceed to Shopify’s Billing Confirmation Page to review and approve the subscription.
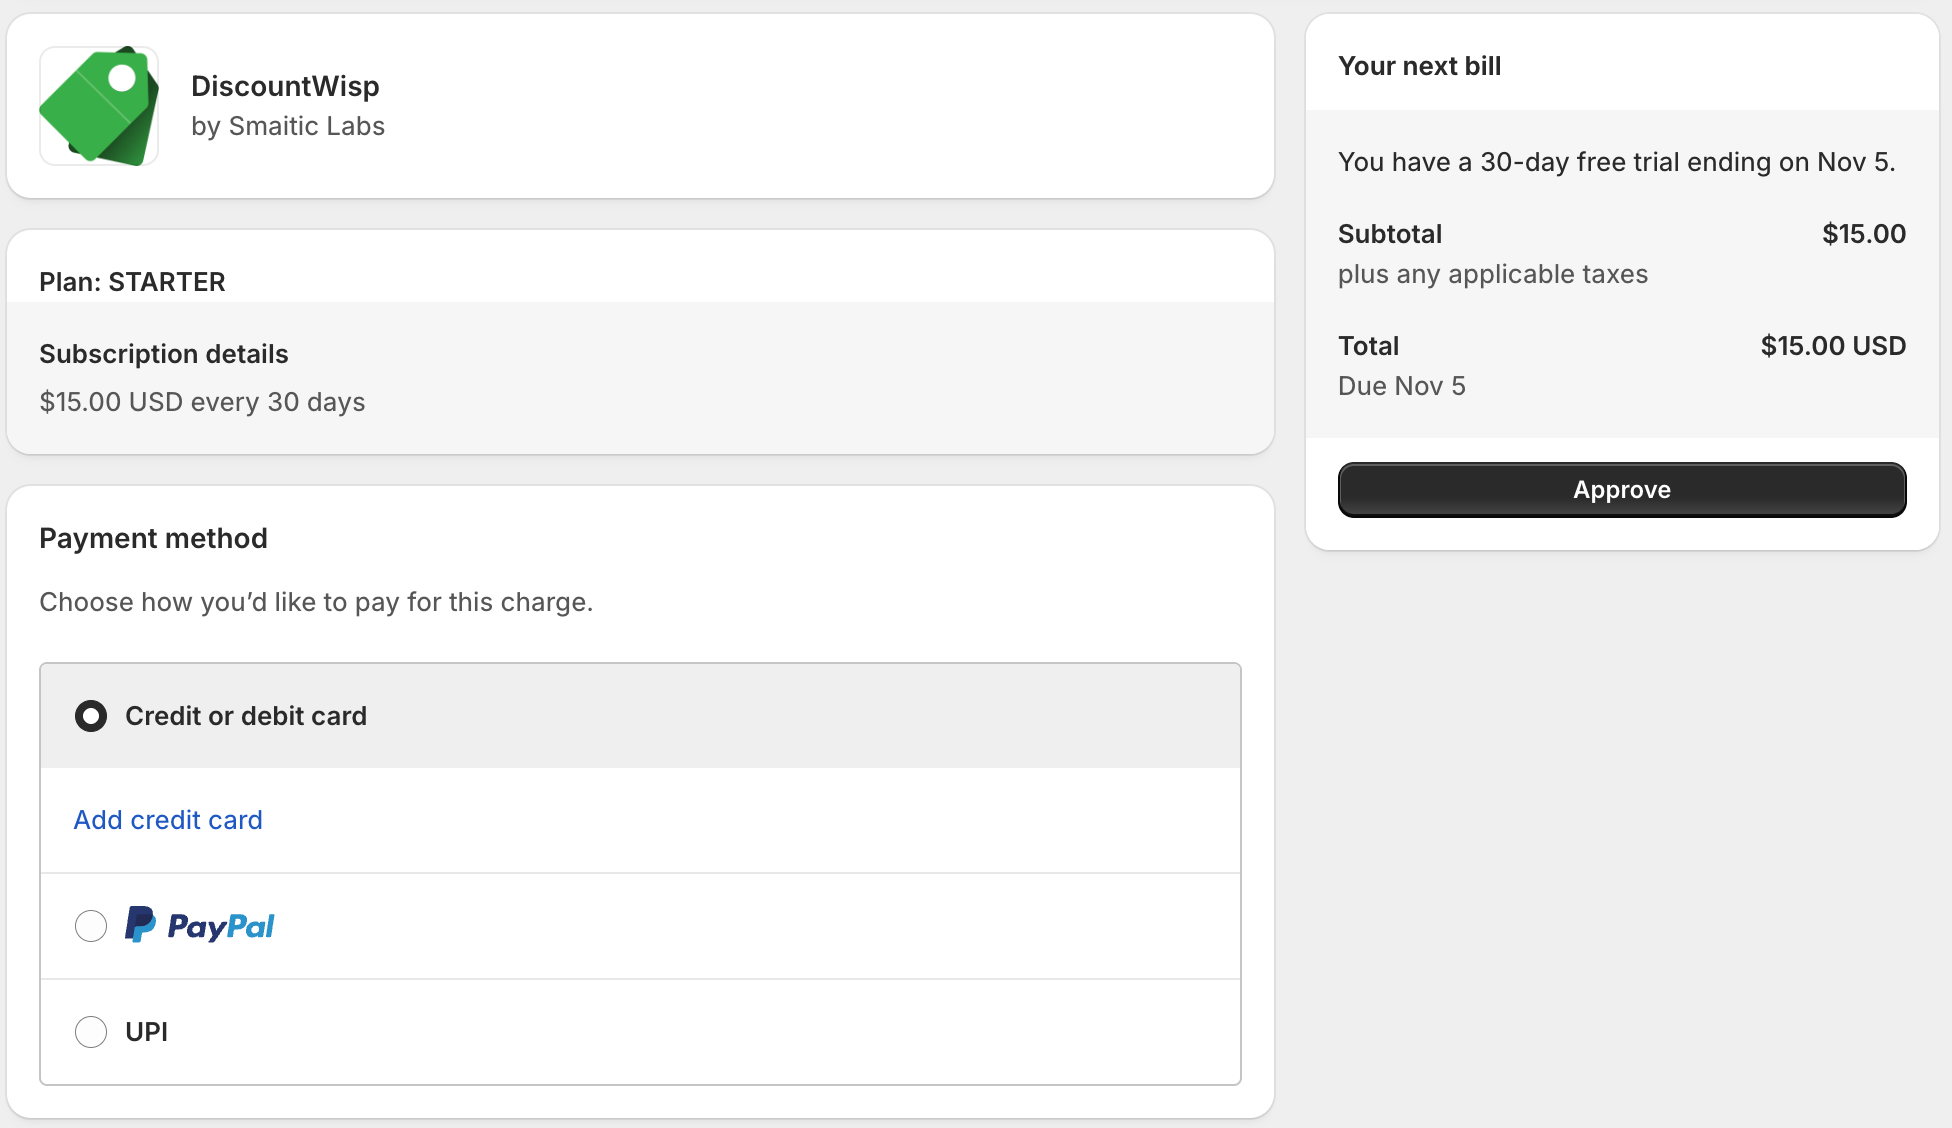
- Once confirmed, you'll gain immediate access to the DiscountWisp dashboard and all app functionalities.
This step ensures you have immediate access to all core functionalities — like creating discount campaigns, managing customer tiers, and automating discount rules — without interruption.
Access to features is restricted until a plan is selected and activated.
Step 4: Adding Customer Tier Classification Request Extension
To allow customers to request classification into custom discount tiers, you'll need to add the DiscountWisp – Customer Tier Classification extension to your storefront.
This extension gives customers access to a classification form, enabling you to segment them into the right pricing tiers — crucial for offering personalized discounts.
Where to Place It
You can place the classification request extension anywhere on your online store — commonly:
- Header (Icon Format) – Recommended for visibility and minimal UI interference
- Footer (Text Format) – Great for consistent access sitewide
- Homepage Body (Featured Button Format) – Prominent CTA placement
Customization Options
You can customize:
- Extension Type : Icon, Text, or Featured Button
- Label : Custom label for extension
- Alignment : Left, Center, Right
- Content Font : Select font of your choice
- Background Color
- Content (Text/Icon) Color
These allow it to match your brand and theme aesthetics.
Installation Steps
The Customer Tier Classification extension allows customers to access the classification form directly from your storefront. There are two ways to add this extension to your theme:
1. Quick Add via Dashboard Shortcut
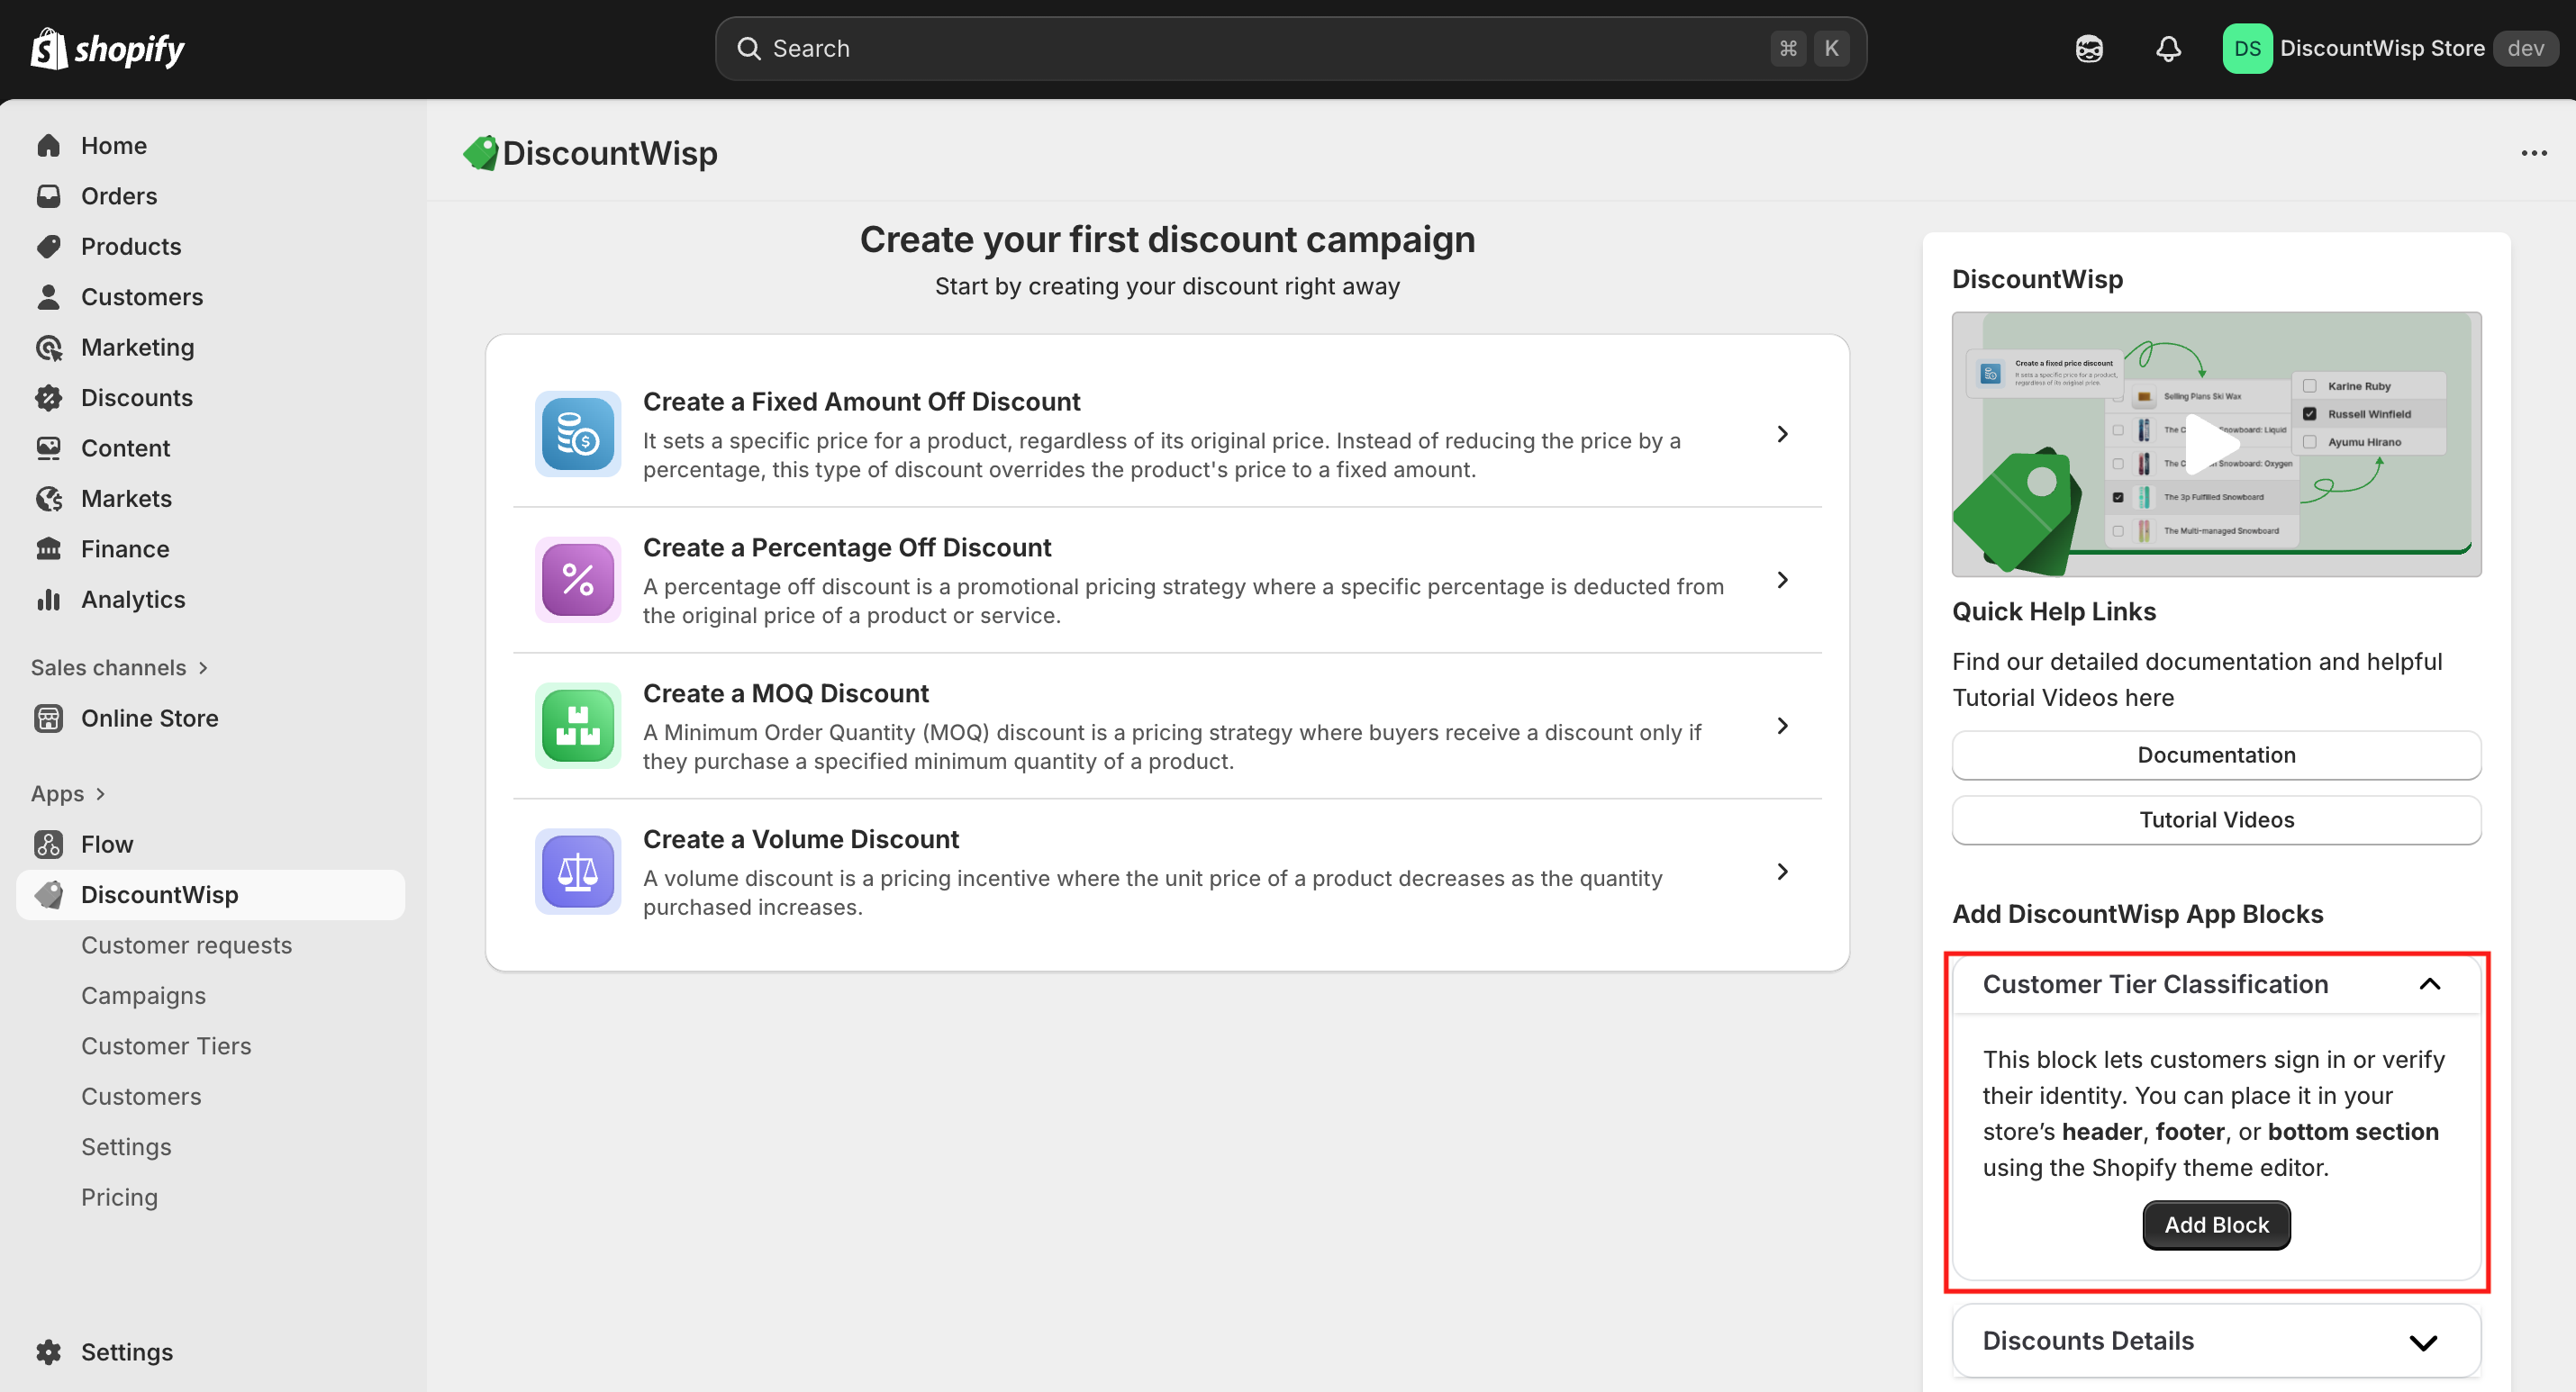
From your DiscountWisp Dashboard, you’ll find a section on the right side titled "Add DiscountWisp App Blocks". This section includes shortcut to Customer Tier Classification Extension.
To add the Customer Tier Classification extension:
-
Click the “Add Block” button next to the desired extension.
-
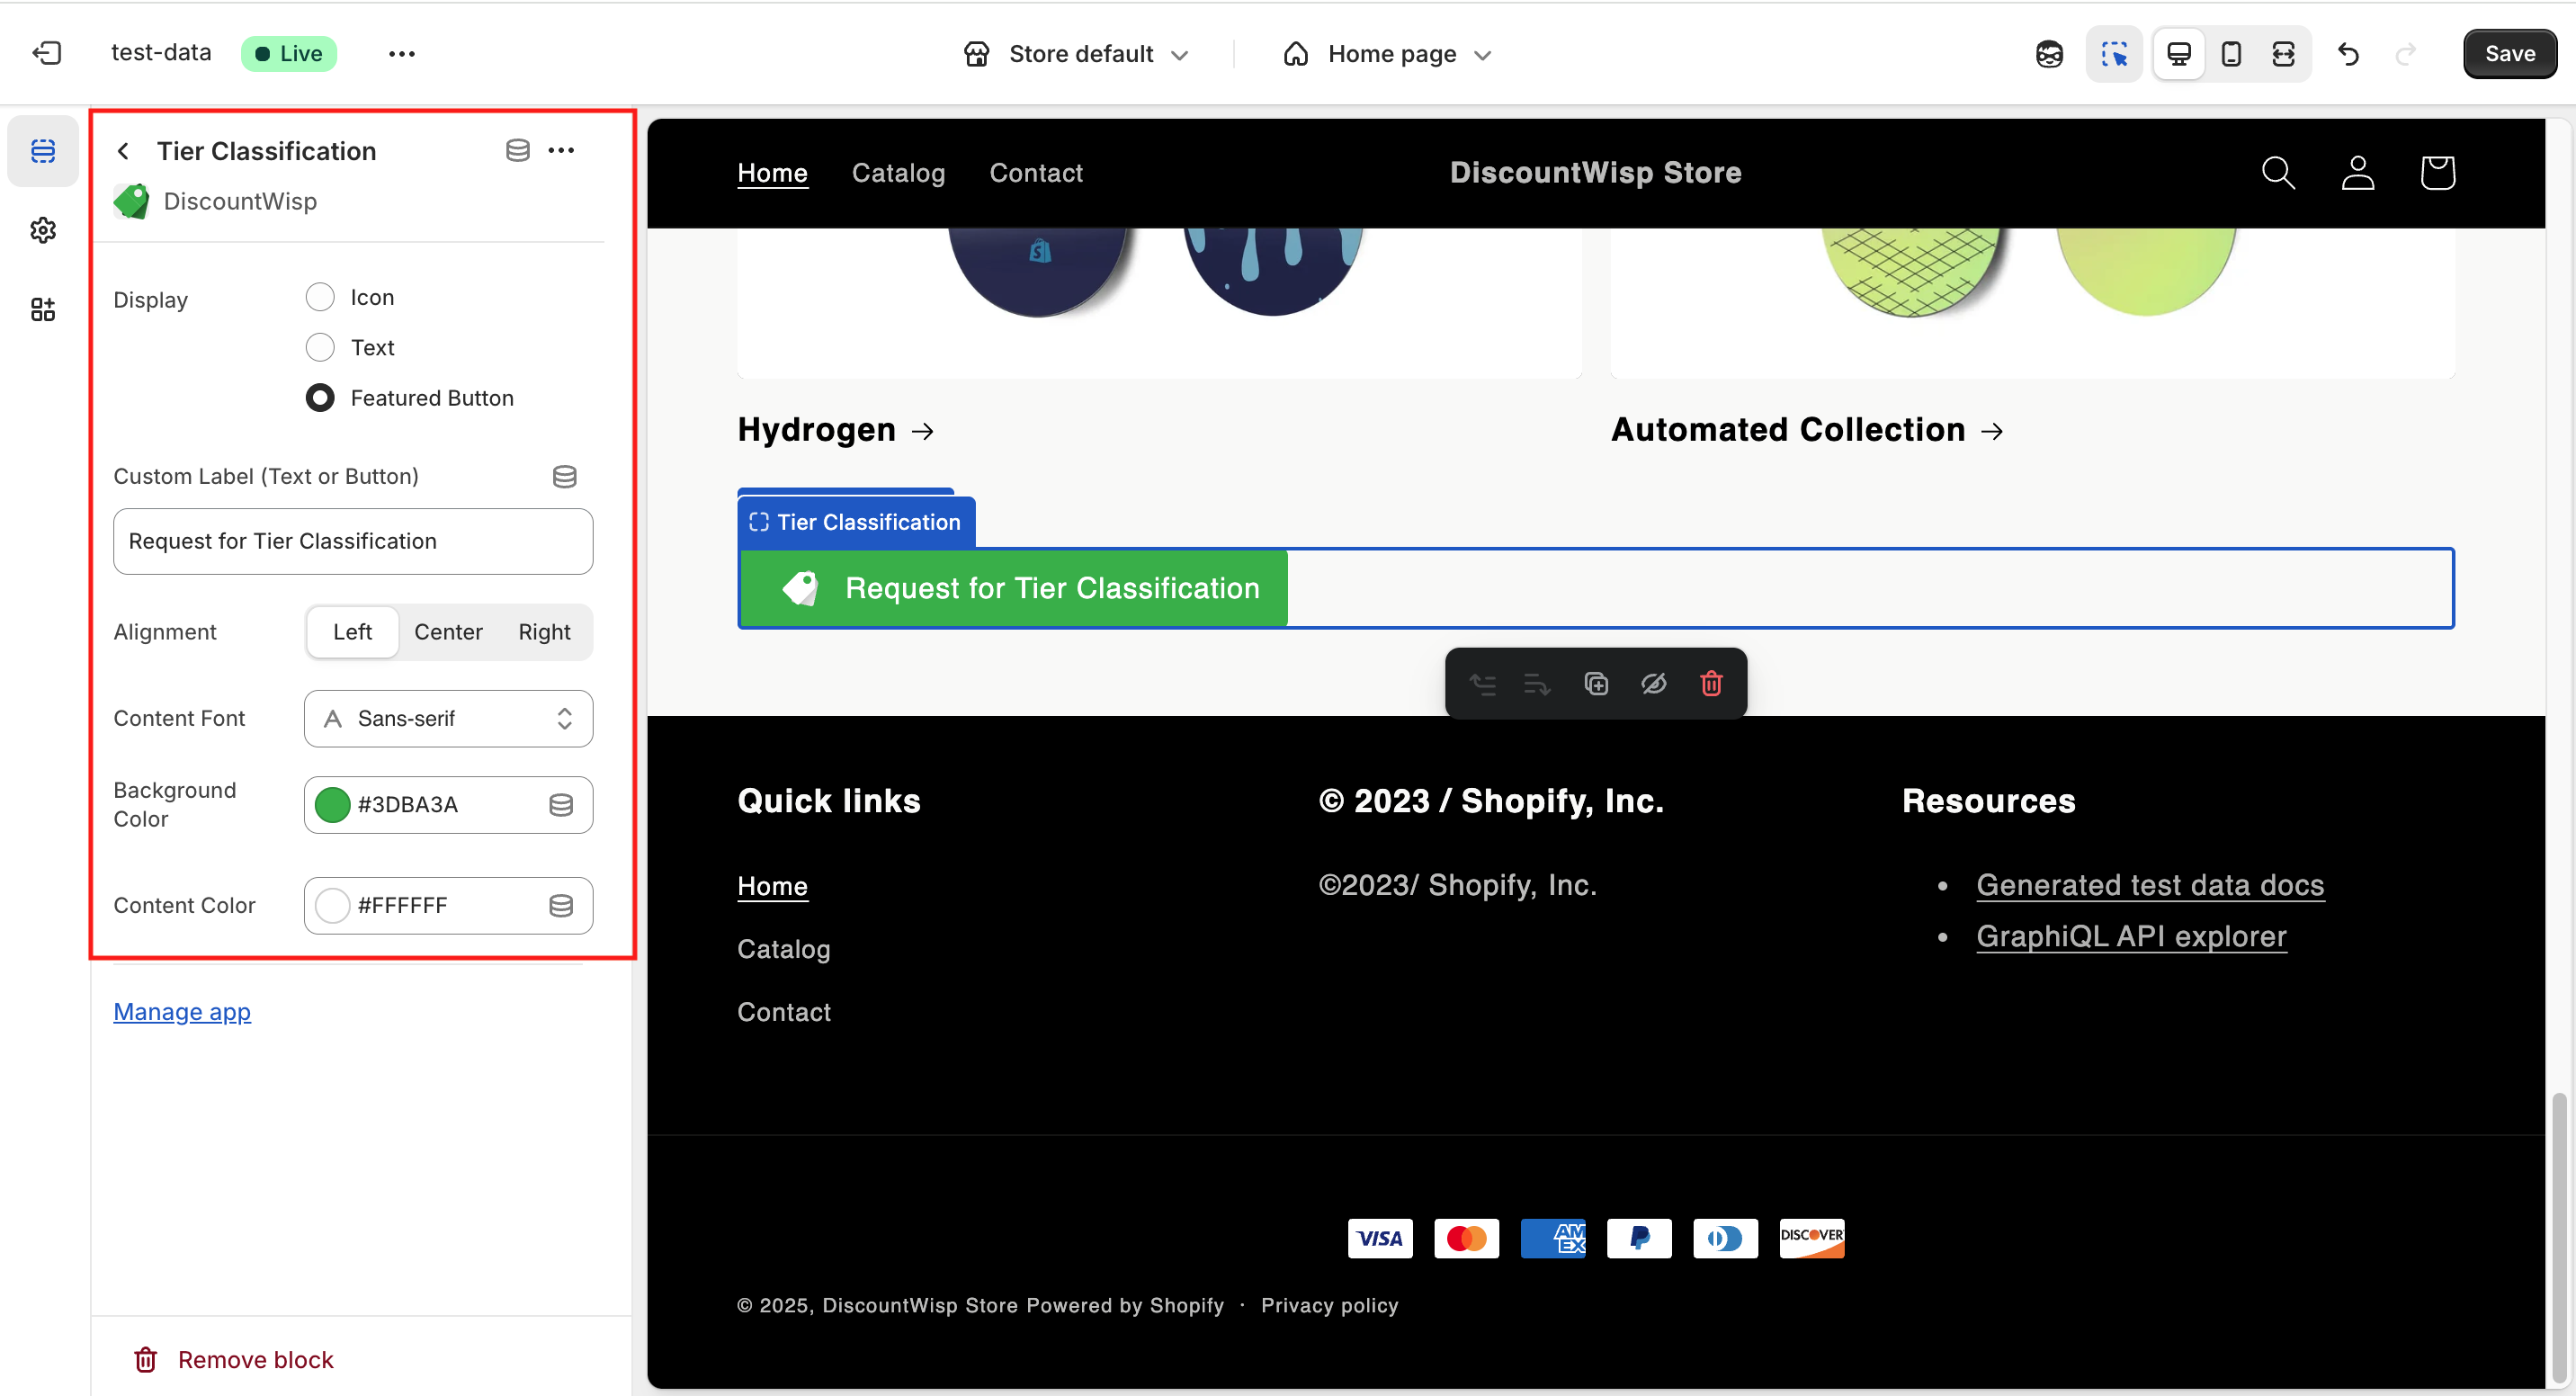
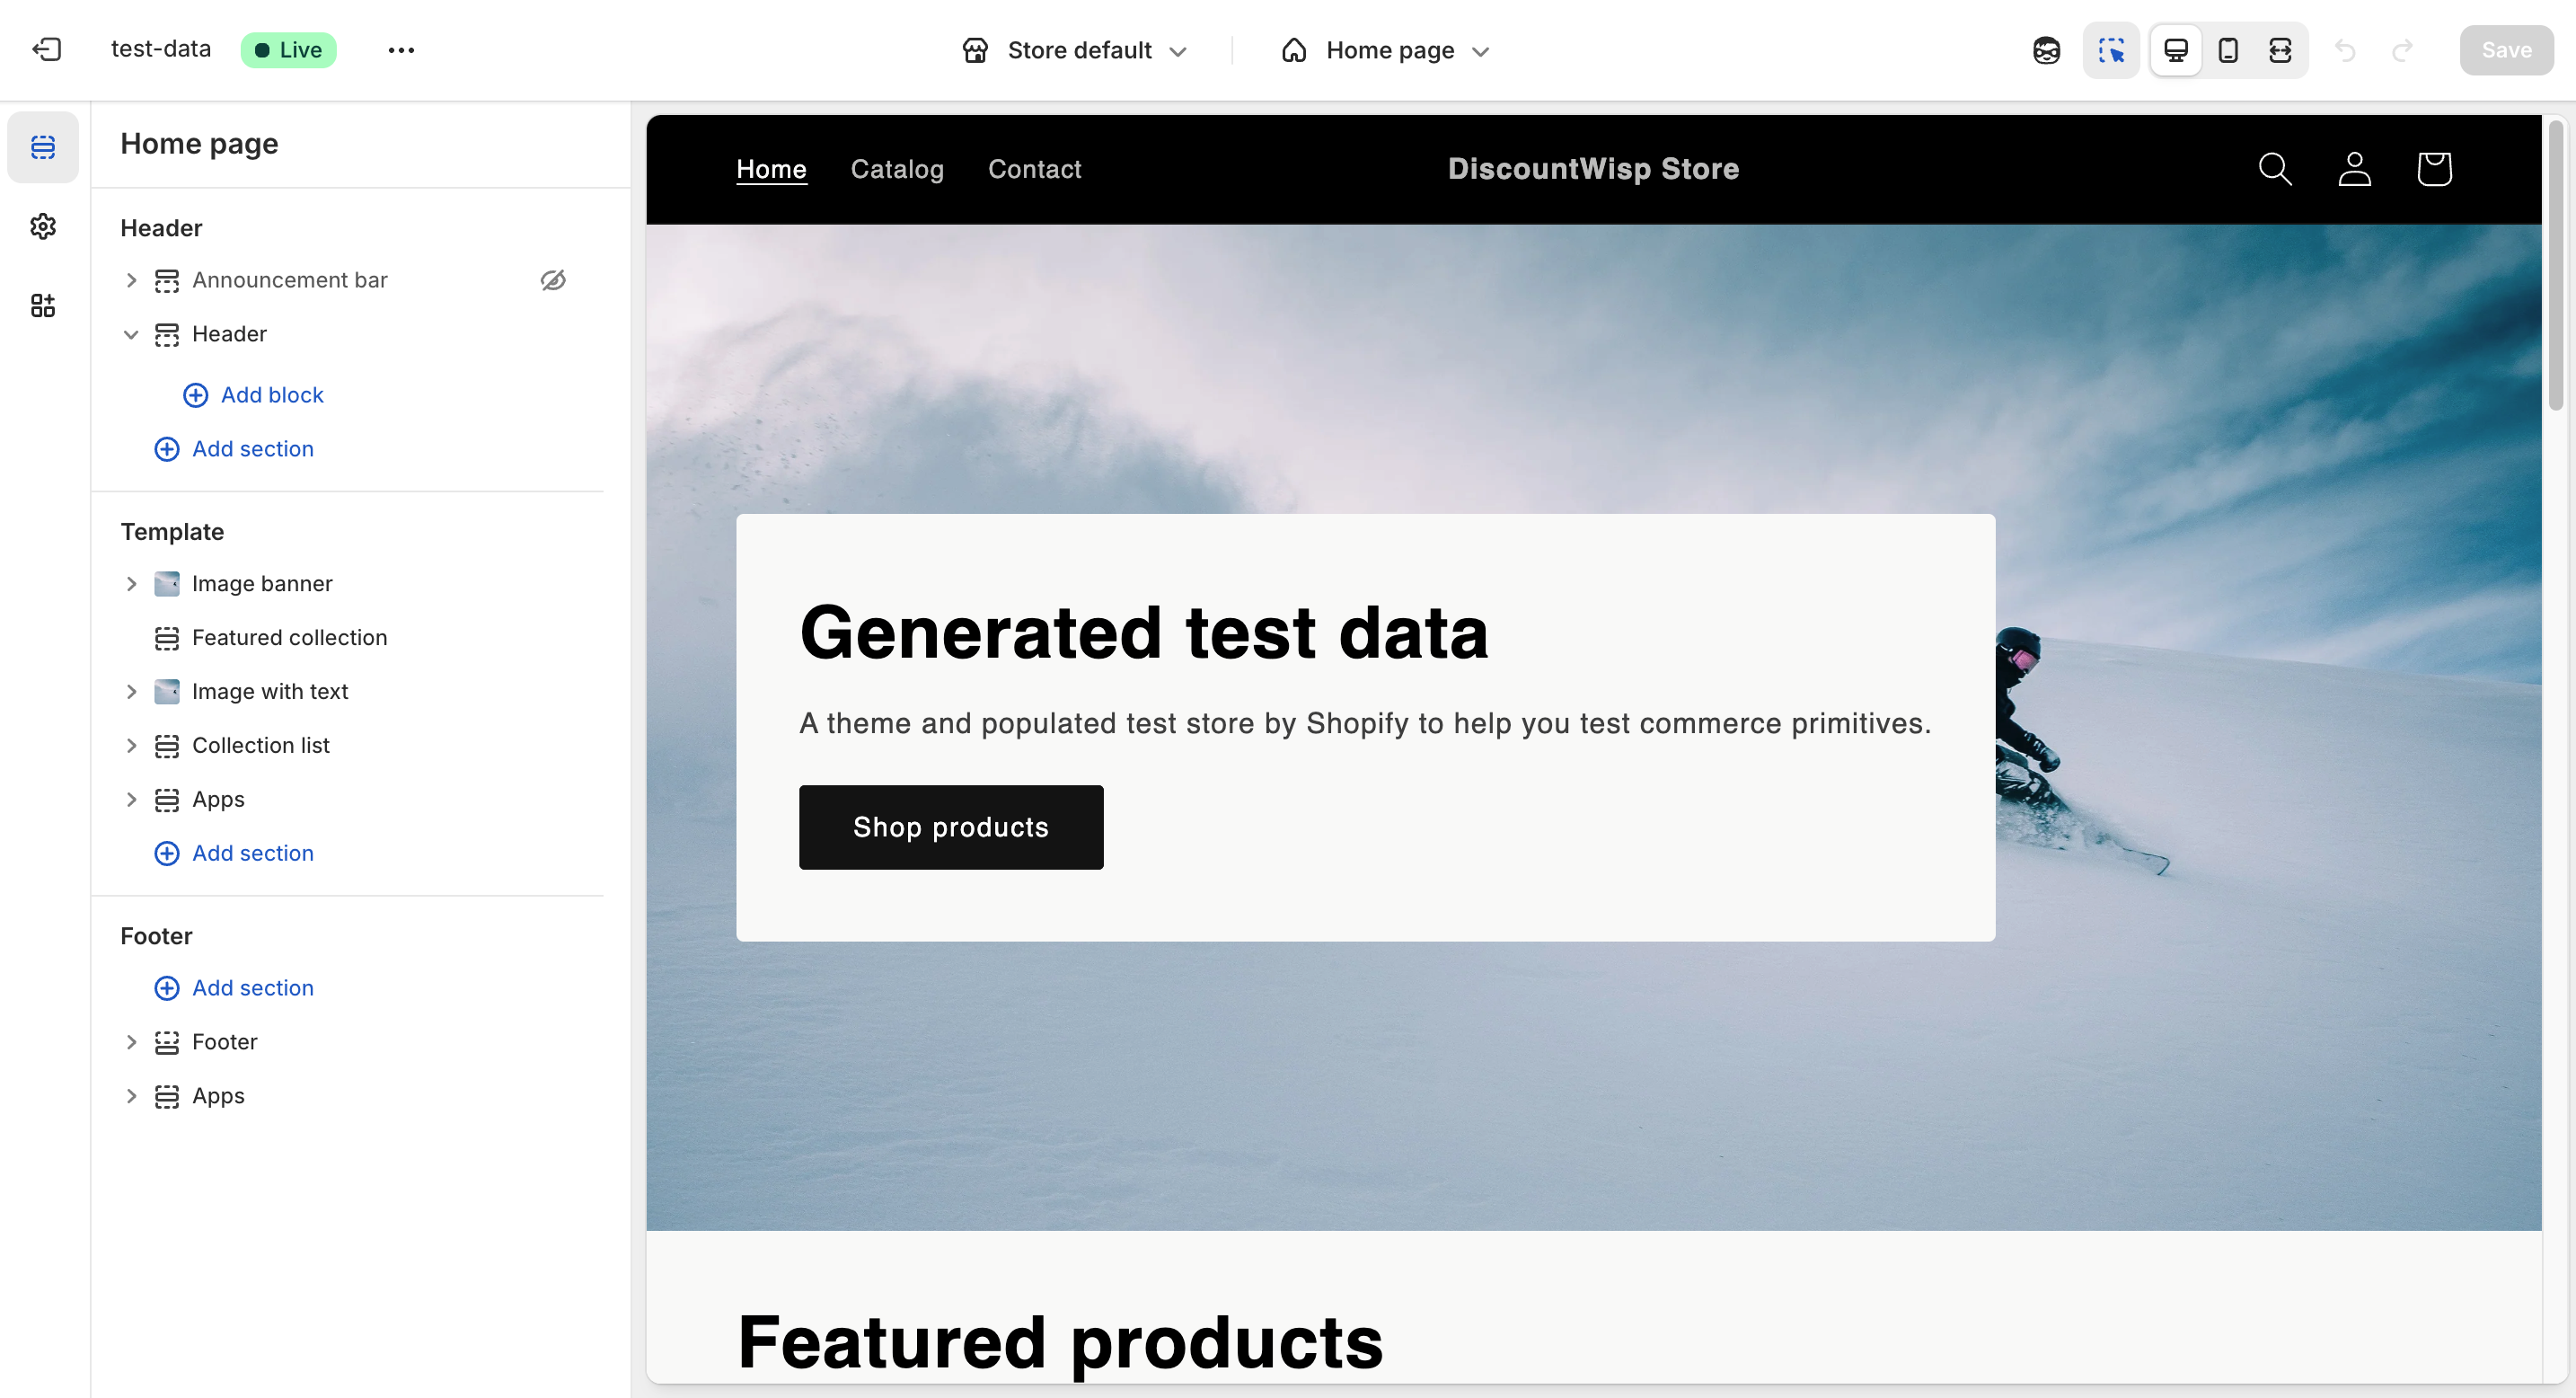
You’ll be redirected to Shopify’s Theme Editor, where the app block will be auto-inserted on the Home Page.

- Drag & Position the block wherever you'd like it to appear on the page.
Customize the appearance:
-
Display options: Text, Icon, or Featured Button
-
Styling options: Custom label, alignment, color, and icon settings
This method provides the fastest way to visually preview and configure the extension placement.
2. Manual Add via Shopify Theme Editor
You can also manually add the extension through the Shopify admin:
- In your Shopify Admin , navigate to Online Store → Themes
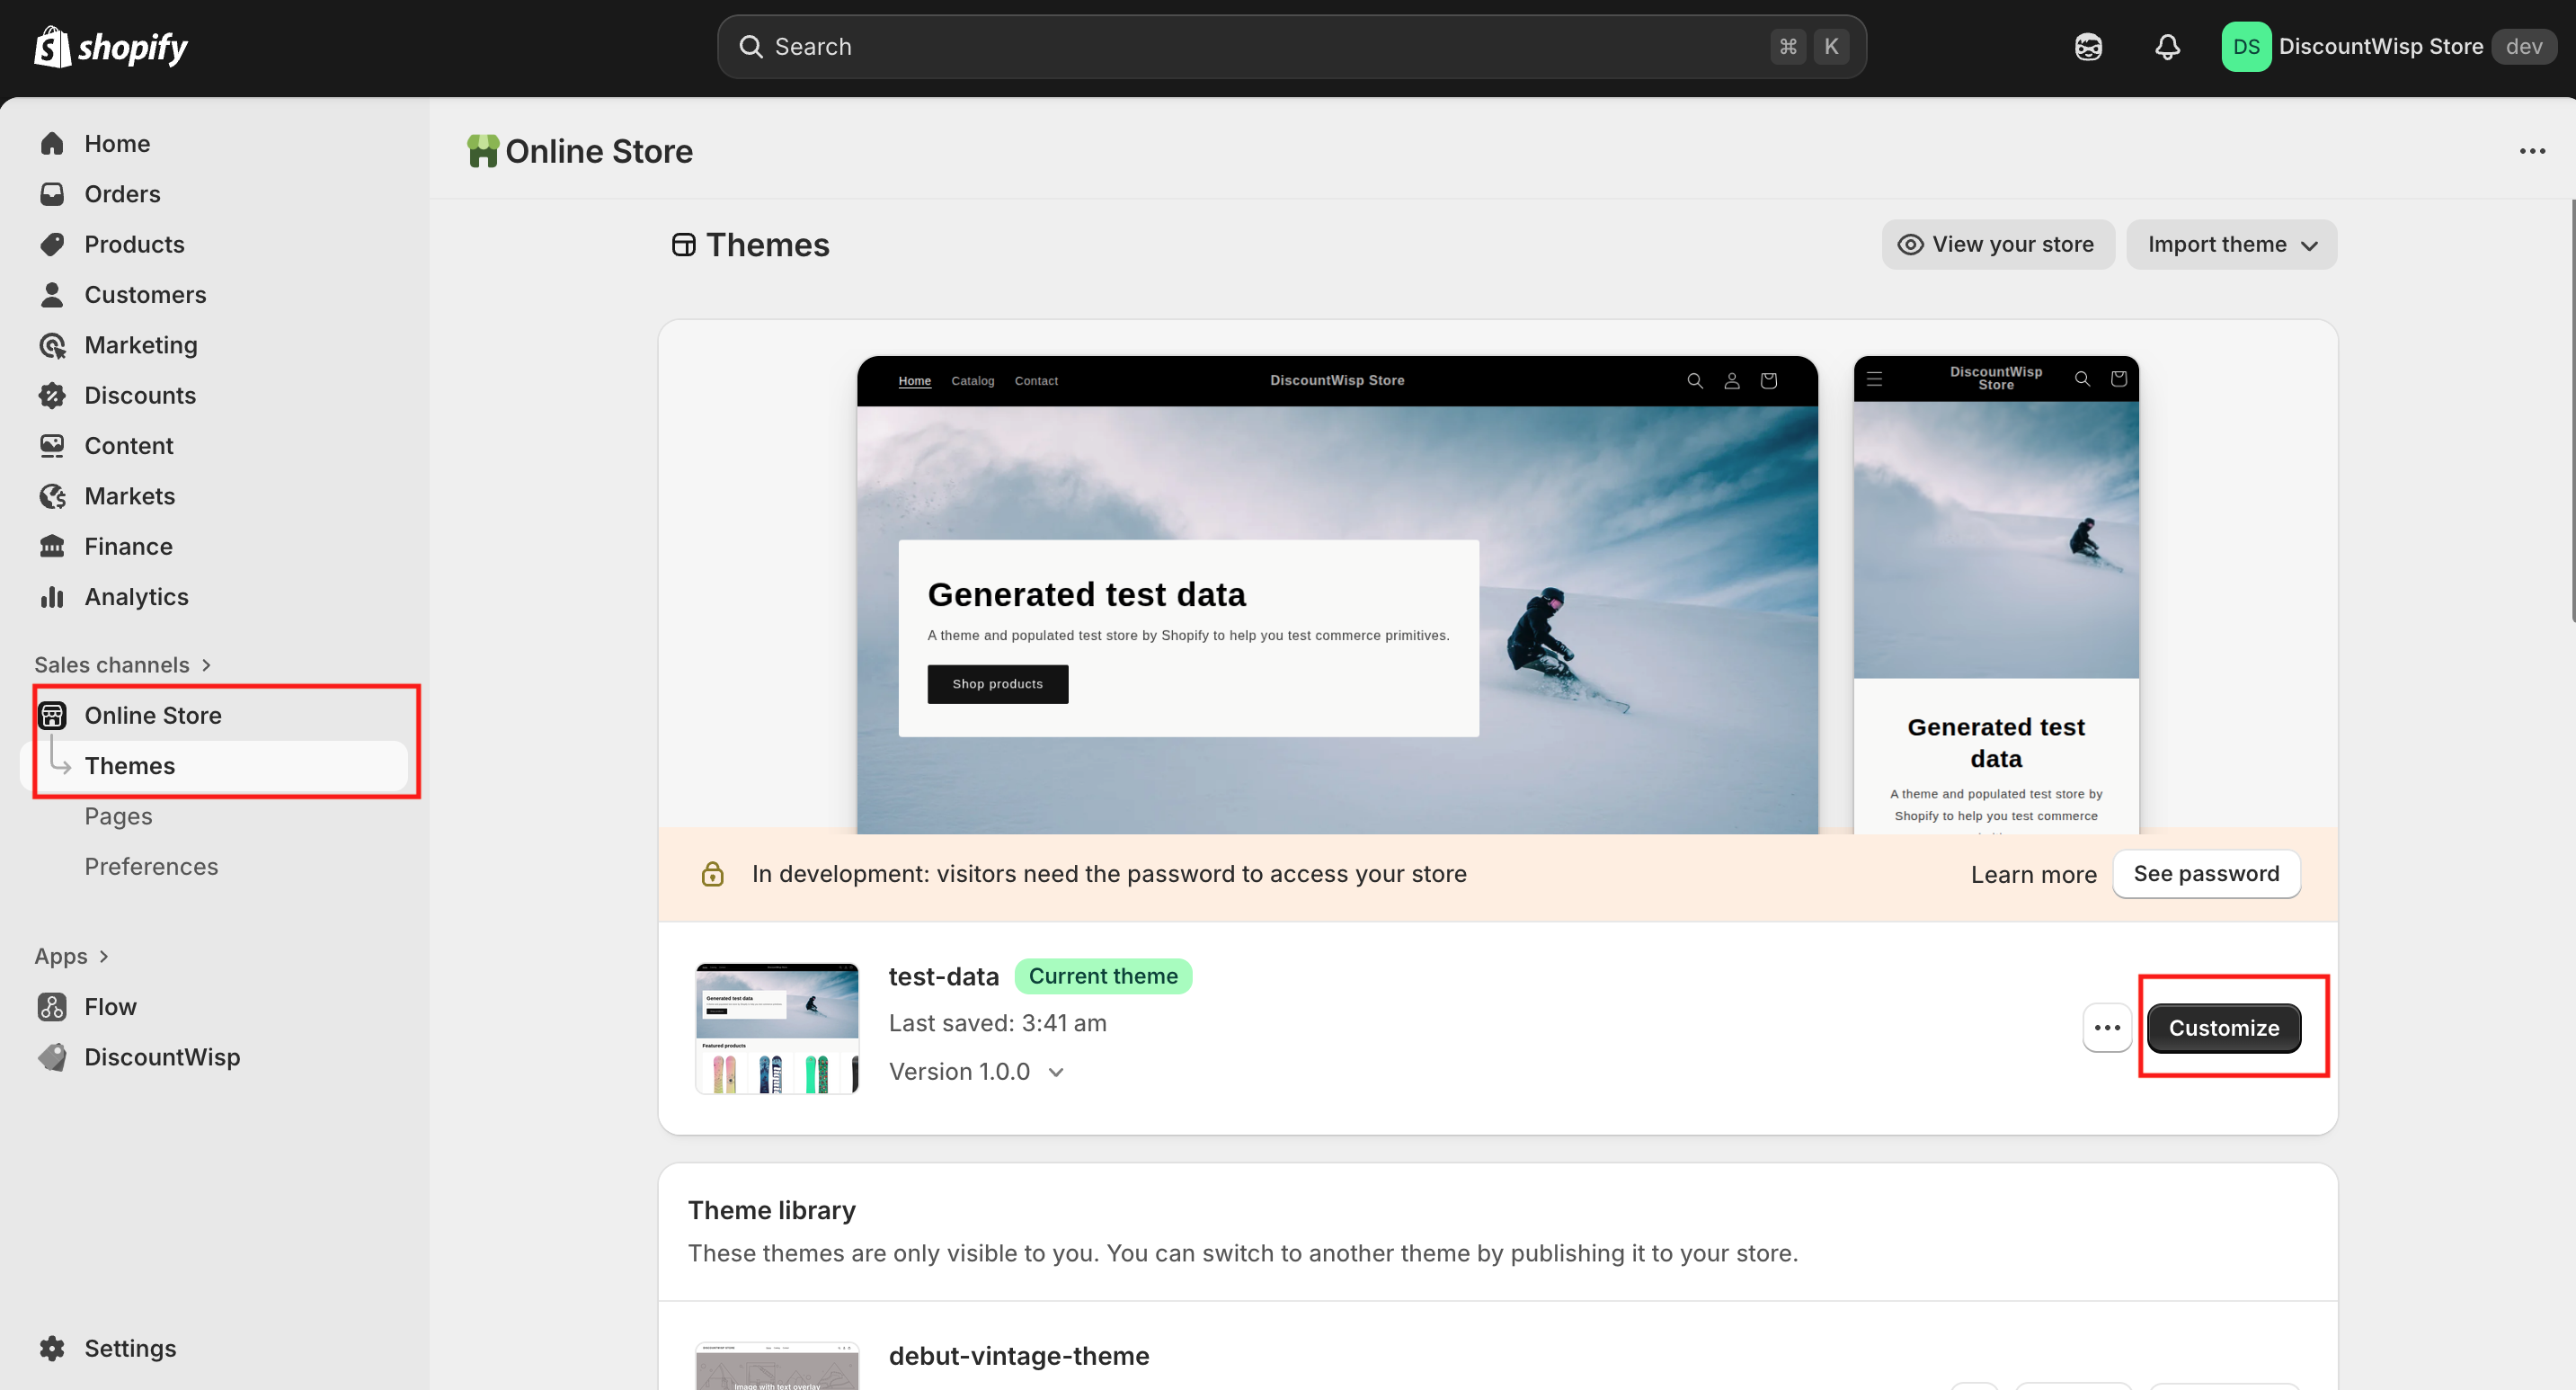
- Click Customize on your active theme.
- In the theme editor sidebar, choose the section where you’d like to place the extension (e.g., Header or Footer or Other Sections)
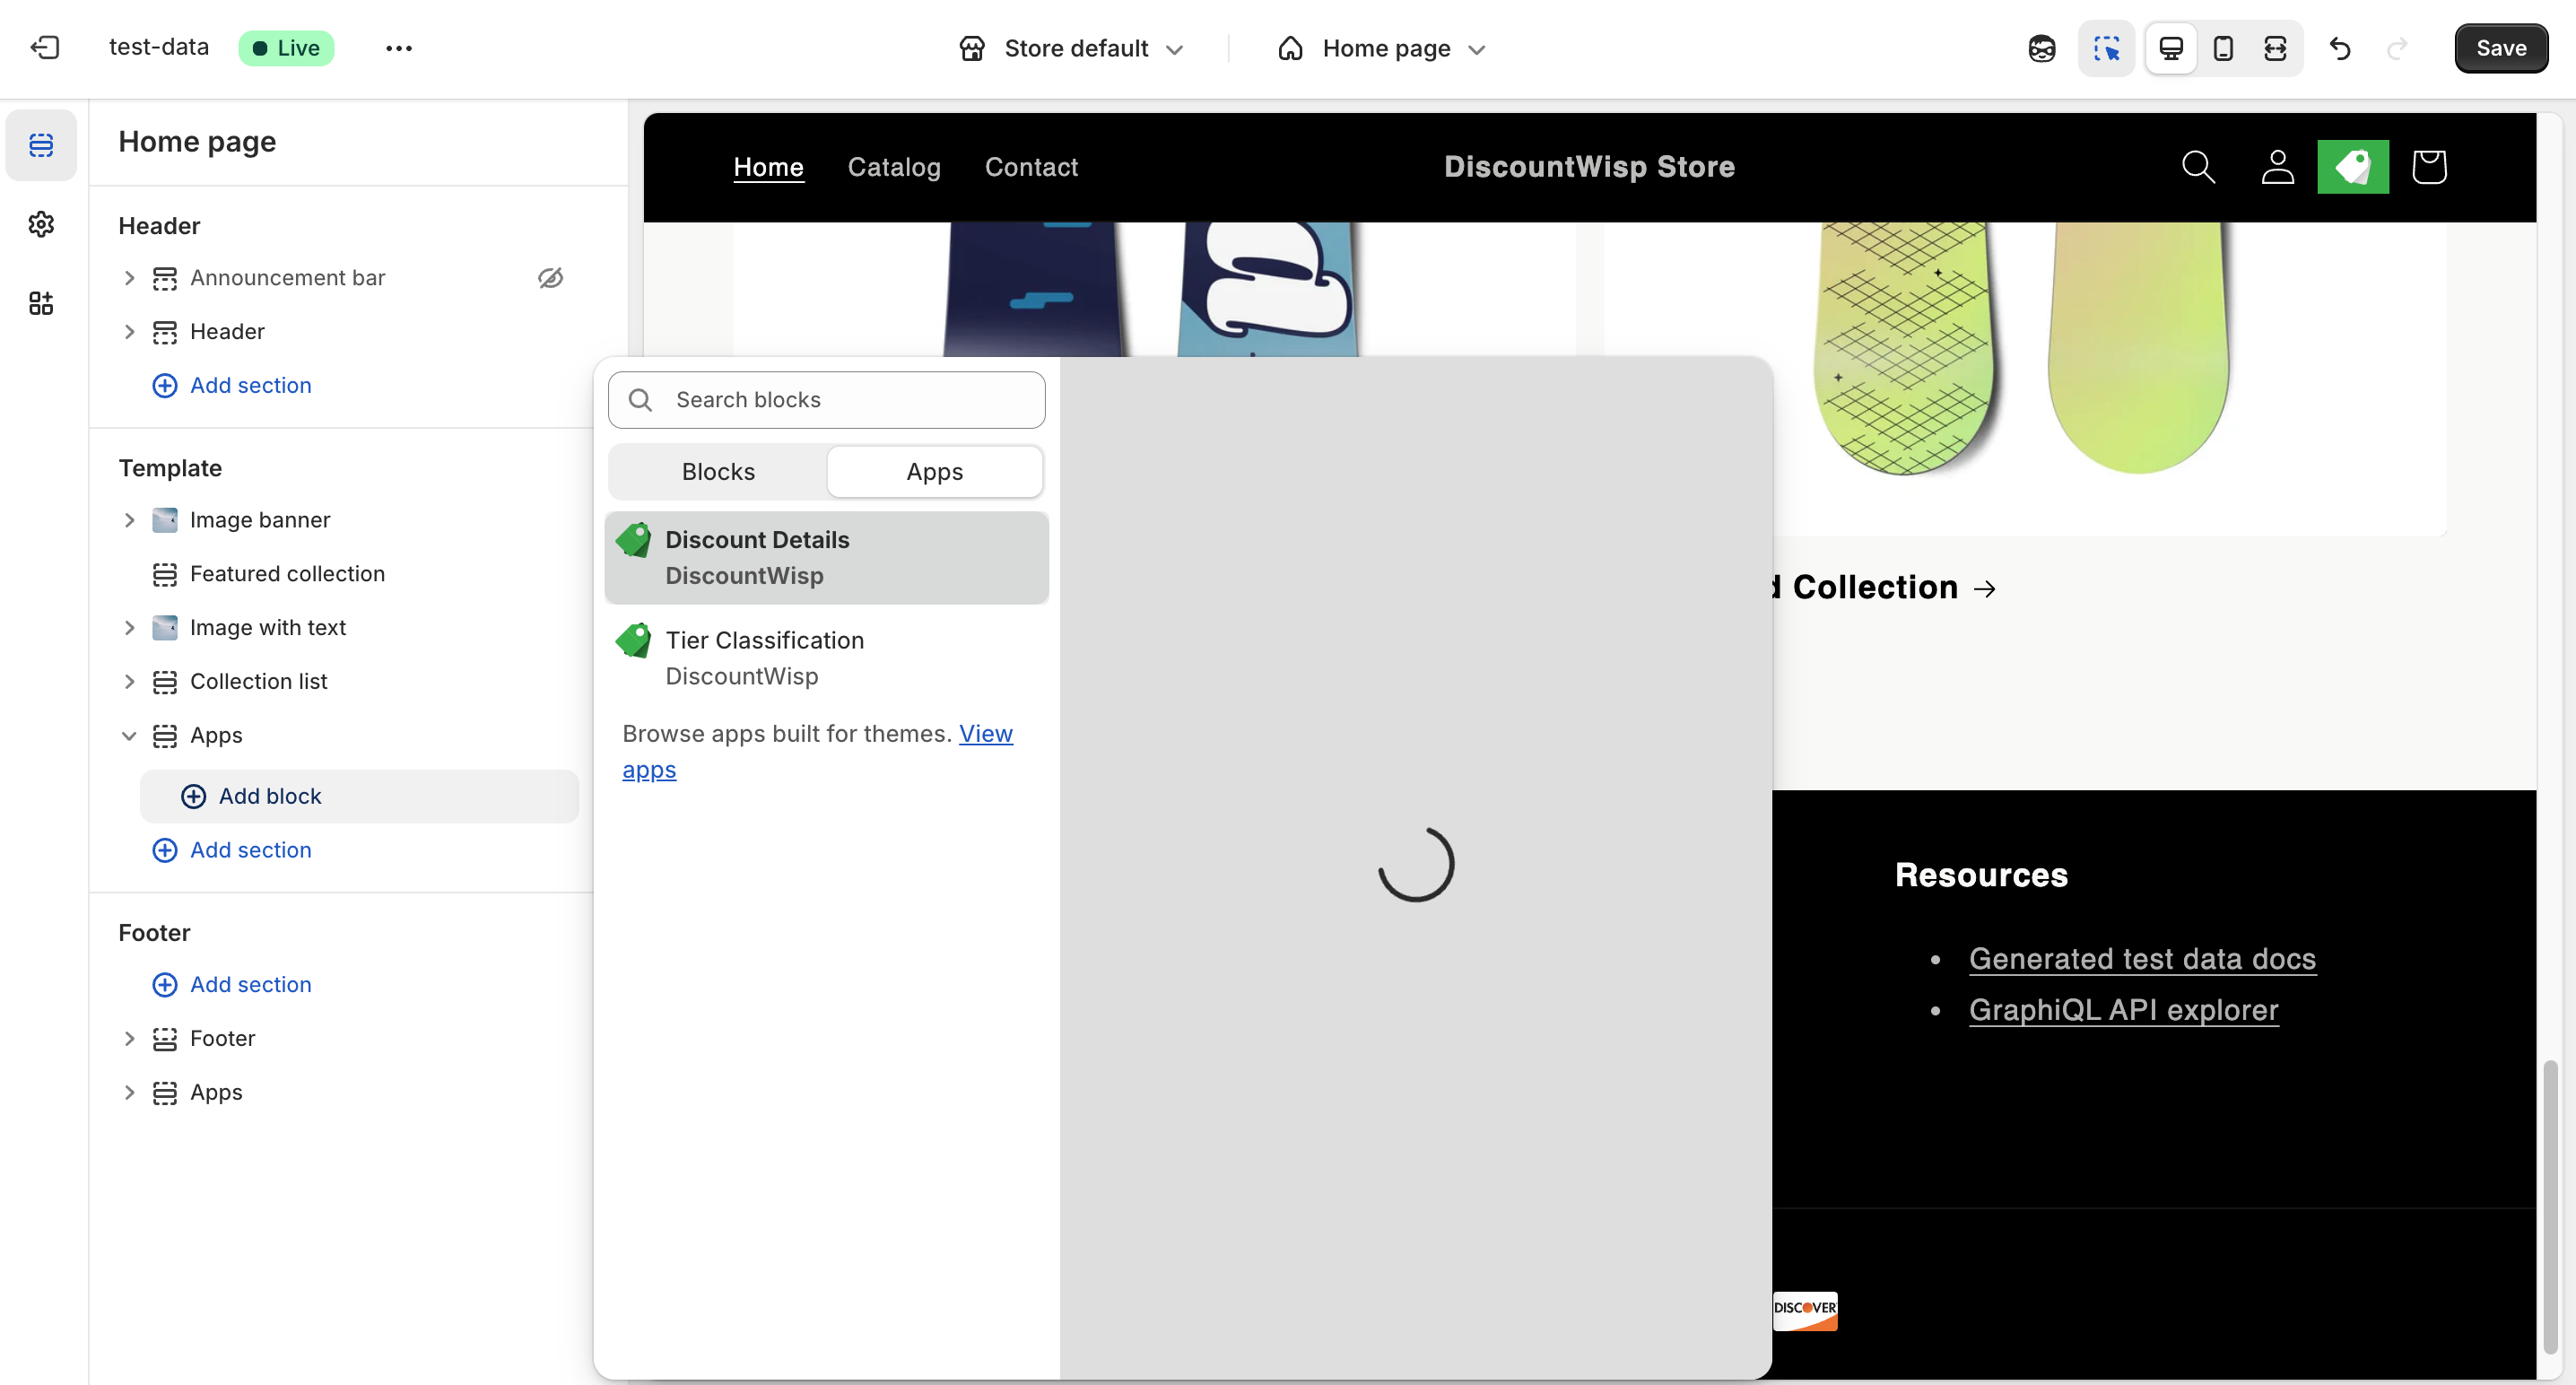
- Click Add Block within the section.
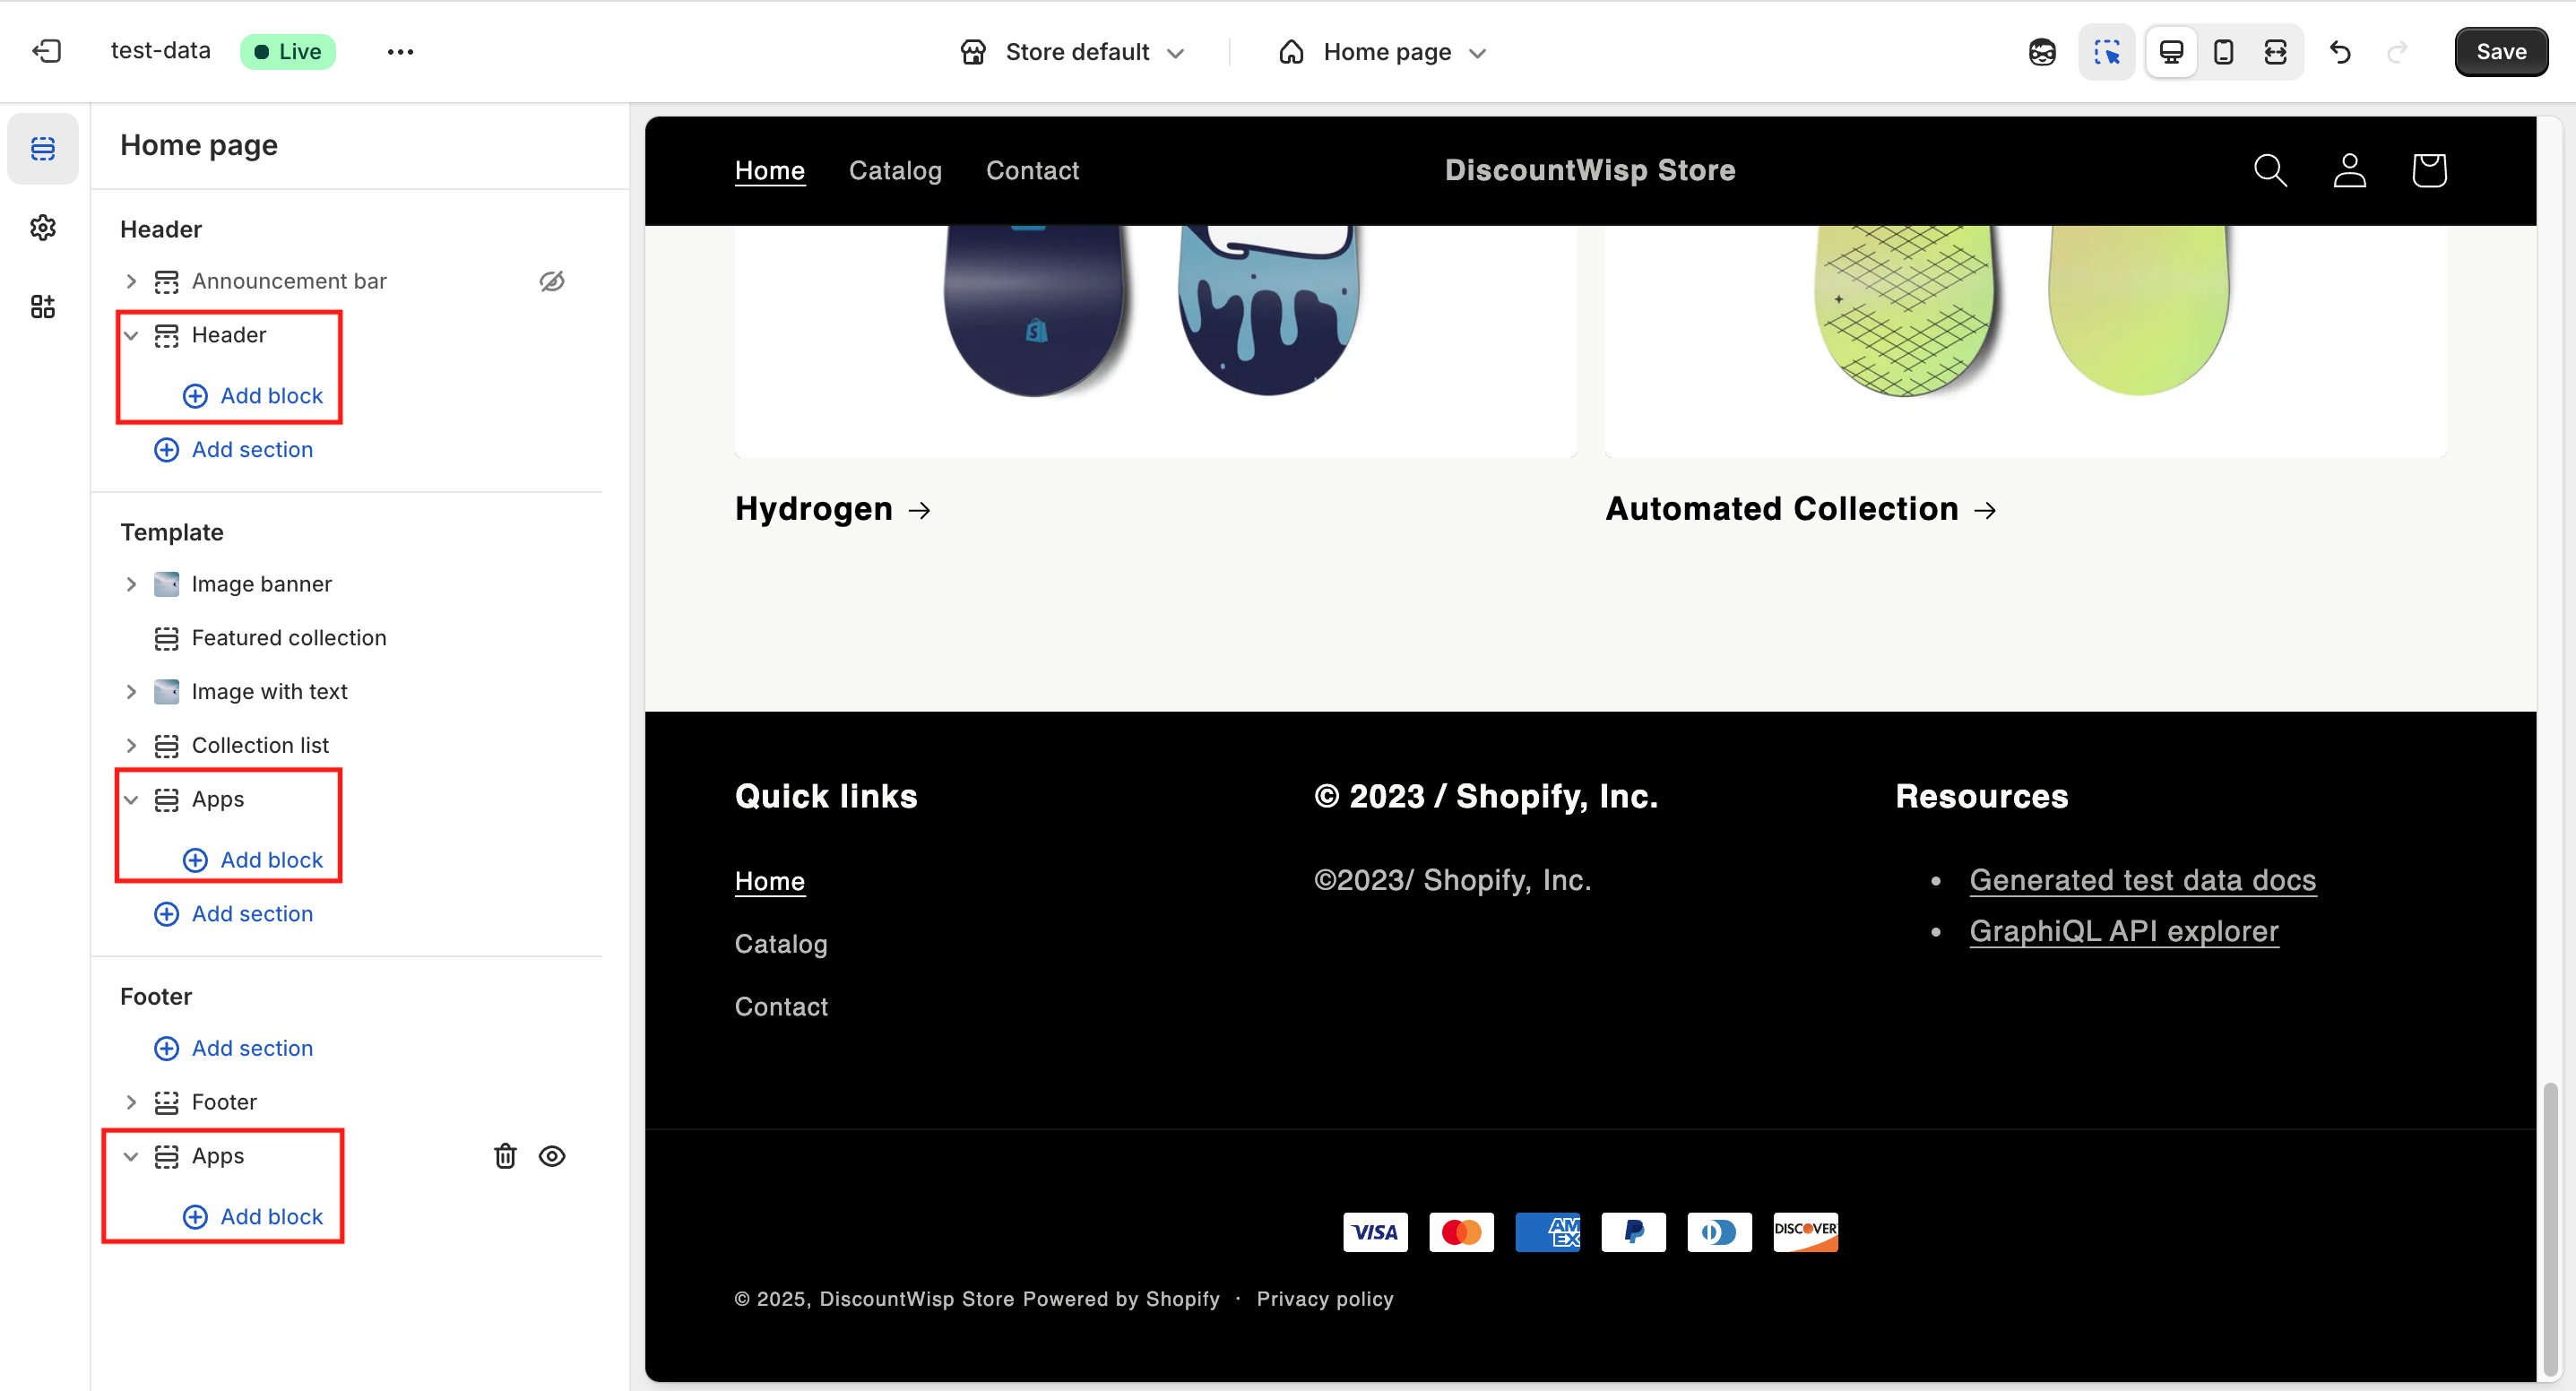
-
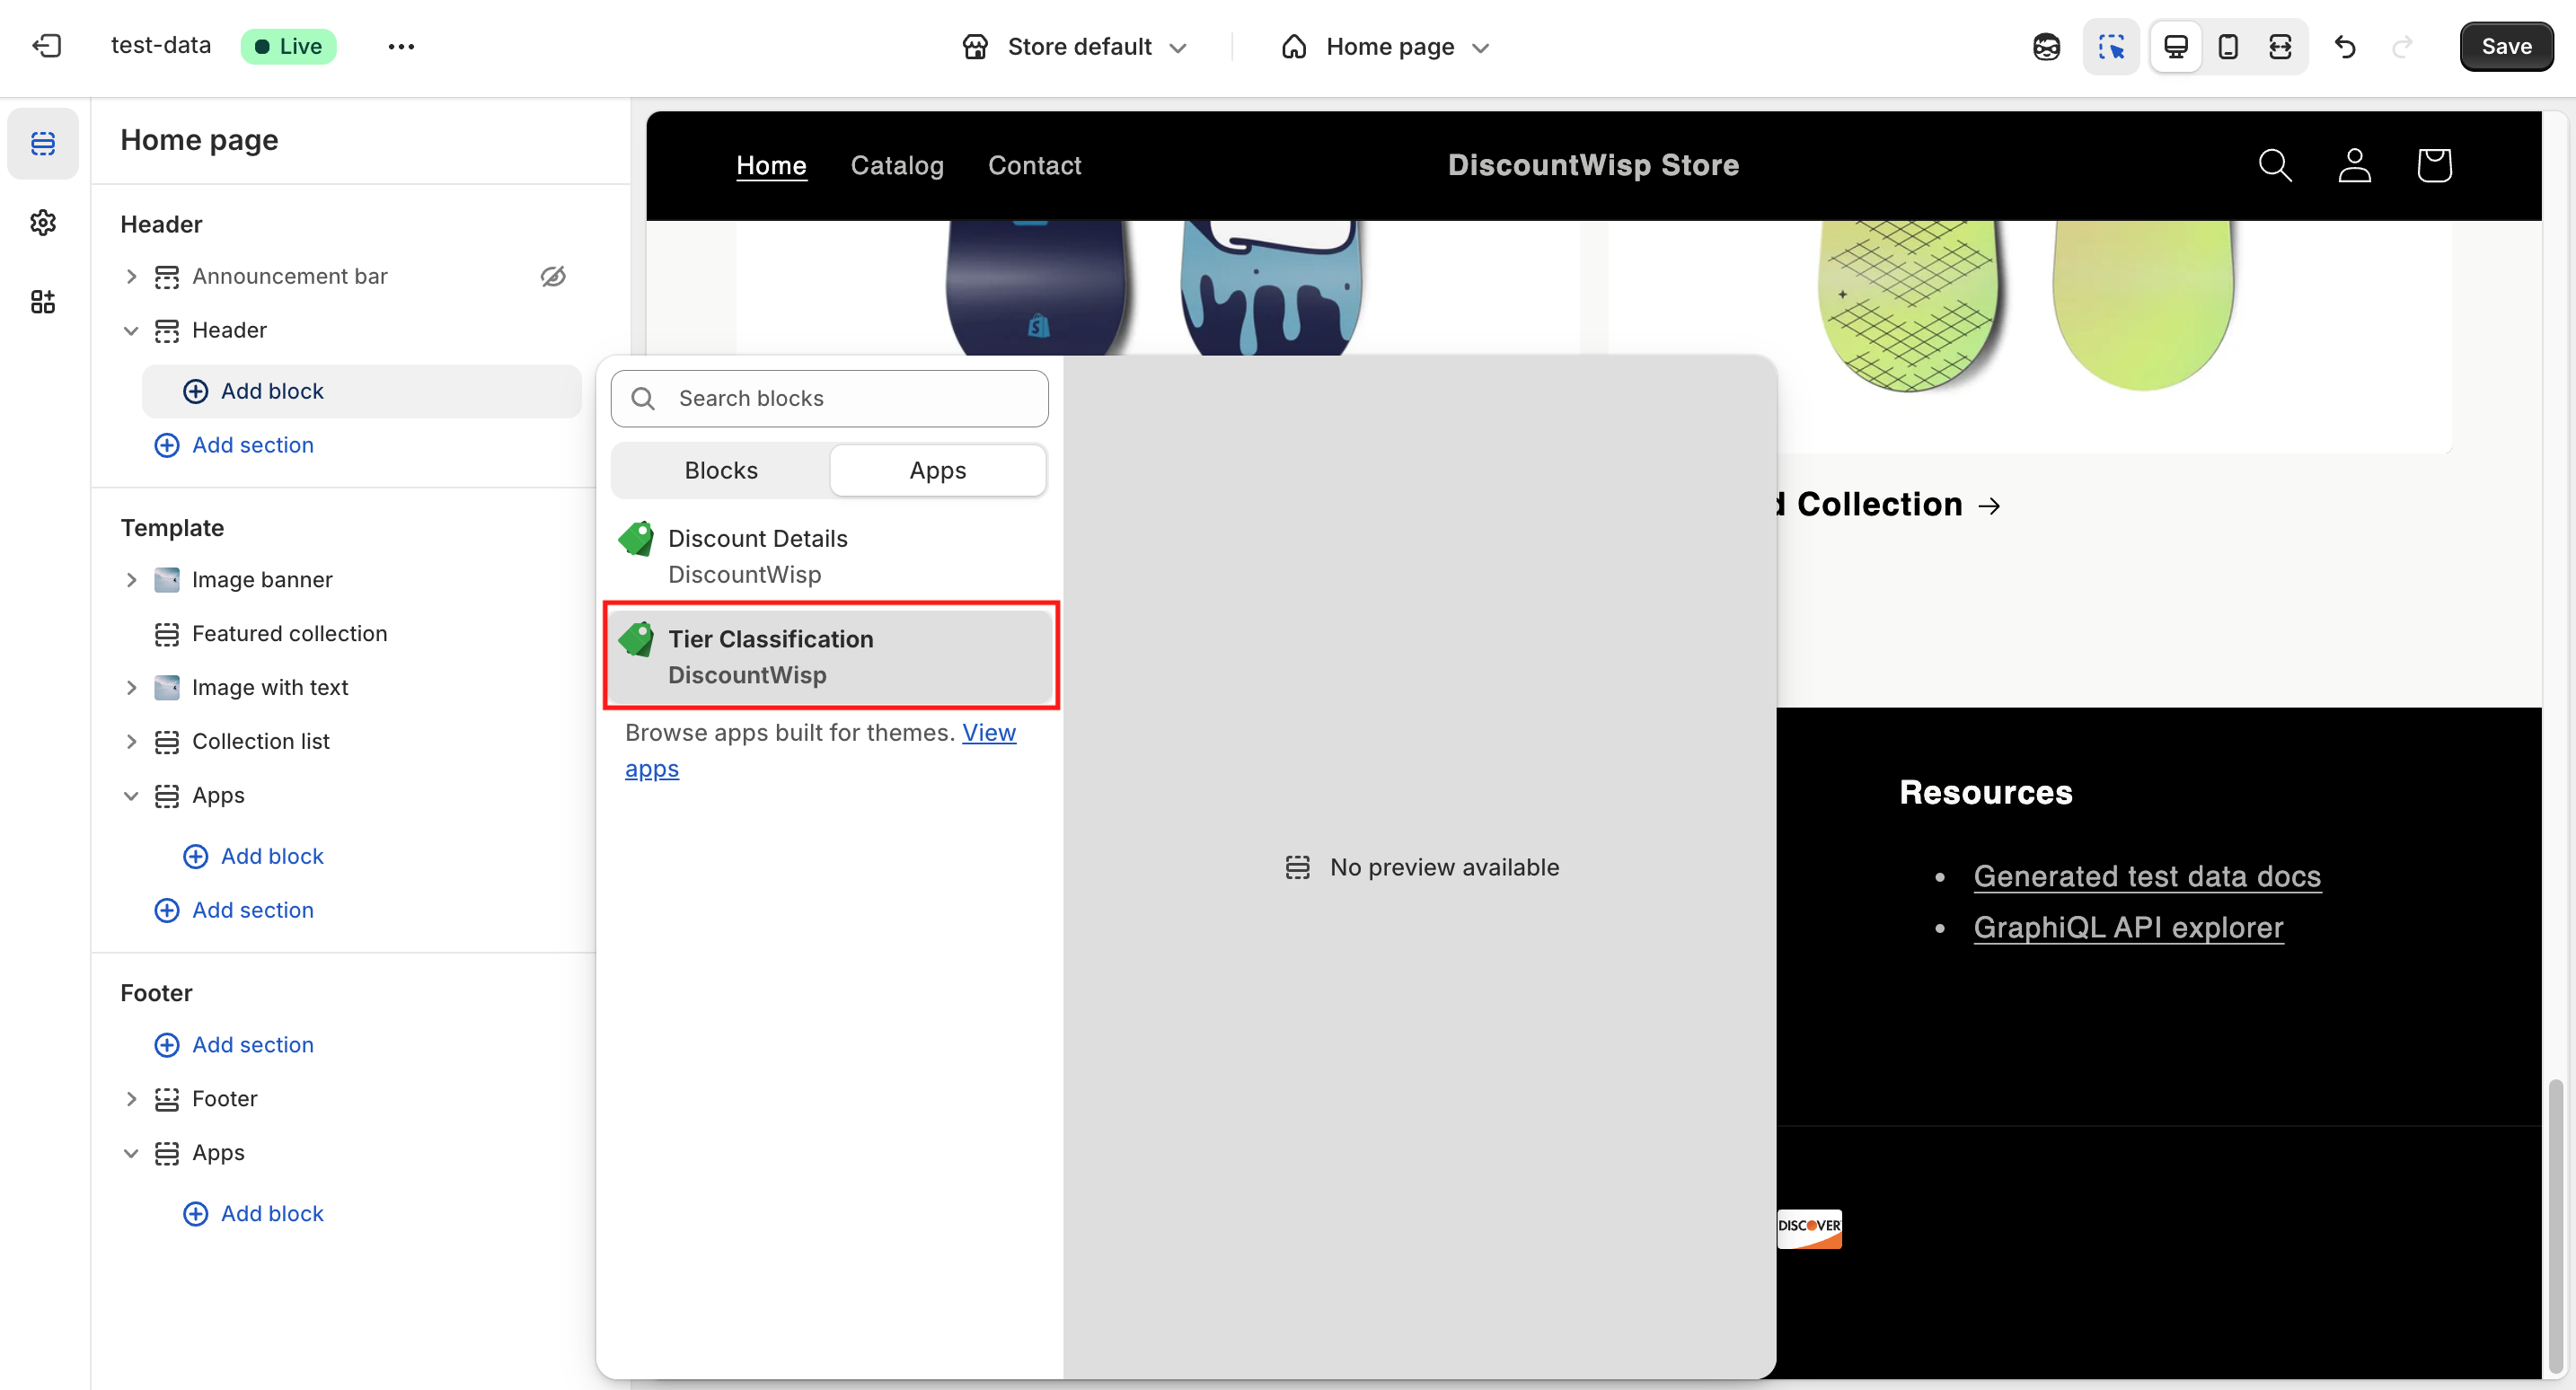
Select Apps , then locate and choose DiscountWisp
-
You’ll see two extensions:
- Tier Classification
- Discount Details
Choose "Tier Classification".
- Pick your desired Extension Type (e.g., Icon for headers).
- Adjust color and alignment as needed.
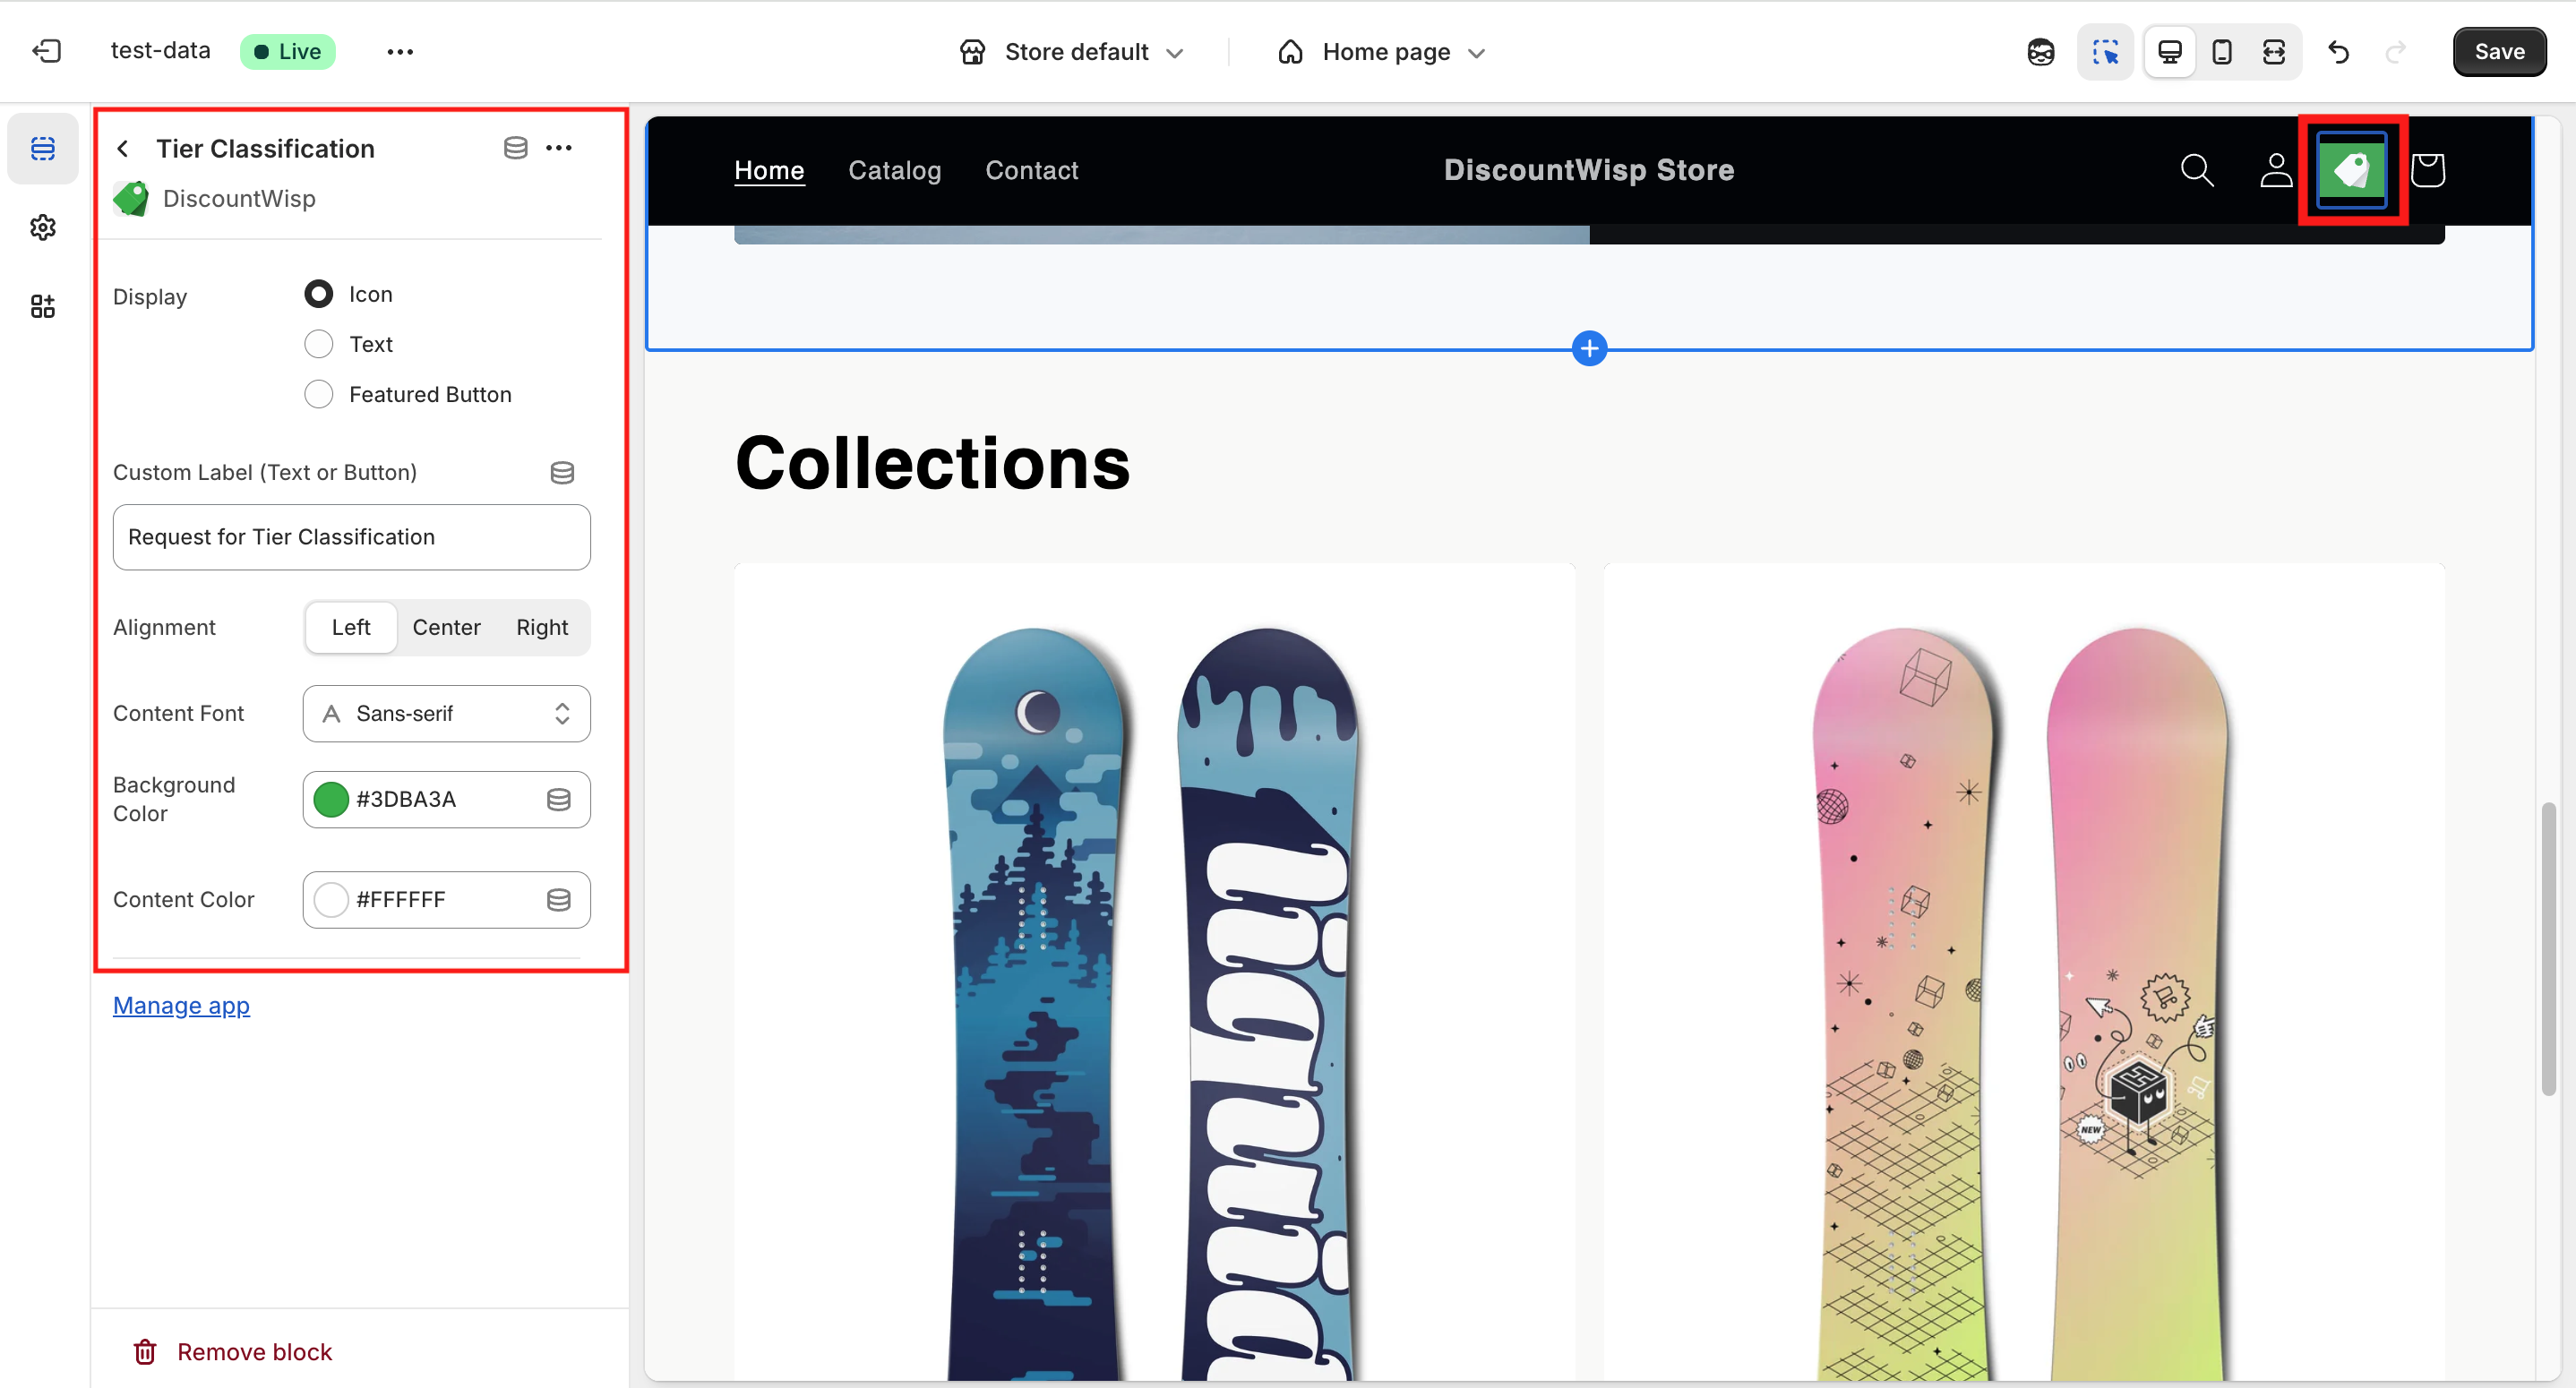
- Click Save
- Preview your storefront to ensure the extension is visible and functional.
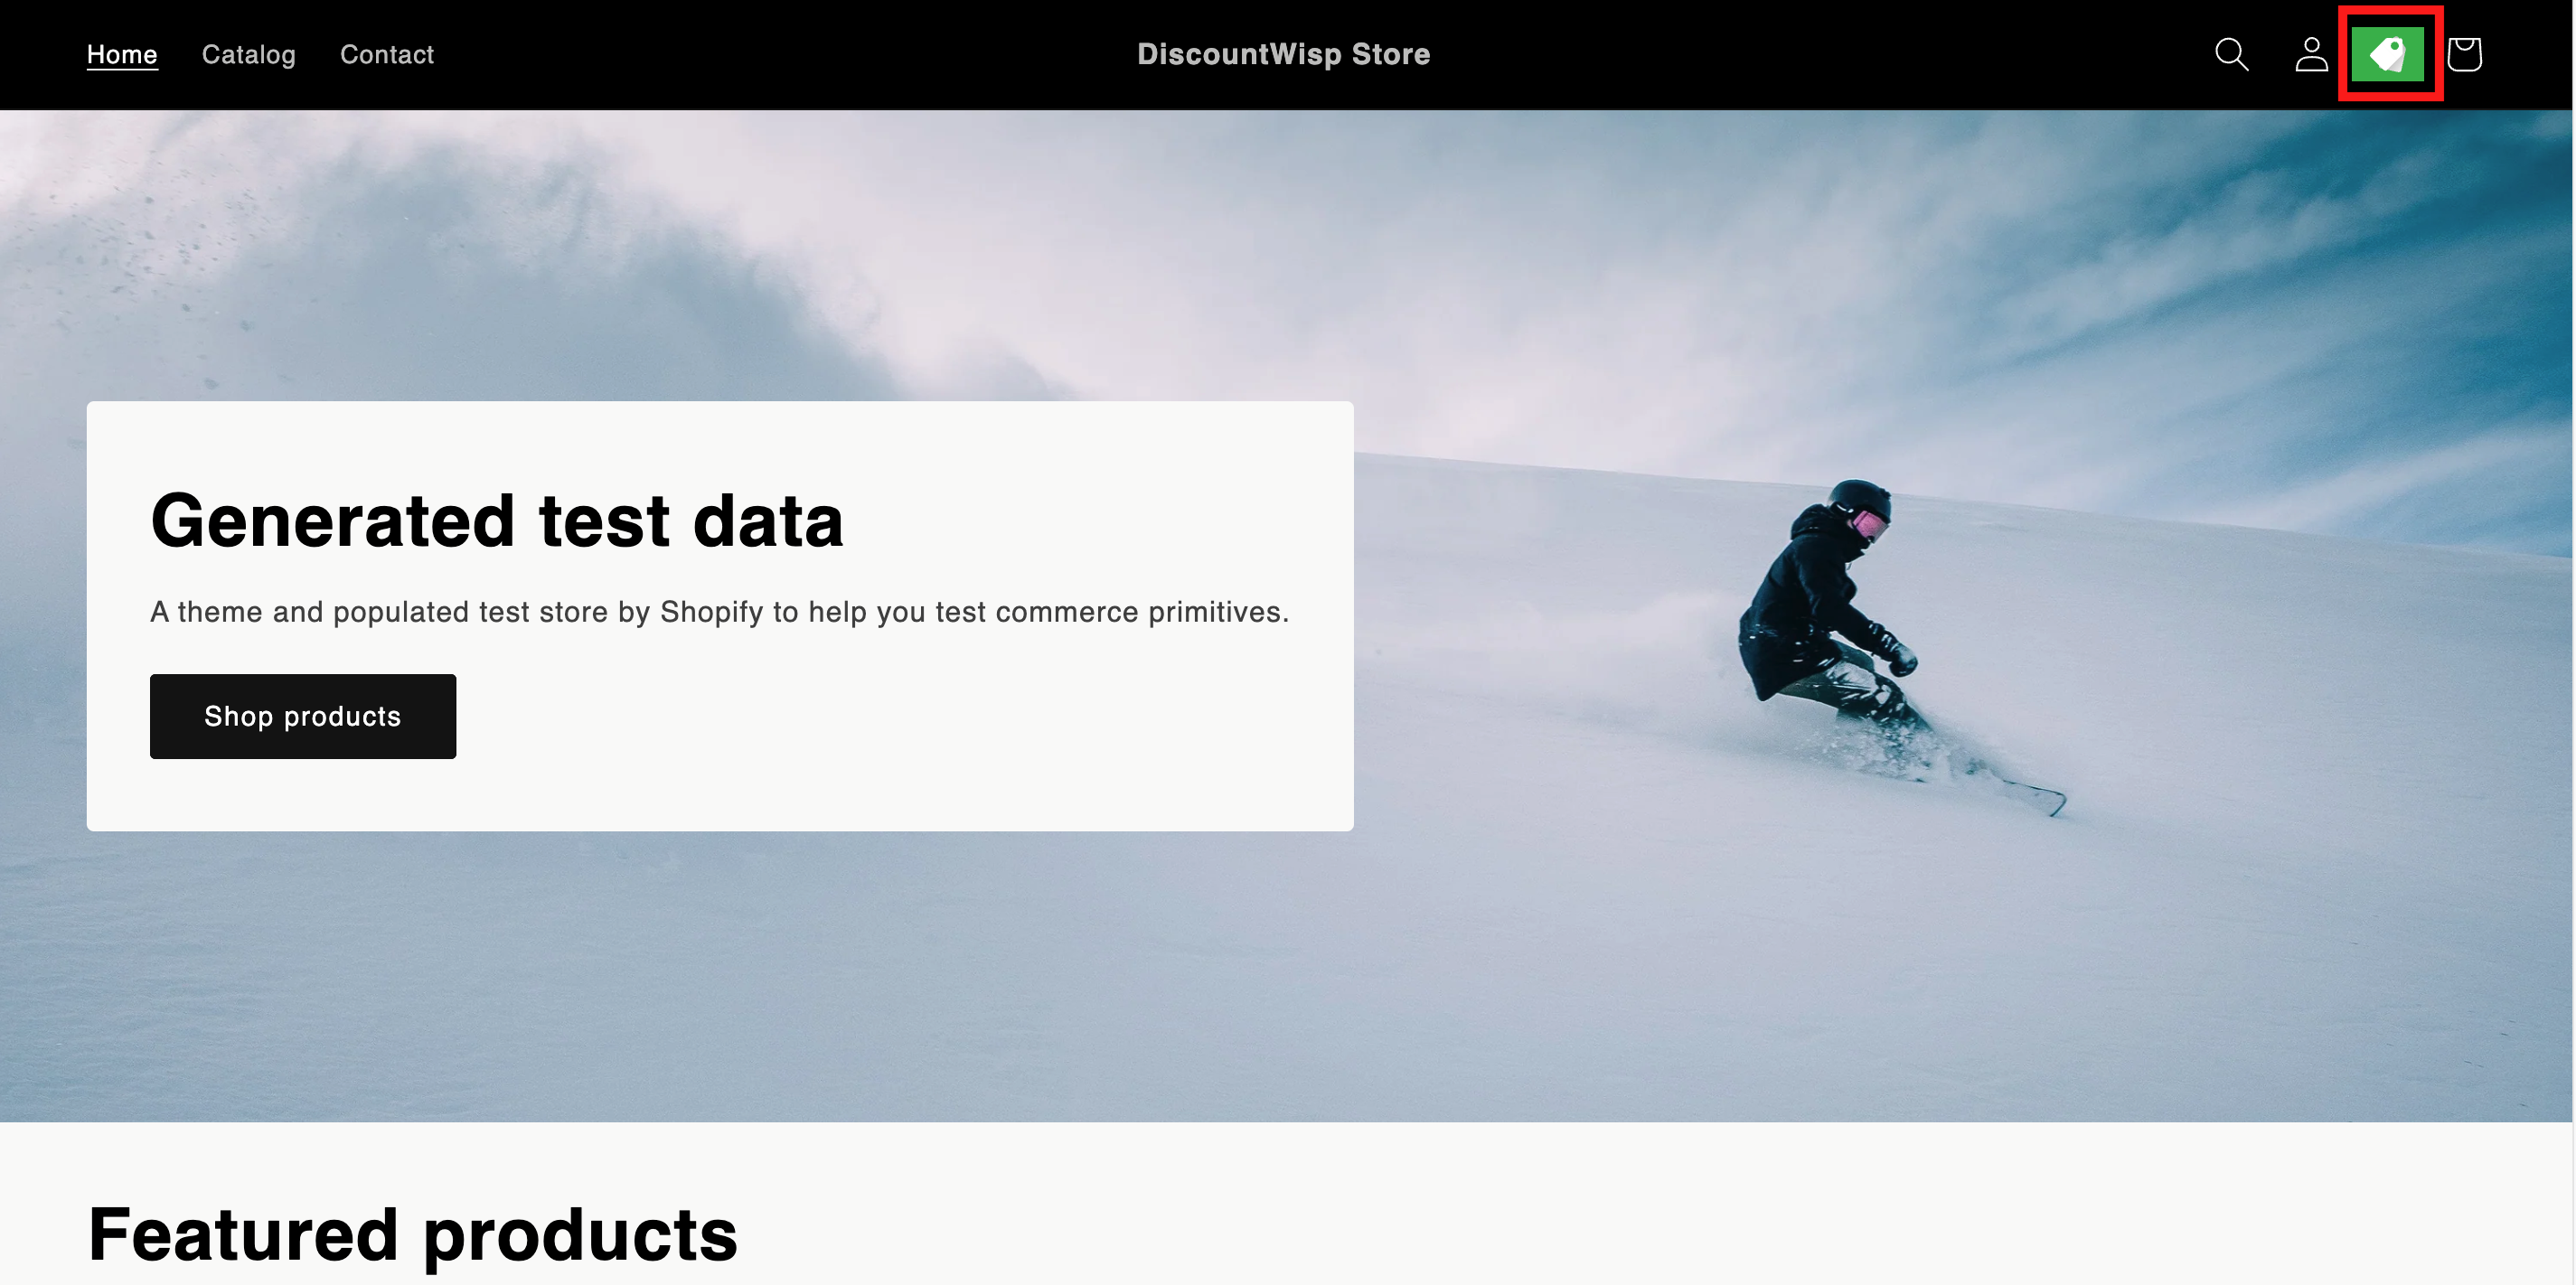
- Place the icon version in the header — next to Cart, Account, or Search icons — ensuring high visibility.
- Place the text version in the footer for better experience.
- Place the featured button version in any relevant section of homepage, product pages or any other pages based on your store's preference.
Step 5: Adding the Discount Details Extension
To enhance transparency and conversion rates, you can show real-time, product-specific discount details directly on your product pages using this extension.
Customers will instantly know:
- Which discounts are available to them
- If they qualify for MOQ or volume pricing
- How much they can save by ordering more
Where to Place It
This extension is designed for Product Pages , where it displays contextual discount information. Place it near:
- The price block
- Product description
- Add-to-cart button
Customization Options
You can choose between:
- Text-Based Extension – Clear and informative messages
- Image-Based Extension – Graphical summary of discounts
Styling options include:
- Alignment (Left, Center, Right)
- Content Font (Font of your choice)
- Background Color
- Content Color (text or image overlays)
Installation Steps
The Discount Details Extension enables customers to view applicable discount rules directly on product pages — personalized based on their assigned tier. You can add it using two methods:
1. Quick Add via Dashboard Shortcut
From your DiscountWisp Dashboard, you’ll find a section on the right side titled "Add DiscountWisp App Blocks". This section includes shortcut to Discount Details Extension.
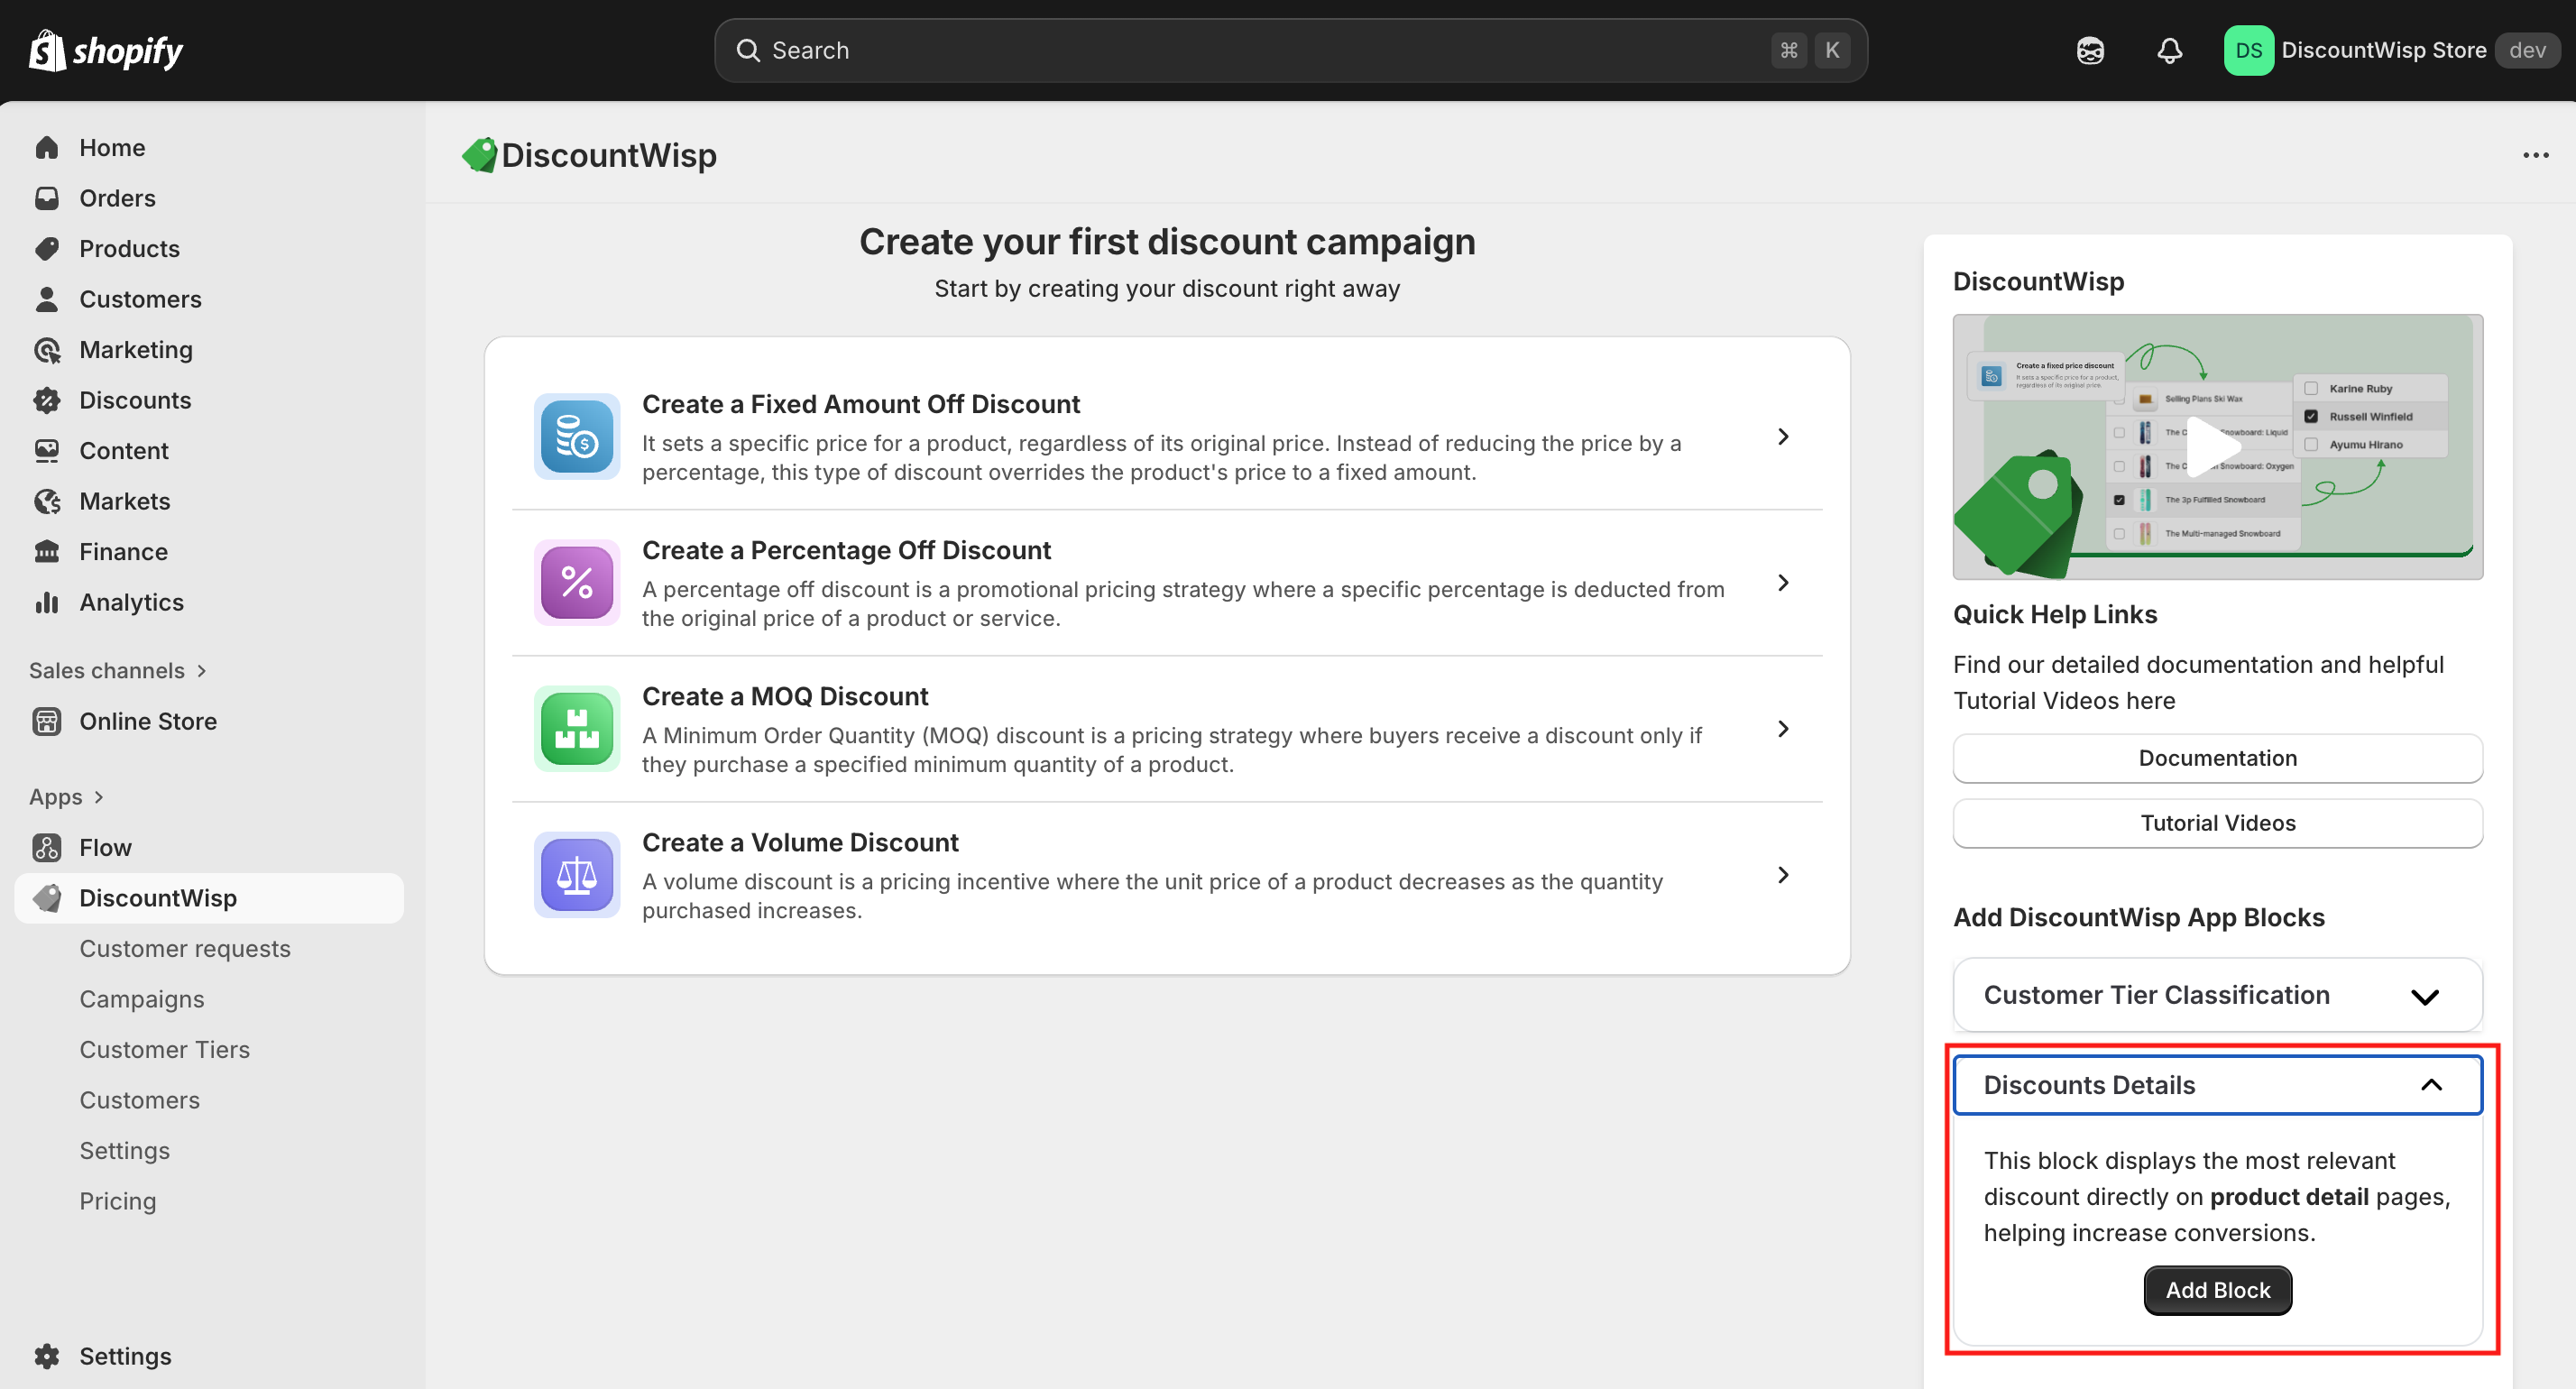
To add the Discount Details Extension:
-
Click the “Add Block” button next to “Discount Details”.
-
You’ll be taken to the Shopify Theme Editor, where the app block is auto-added to the Product Page.
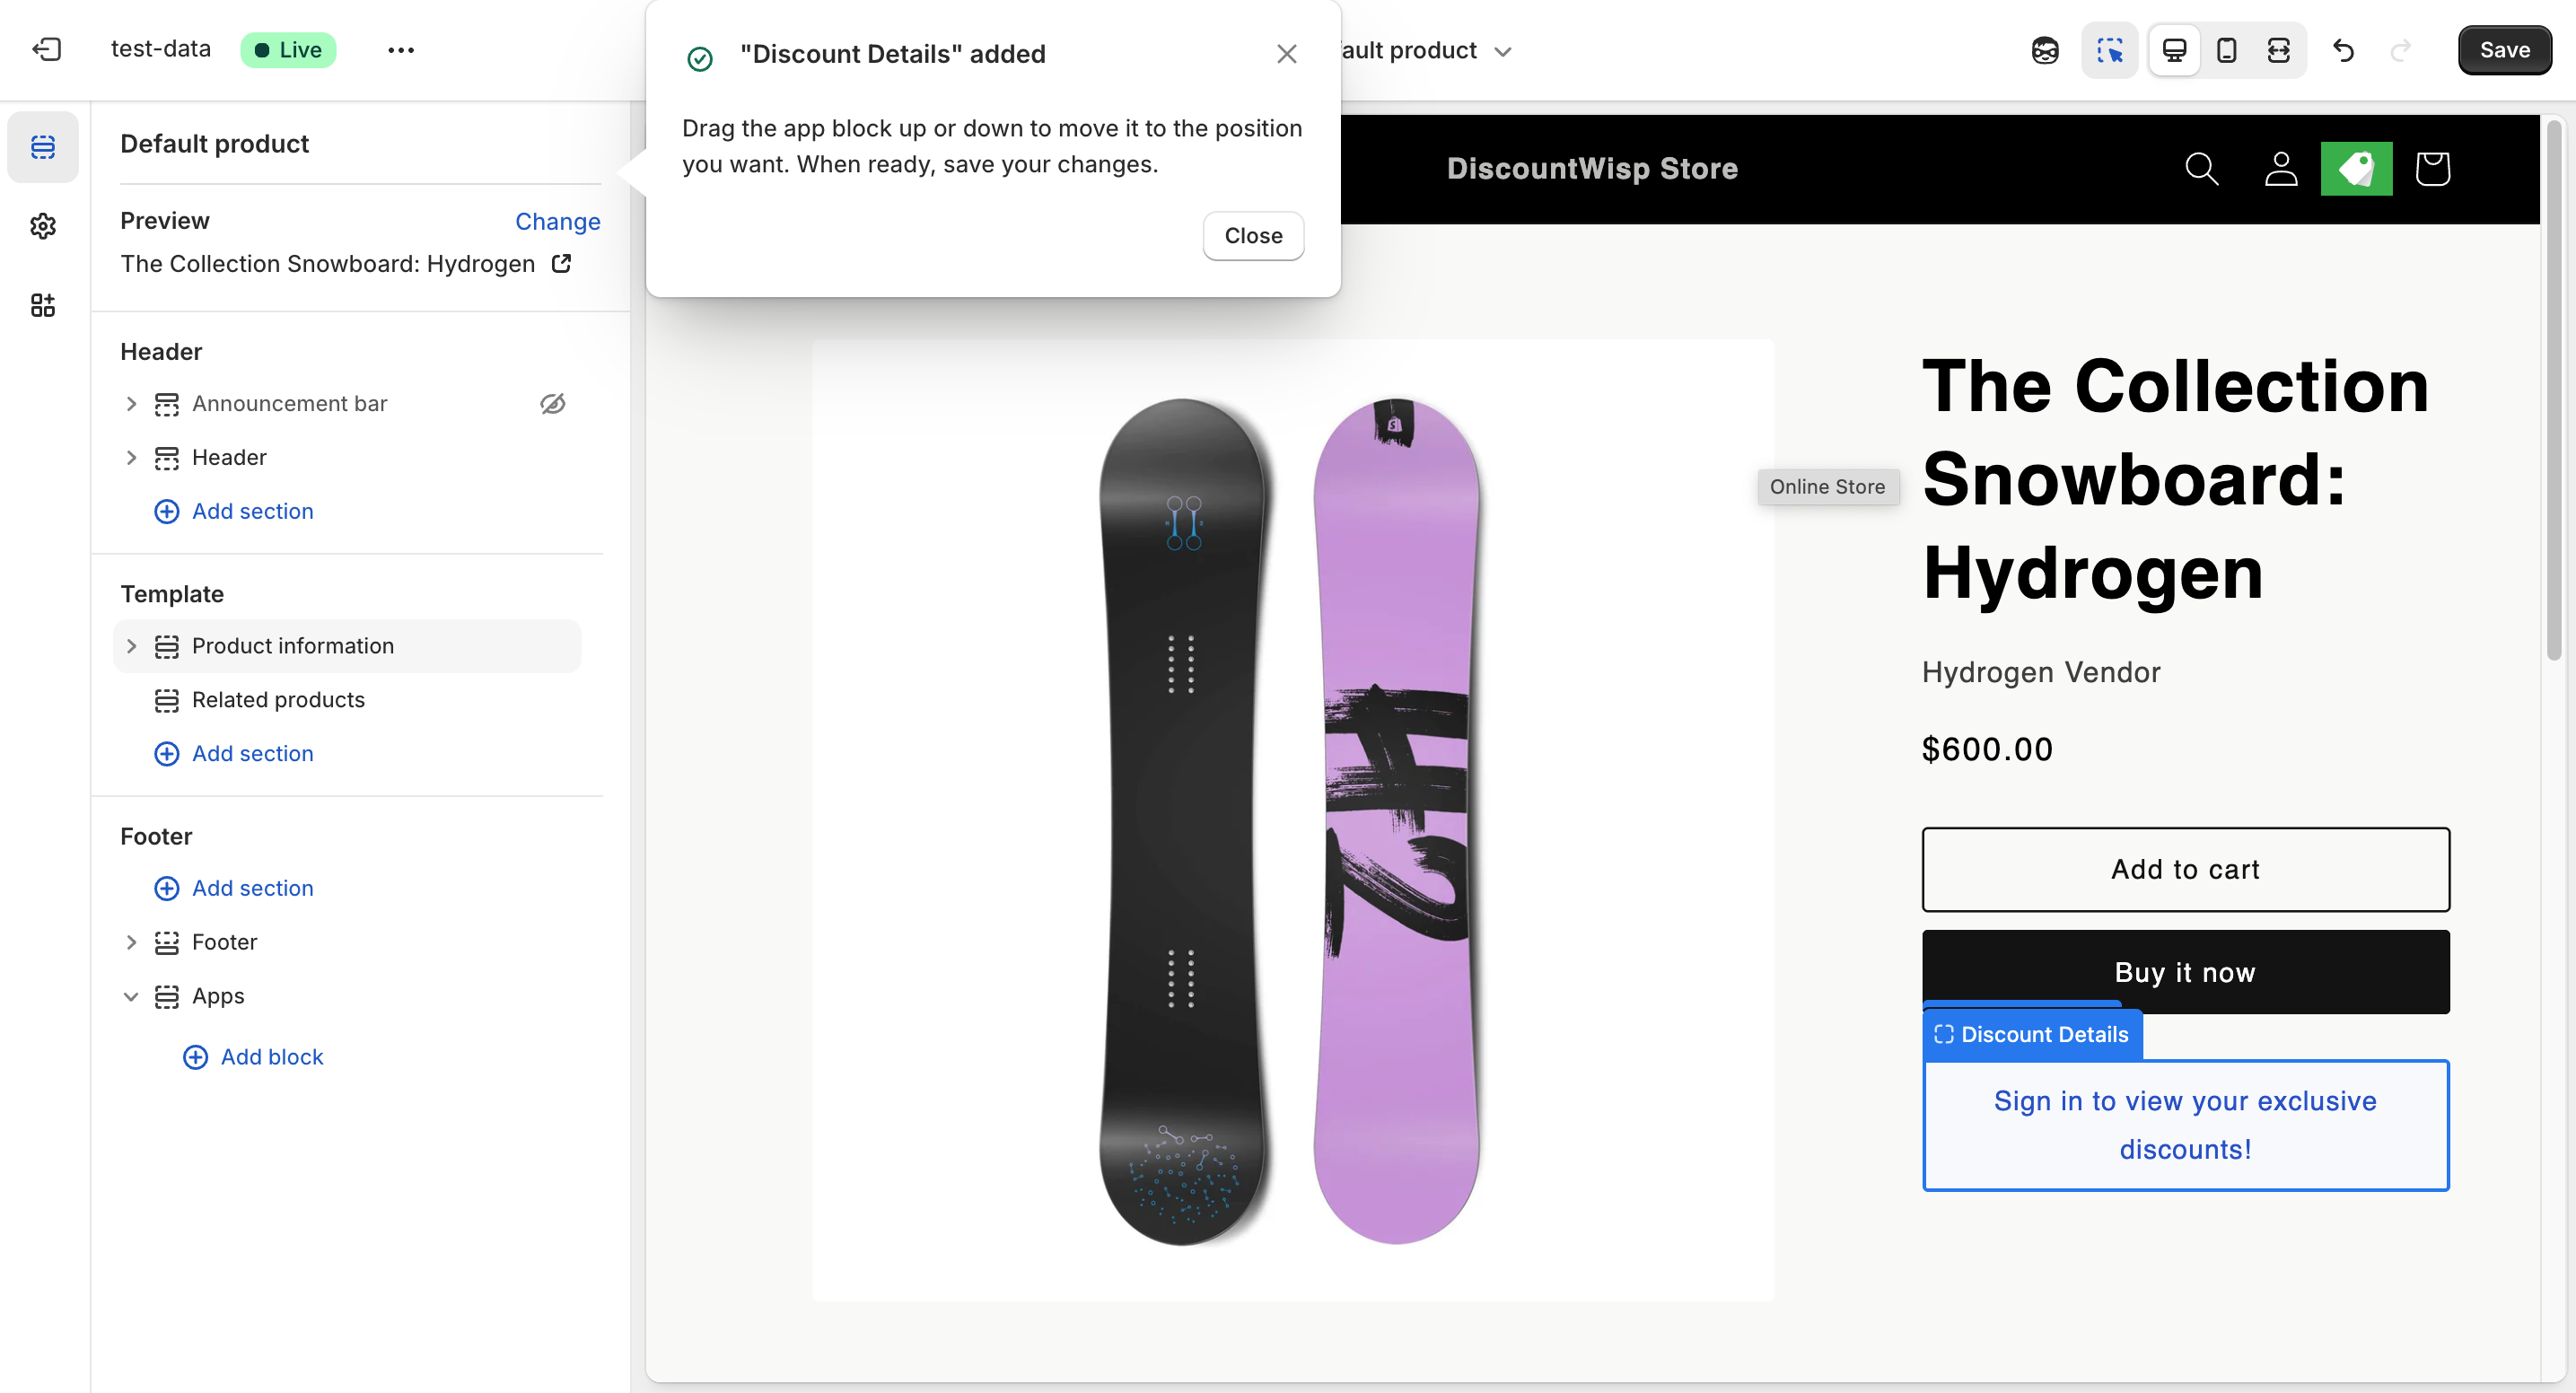
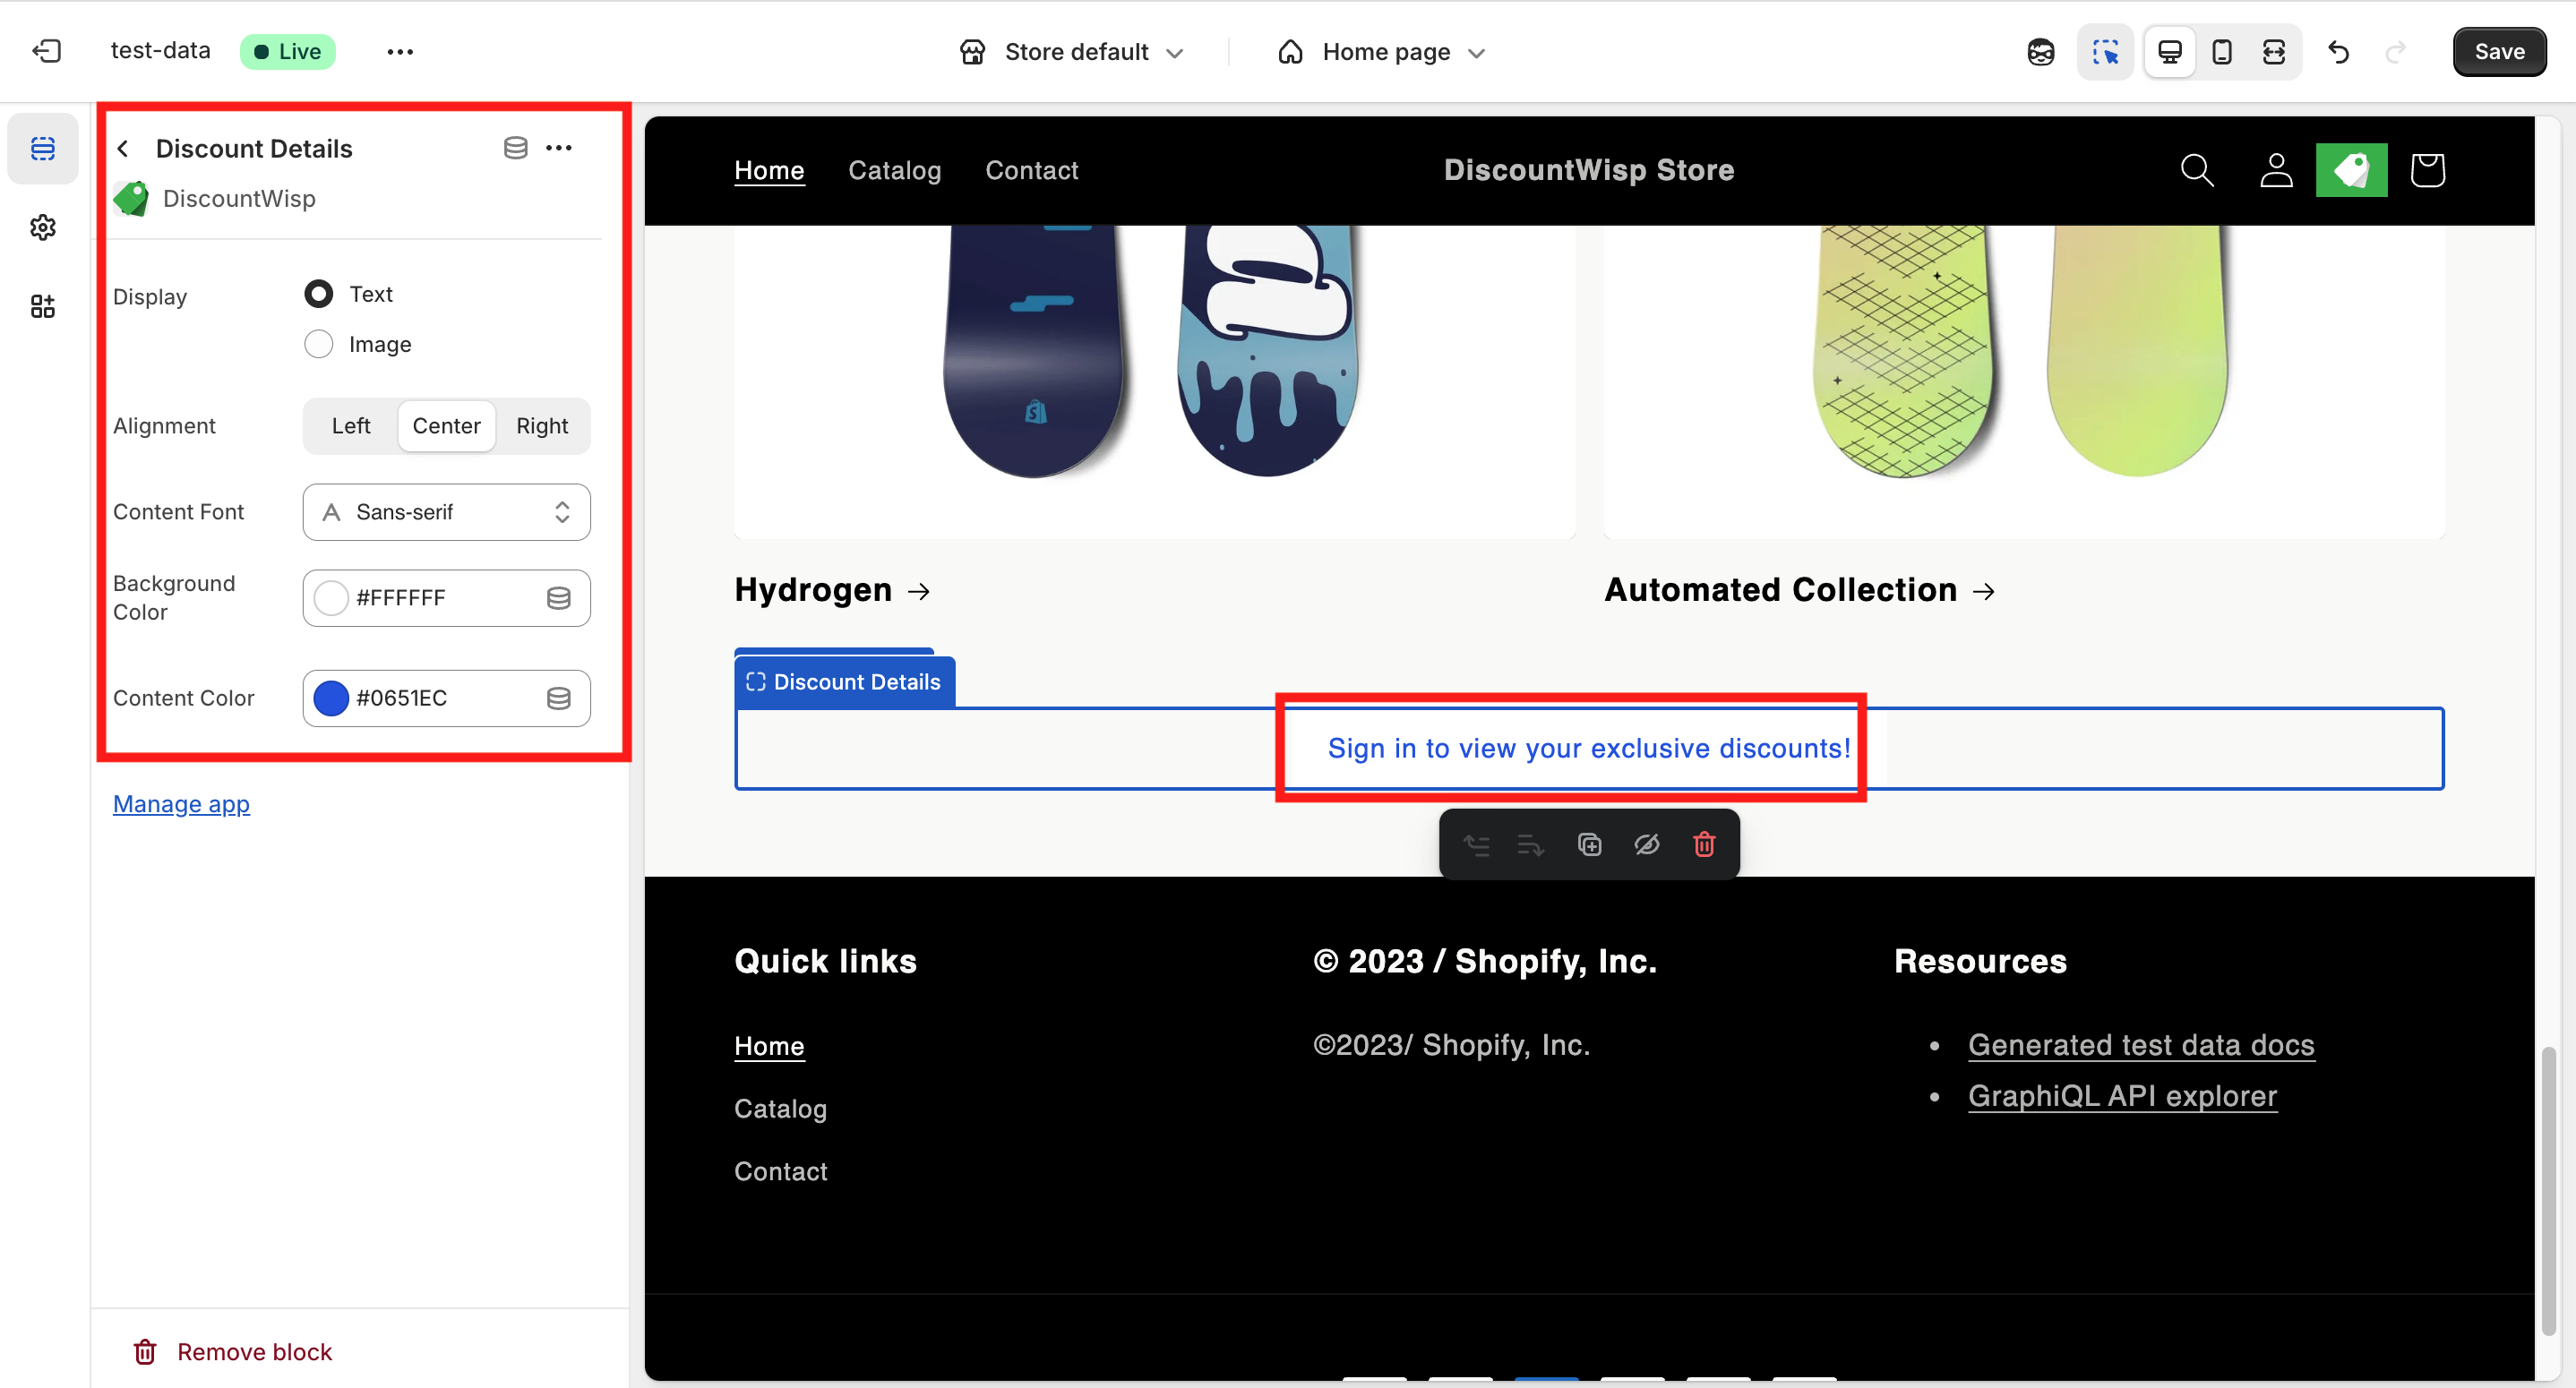
- You can drag and reposition the block anywhere within the product page layout.
Customize its appearance using the available settings:
-
Display format: Text or Image
-
Alignment, font and color options to match your store’s theme.
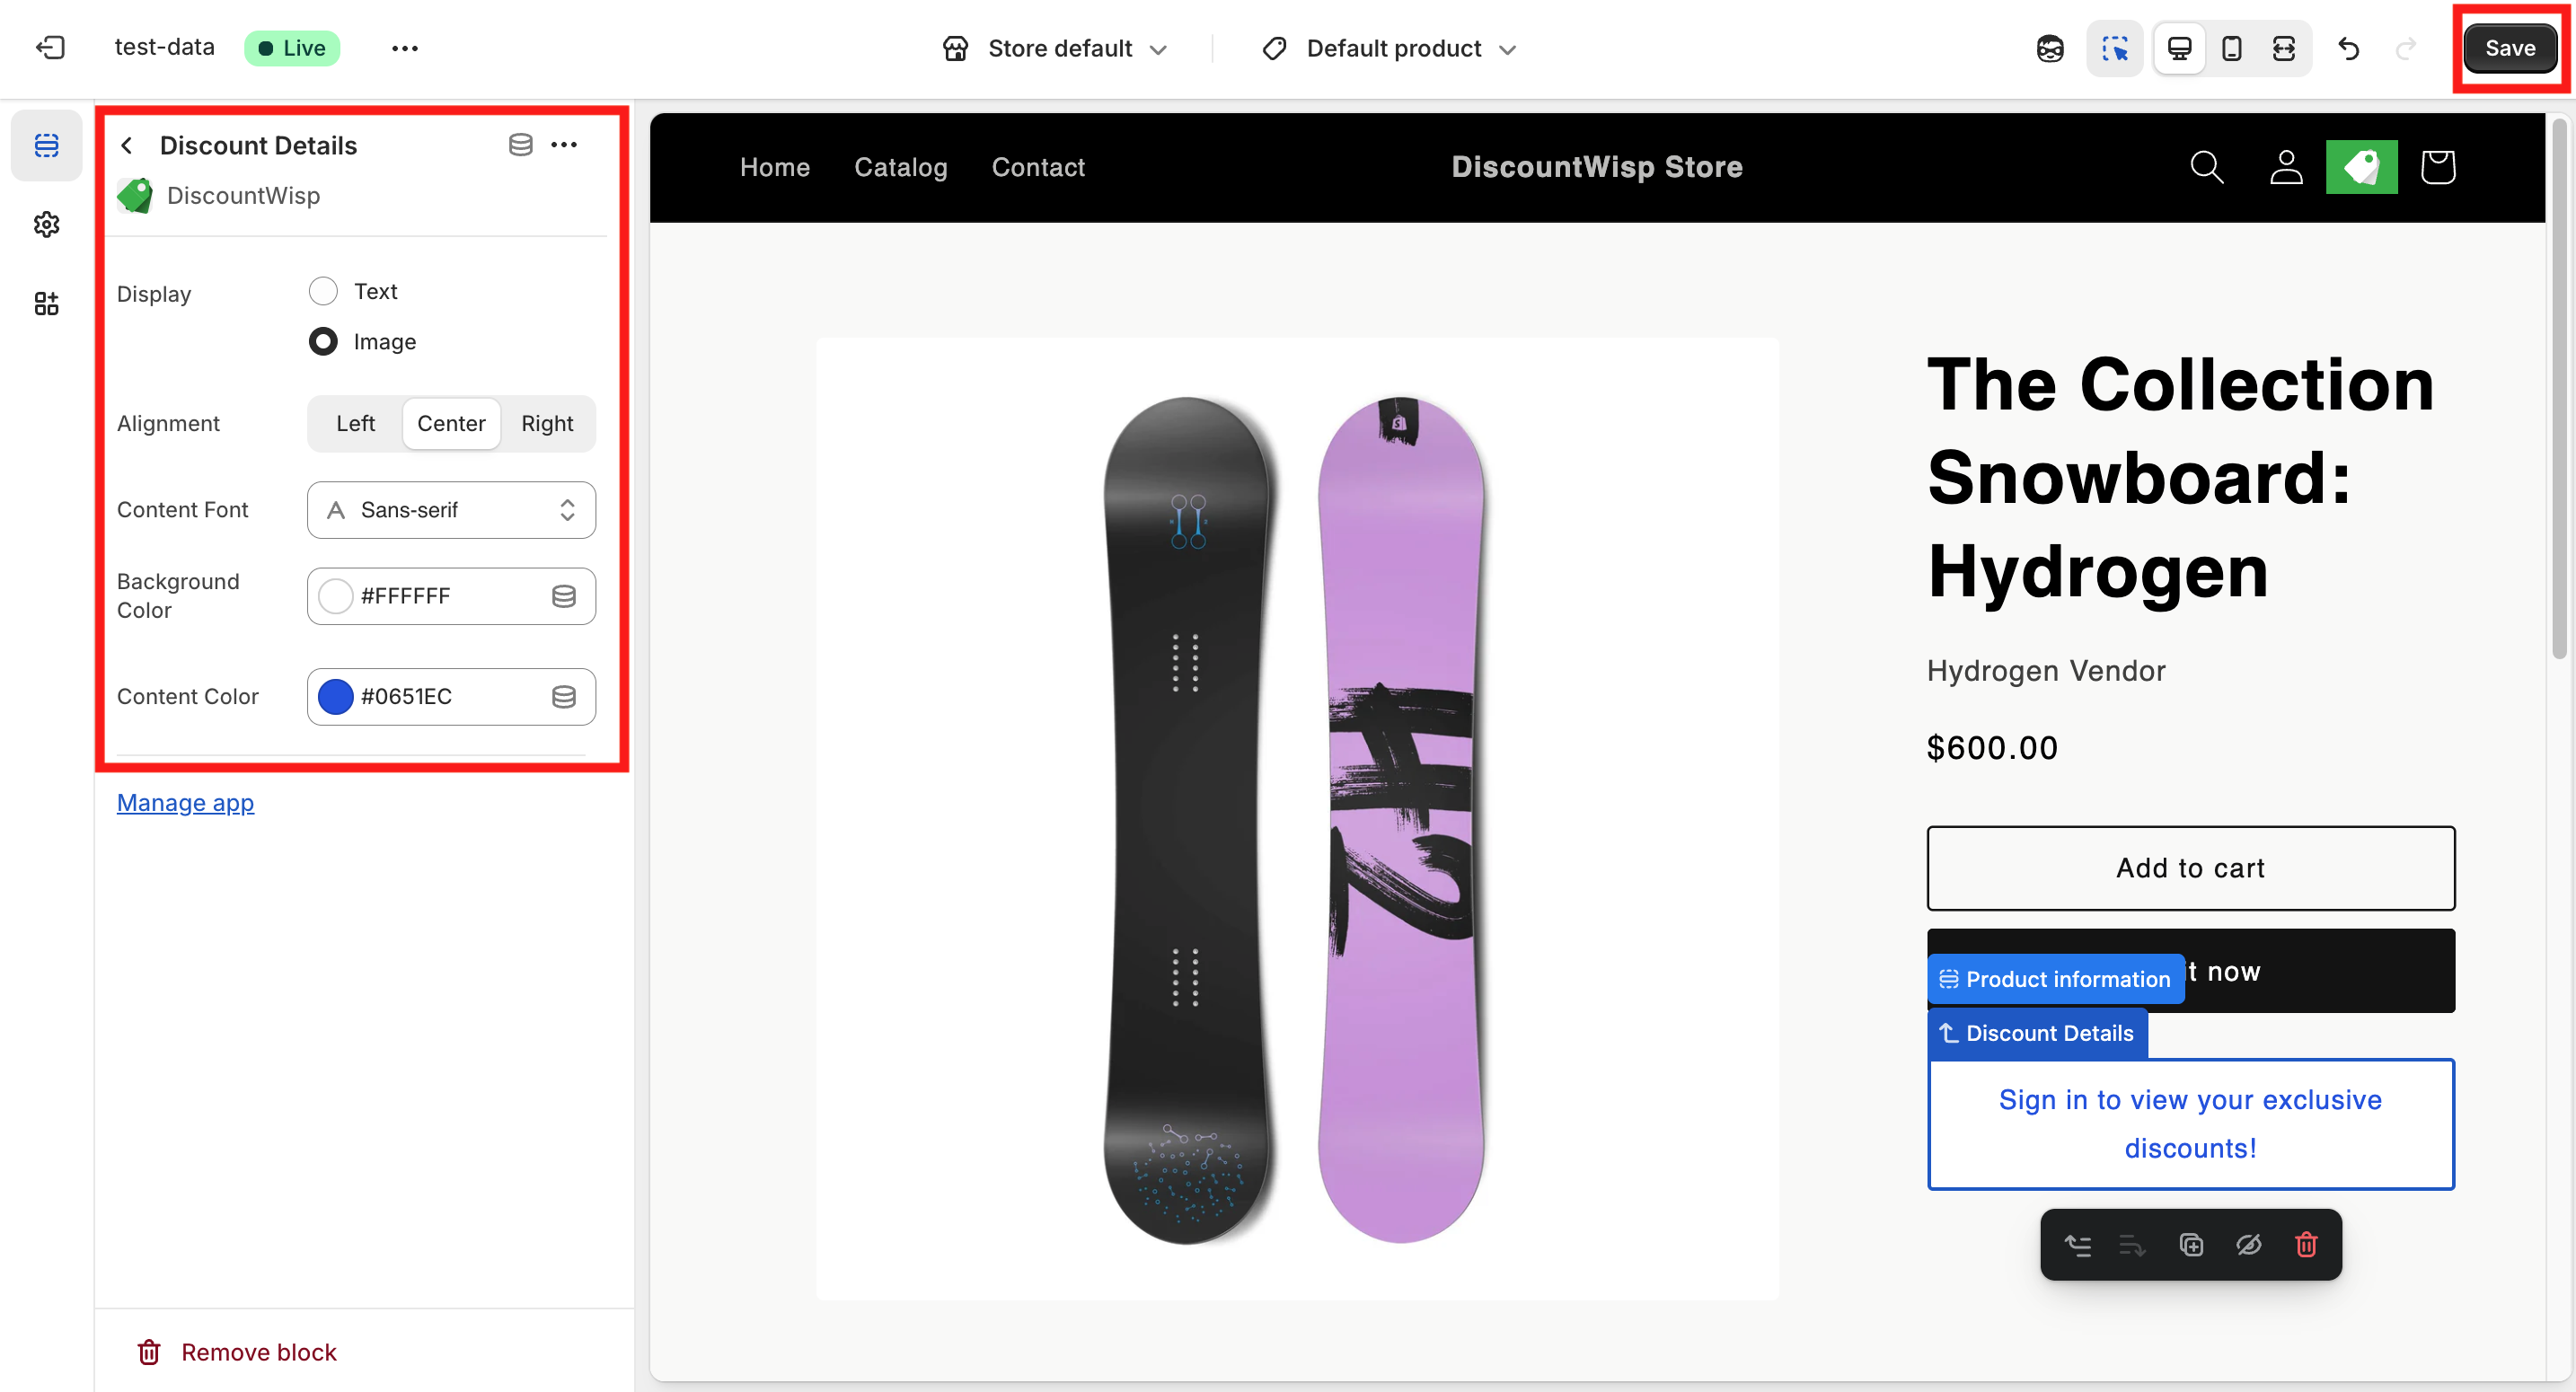
Click on "Save" to publish the changes. This method is ideal for a fast setup without manually navigating through Shopify admin.
2. Manual Add via Shopify Theme Editor
If you prefer the manual approach, follow these steps:
- In Shopify Admin , go to Online Store → Themes
- Click Customize for the current theme.
- In the theme editor, navigate to Product Page and select Default Product.
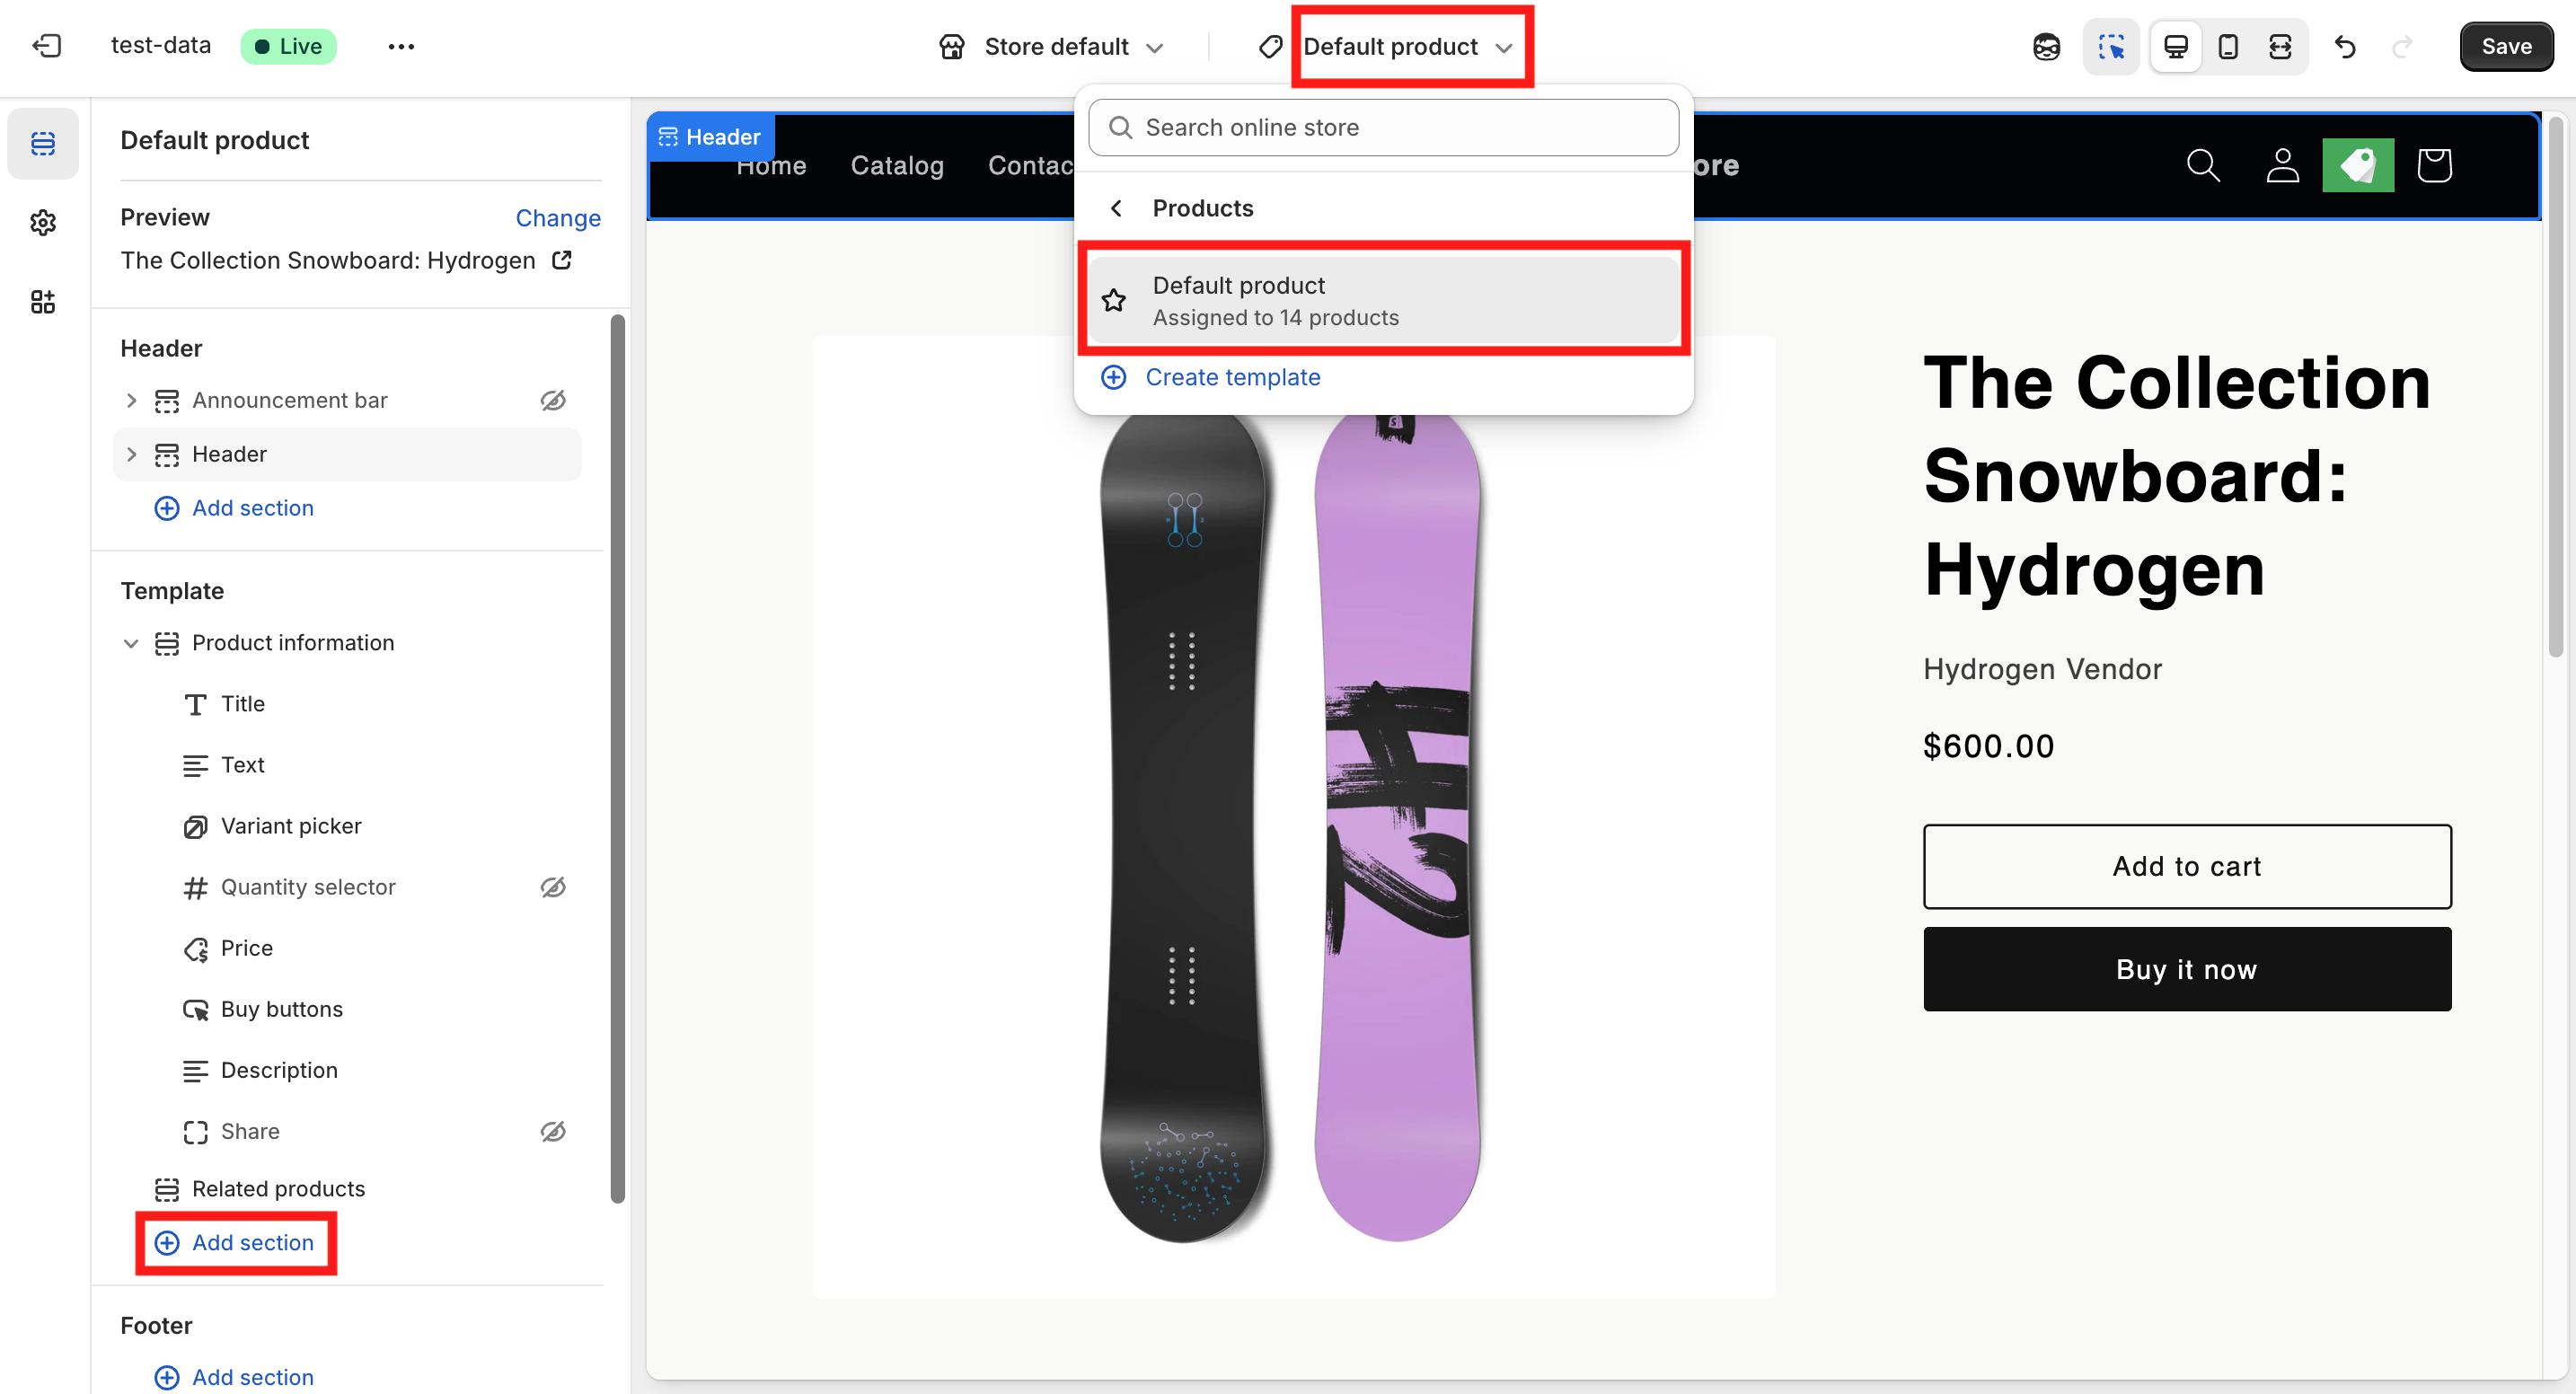
- Click on Add Section on Template to add the discount details extension on desired section.
- Click Add Block in the appropriate section (e.g., product info or media area)
- Select Apps , then pick the DiscountWisp app
- Choose the extension: Discount Details
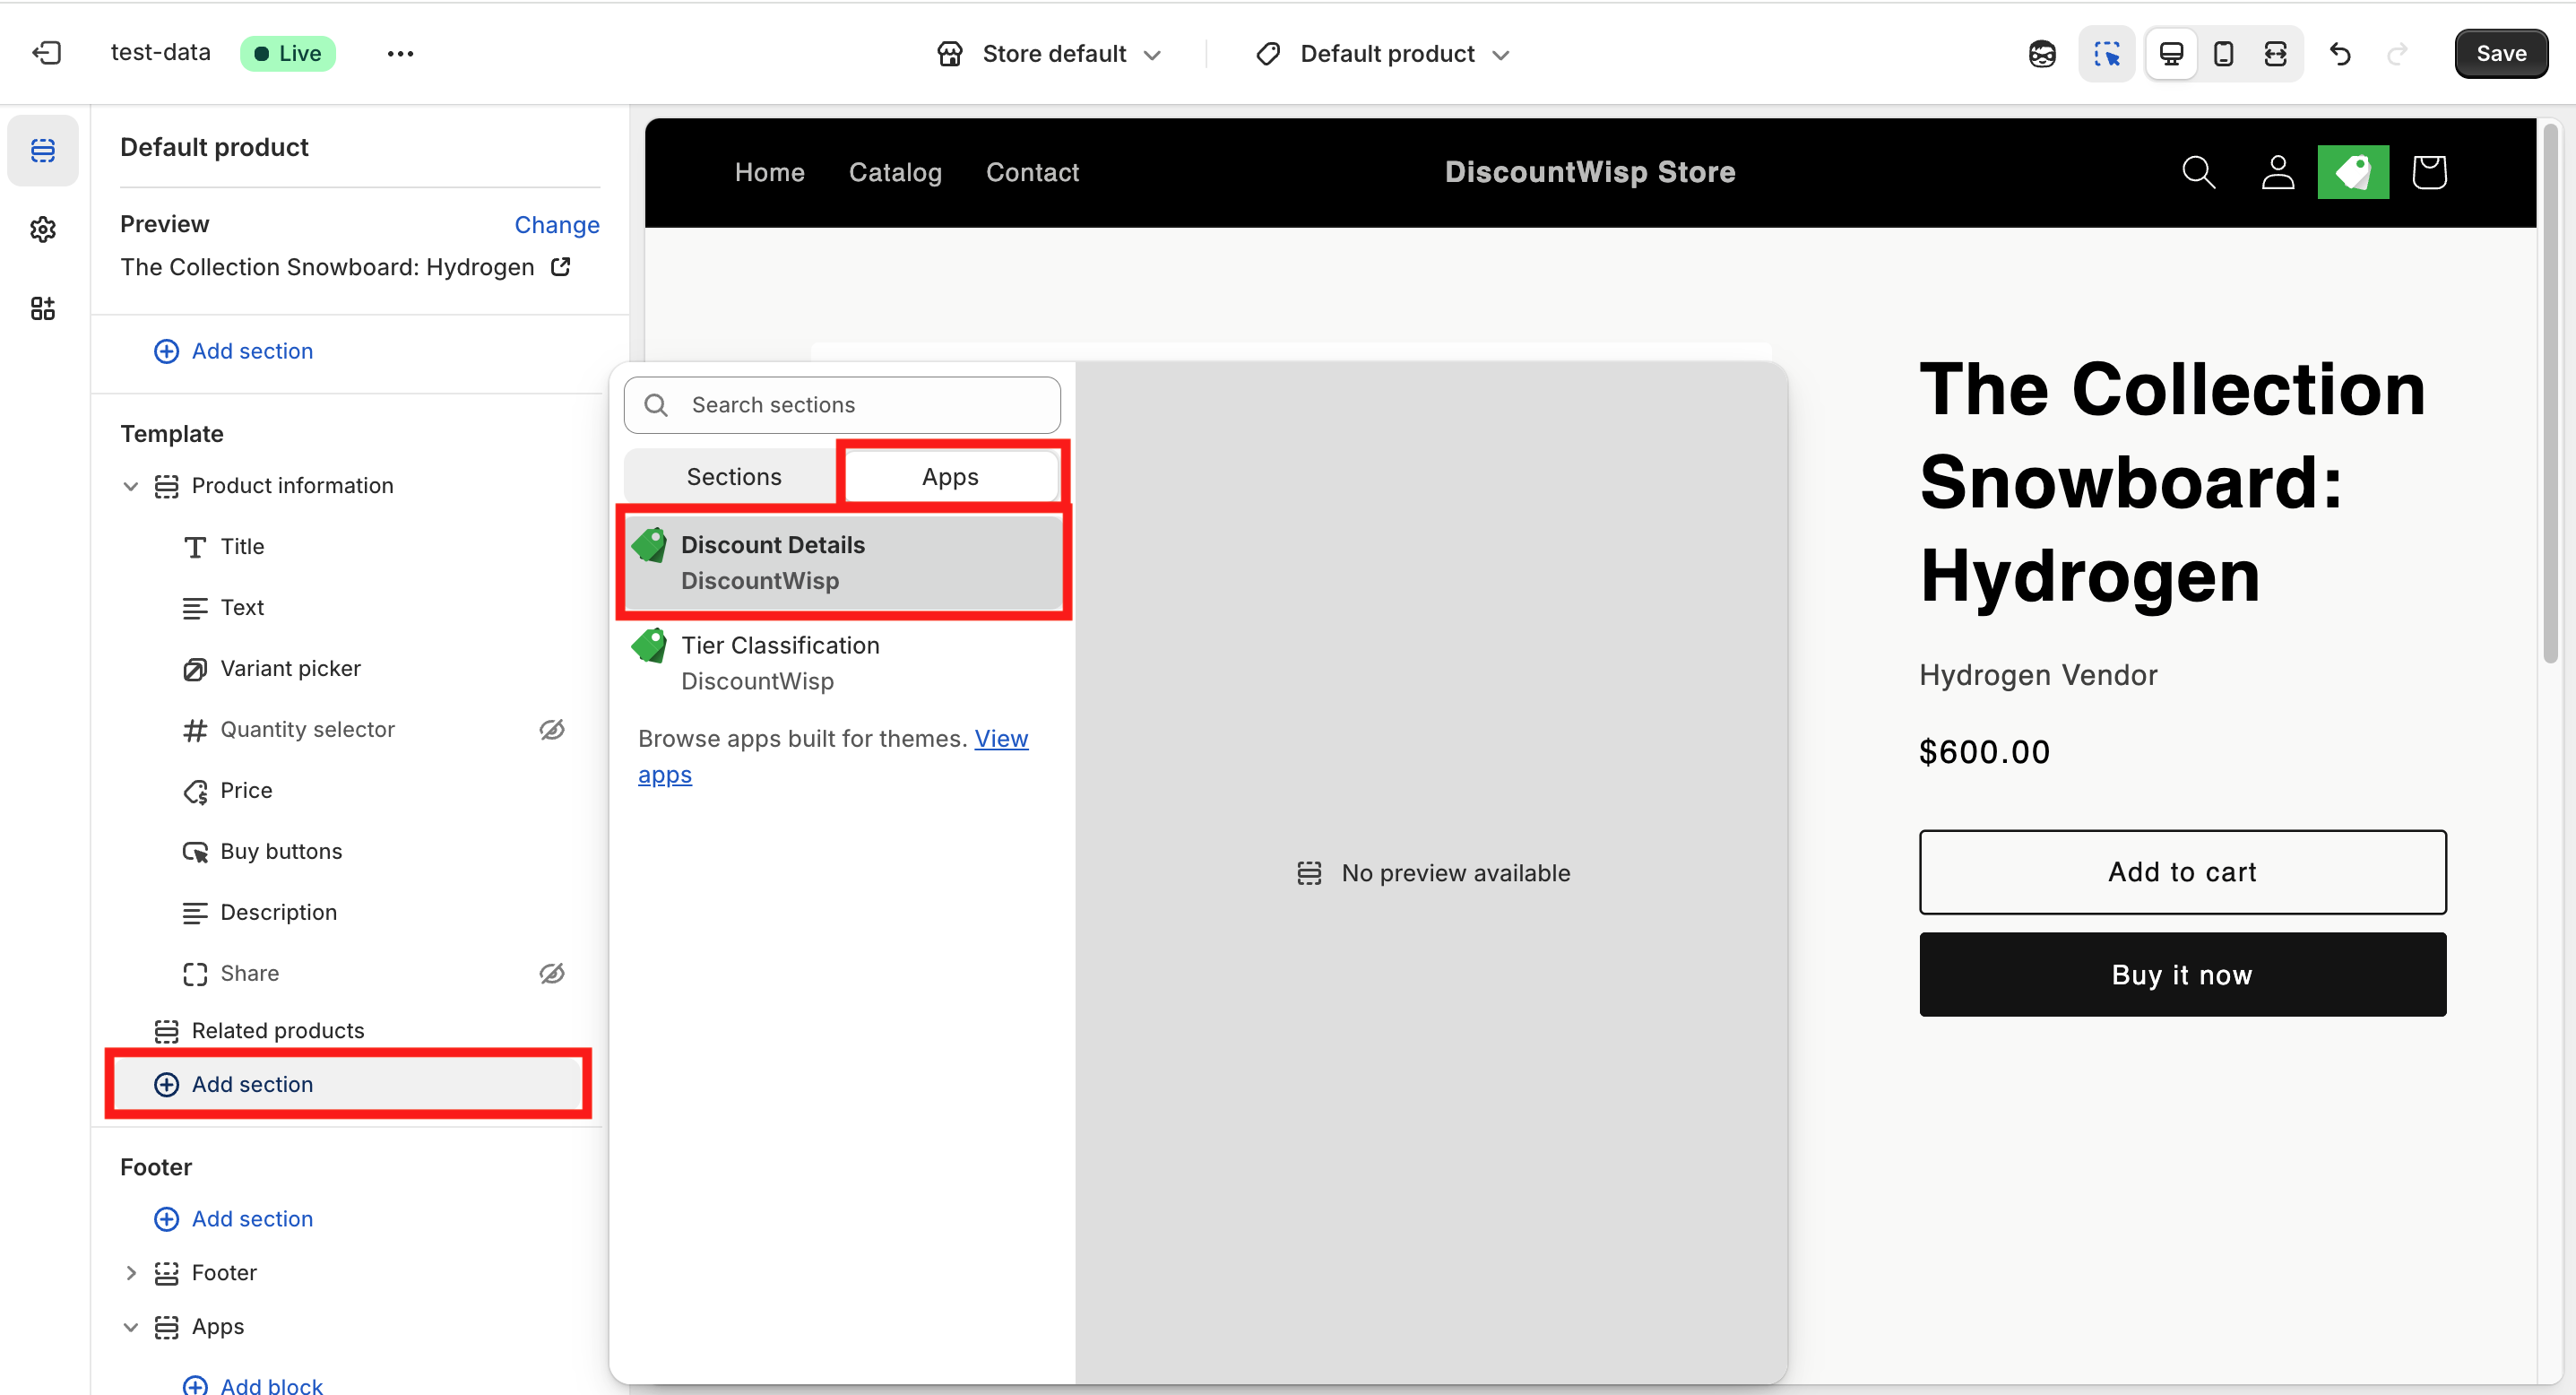
- Pick your format: Text or Image
- Customize alignment and colors to fit your store design
- Click Save
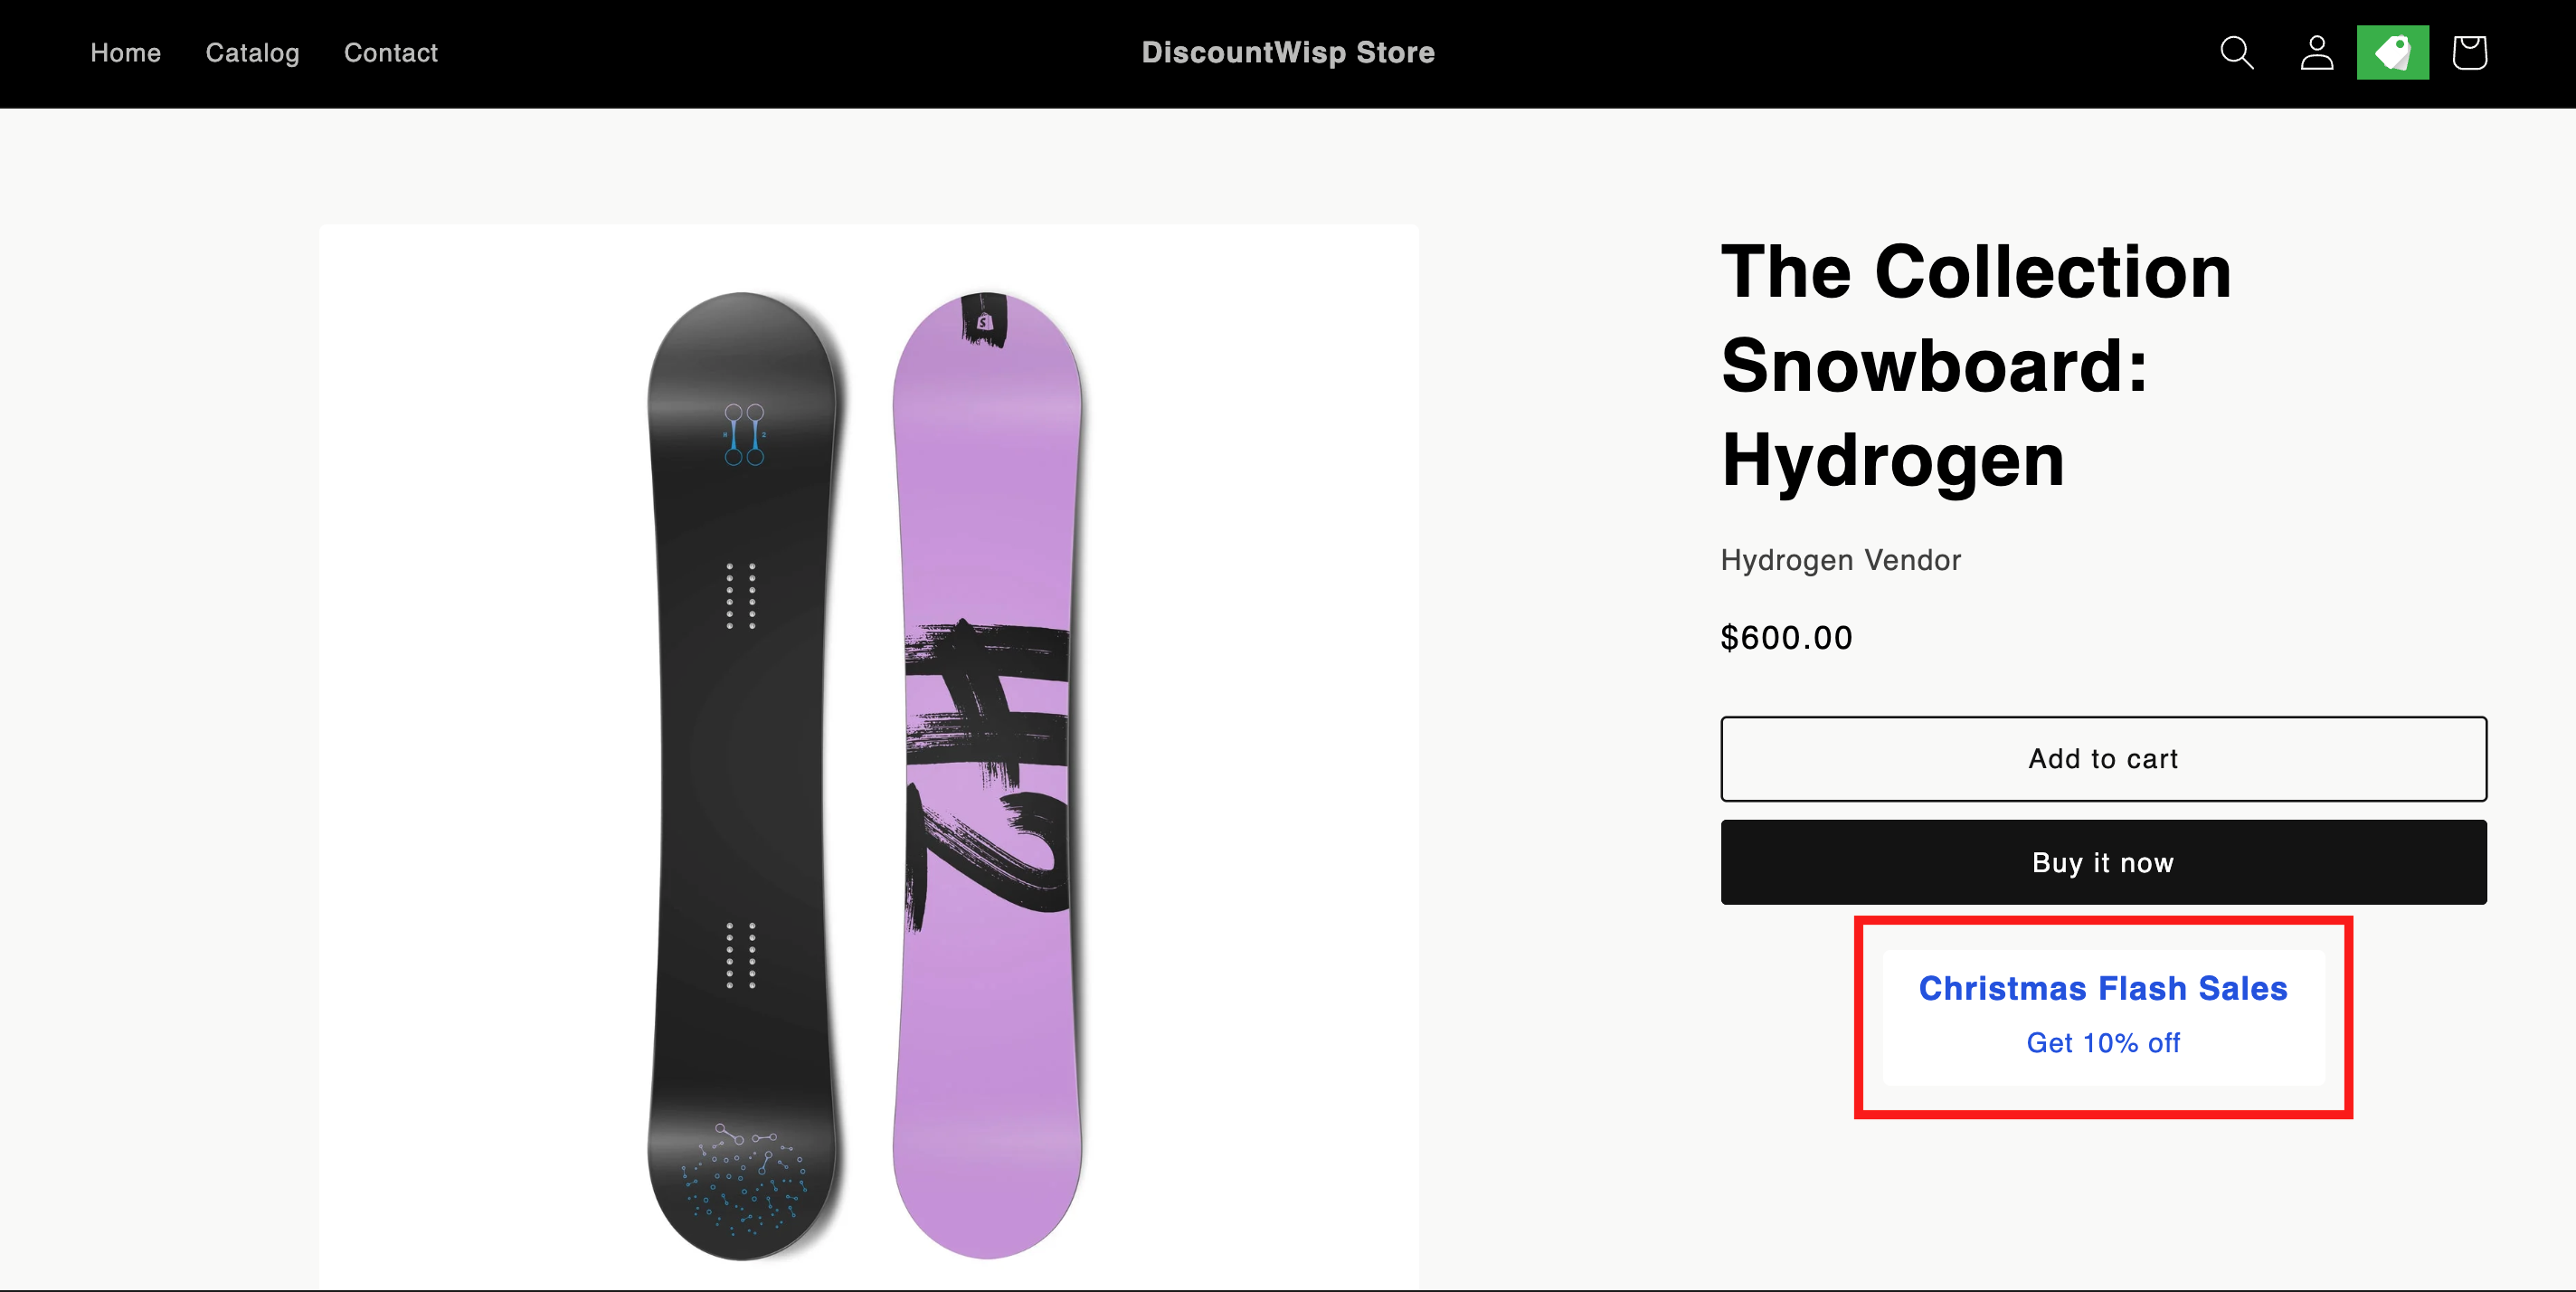
Once installed, the discount rules applicable to the logged-in customer (based on their tier) will be shown directly on each product they visit. If they are not logged in, they'll see the message to log in first.
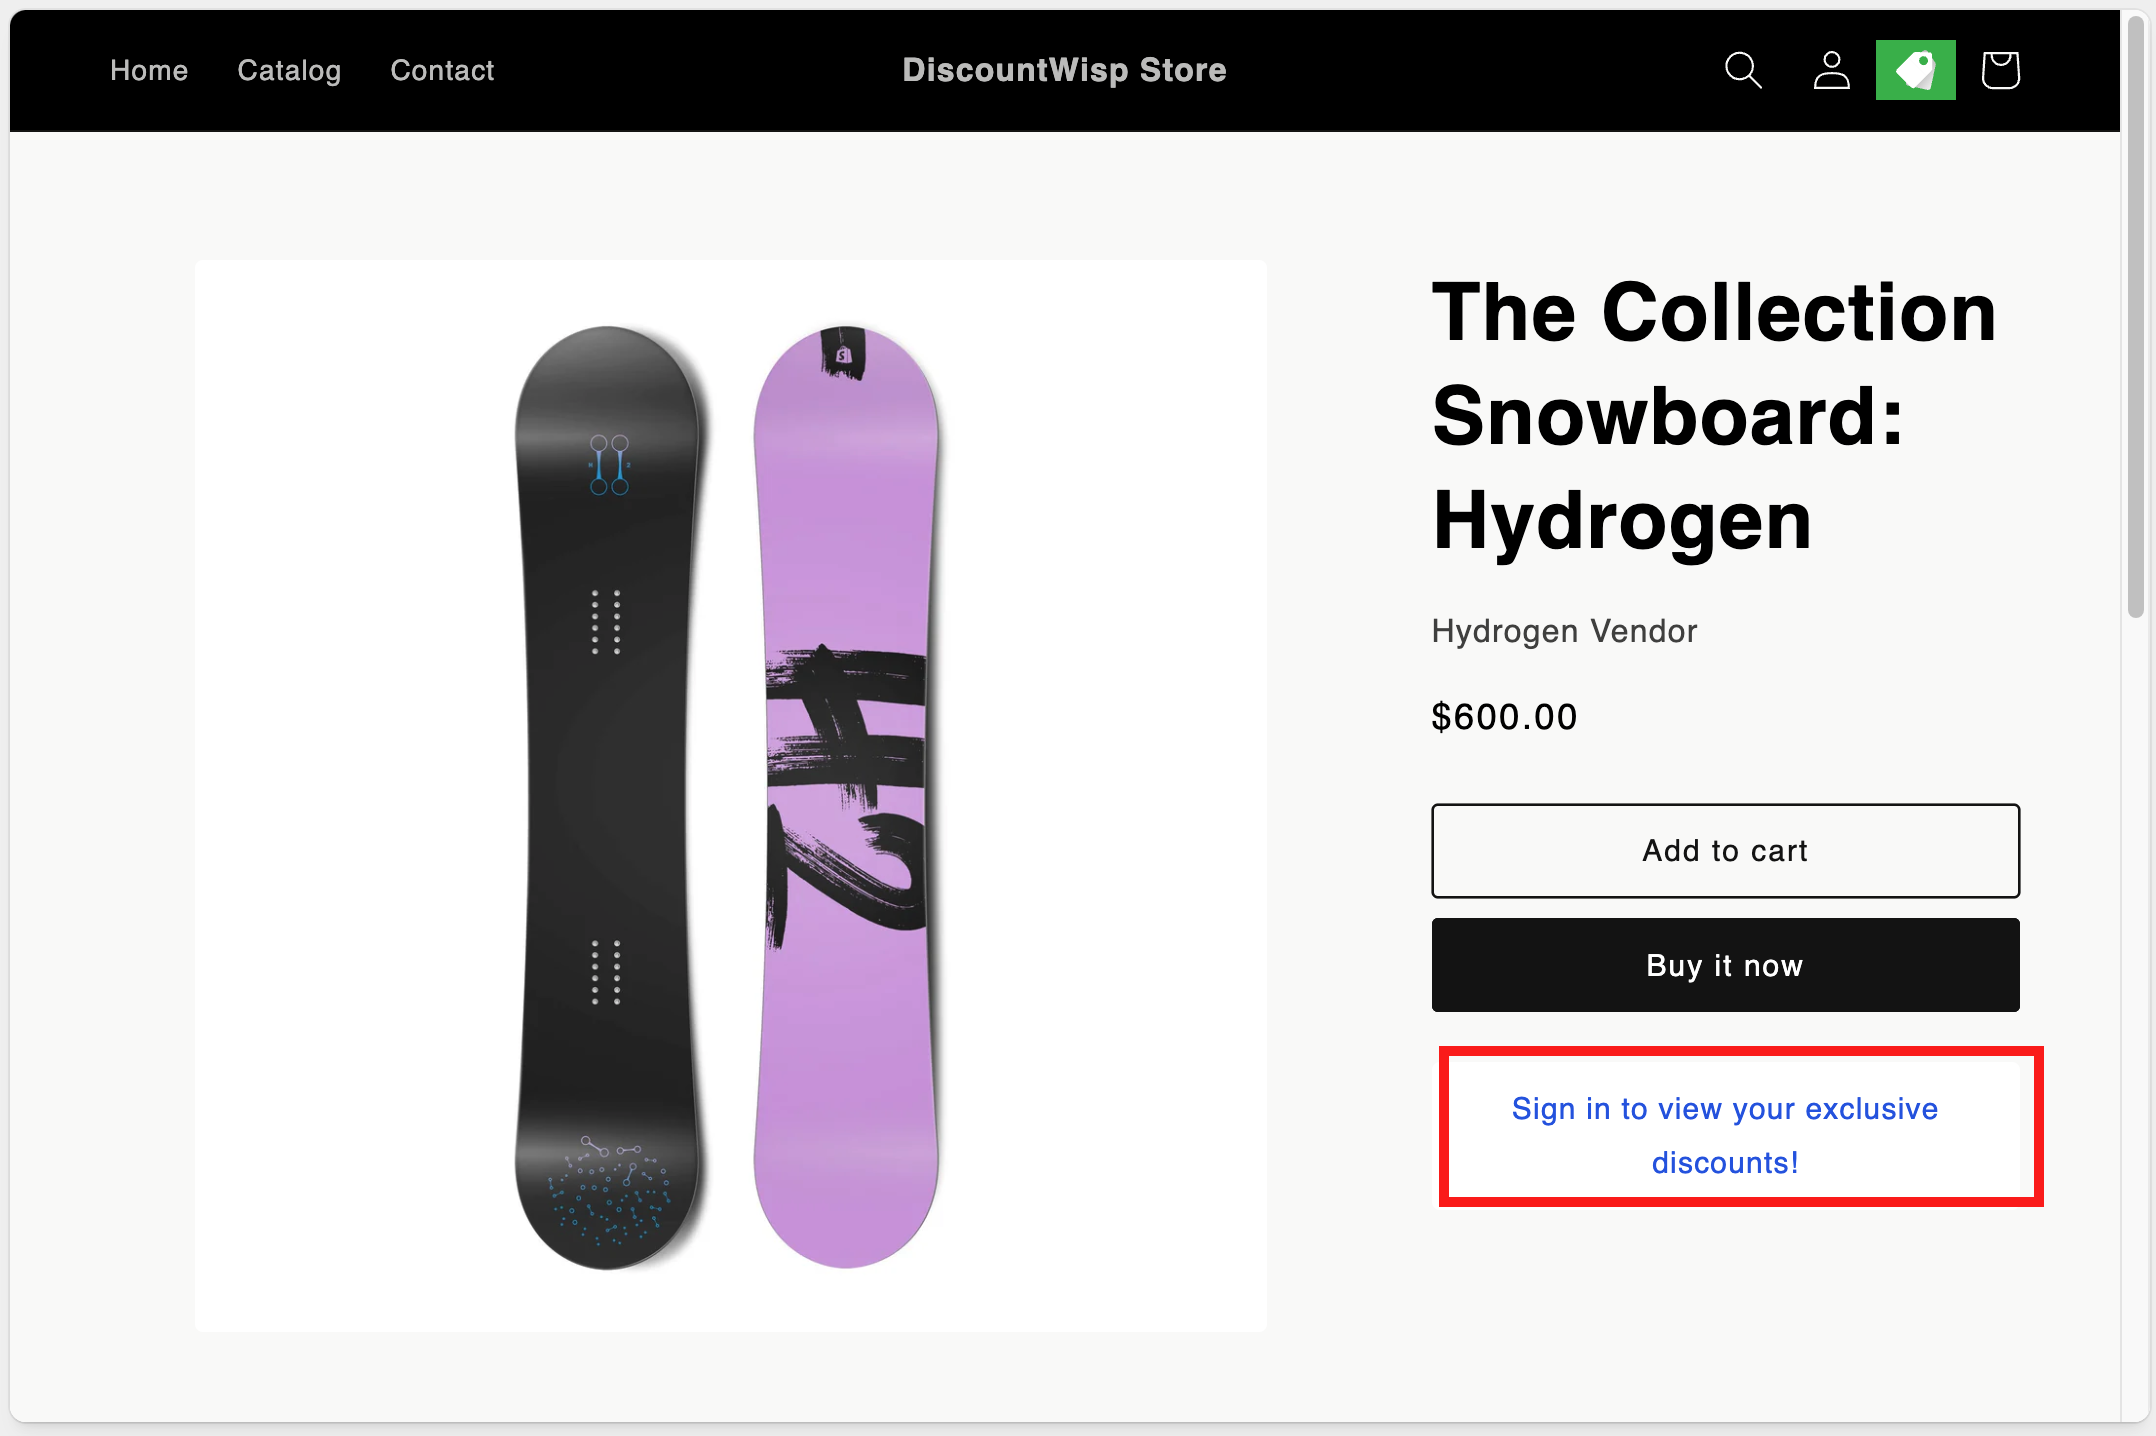
But if the customers are already logged in, they'll see the applicable discounts on the product pages.
Step 6: Initial App Setup & Discount Configuration
Once installed, DiscountWisp will launch directly into a setup walkthrough for creating your first campaign.
a. You'll be guided to create your first discount campaign before accessing the main dashboard.
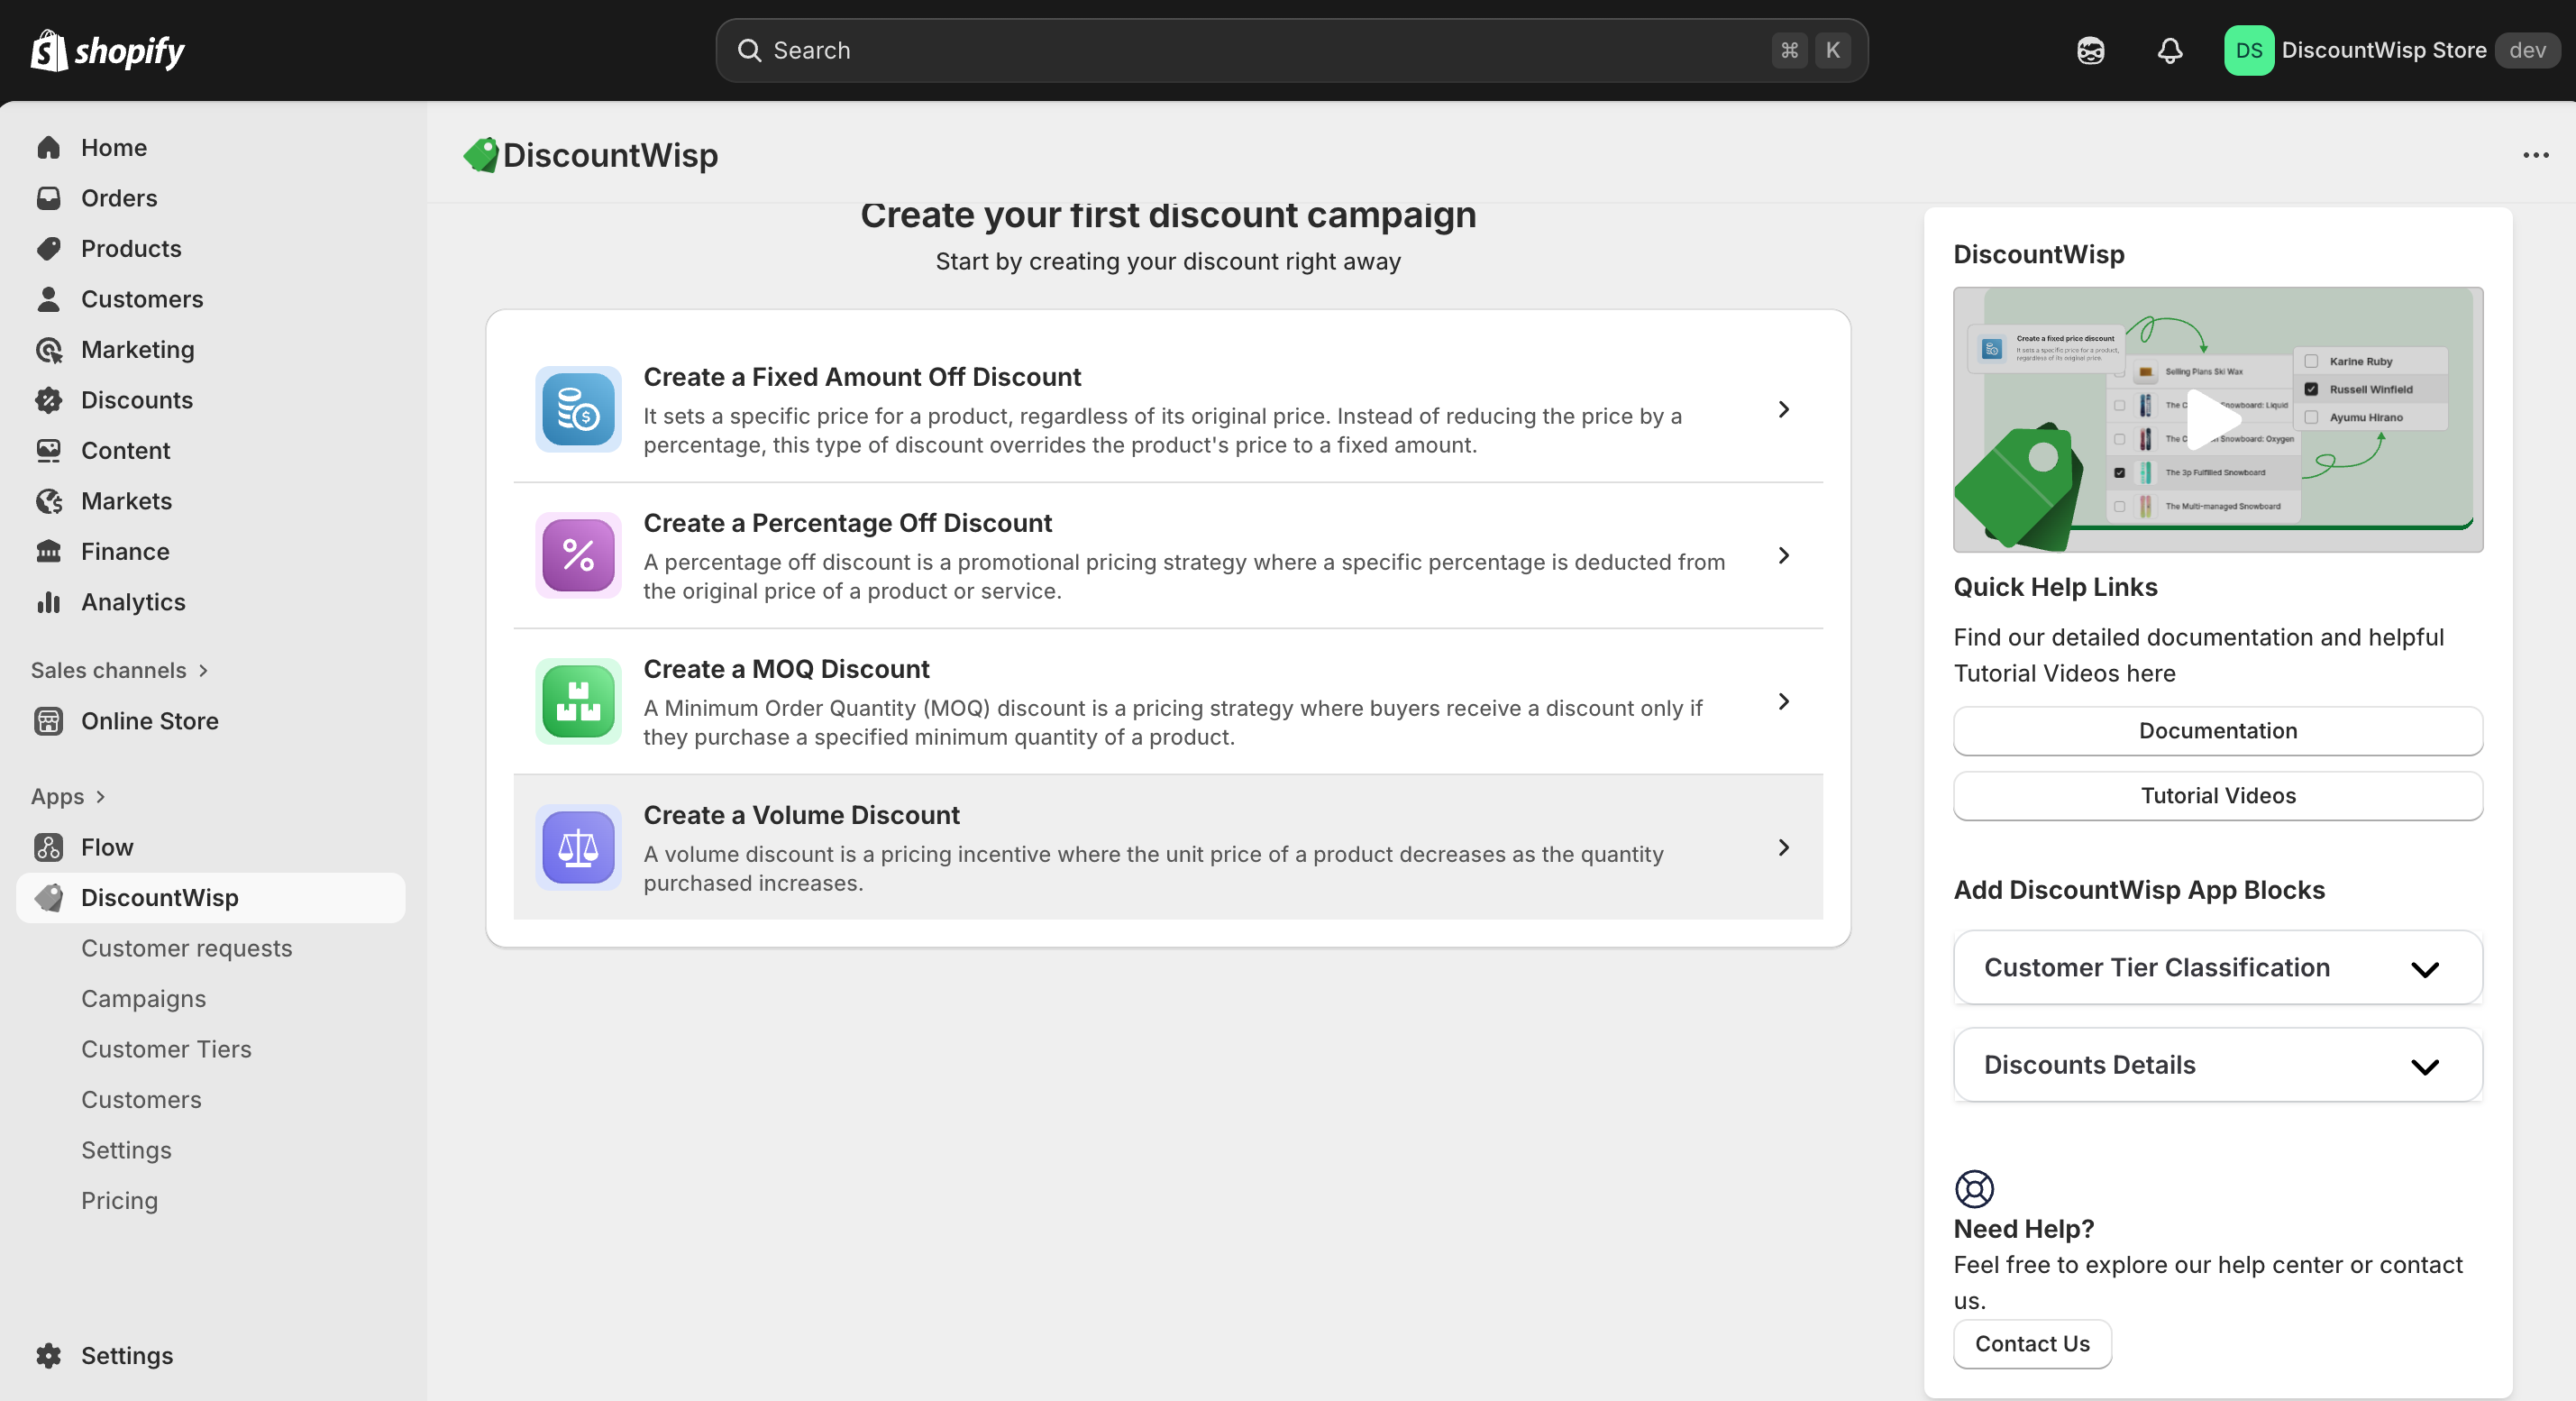
b. Select a discount type: Fixed Percentage, Fixed Amount Off, MOQ, or Volume Ladder.
c. Configure the rule details, campaign name, title, description, applicable product(s)/collection(s), and customer tier(s).
d. Set campaign dates (start & end) and choose to Publish or Save as Draft.
Step 7: Completing Setup and Exploring the Dashboard
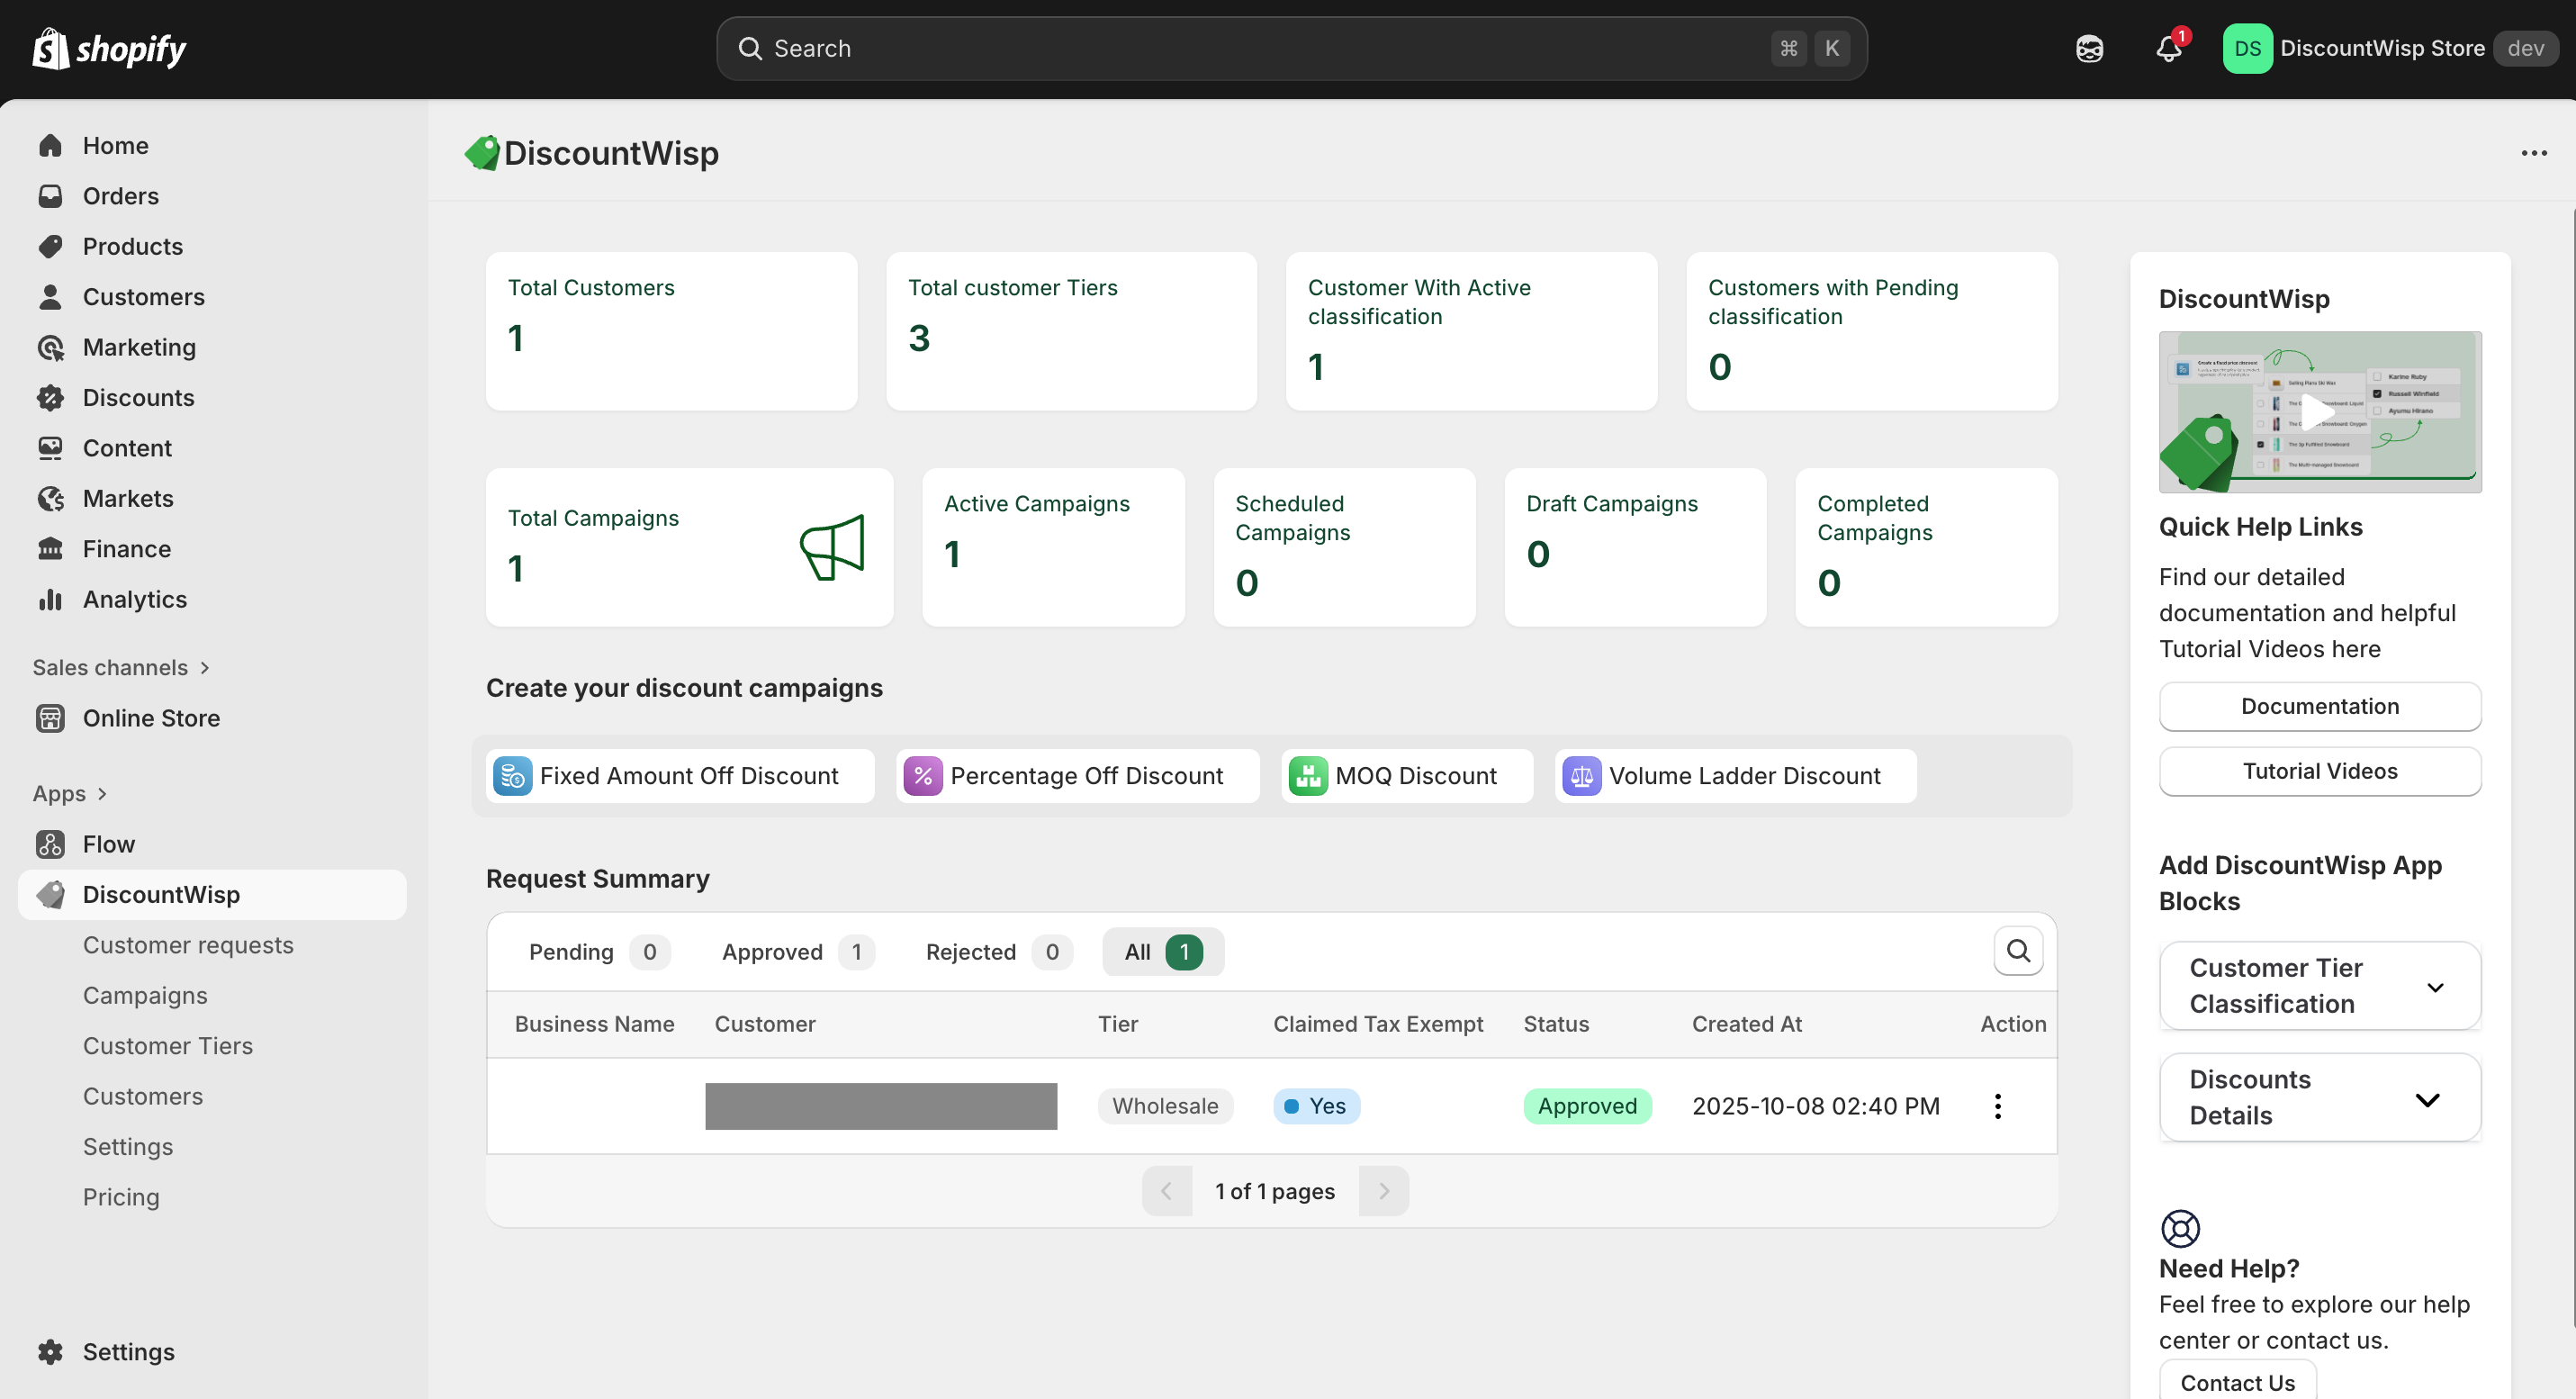
After publishing your first campaign:
- You’ll be redirected to the Dashboard , which provides a real-time overview of your campaigns and customer metrics.
- From here, you can view or adjust campaigns, manage customer tiers, and process classification requests.
If you encounter any issues during the installation and configuration process or need assistance with using DiscountWisp, don't hesitate to reach out to our Support Team for help. We're here to ensure a smooth and successful experience with our app.